
PROJECT LEARNING PATH
Window Screen Repair & Measurement Hub
A step-by-step learning path for measuring, rescreening and fixing loose or damaged window screens without guessing at part sizes.
A removable window screen has several parts that must work together: a frame that fits its opening, mesh that suits the intended use, a compatible spline or retainer, and the clips or tabs that hold the frame in place. Repairing one part without inspecting the others can leave the original problem unchanged.
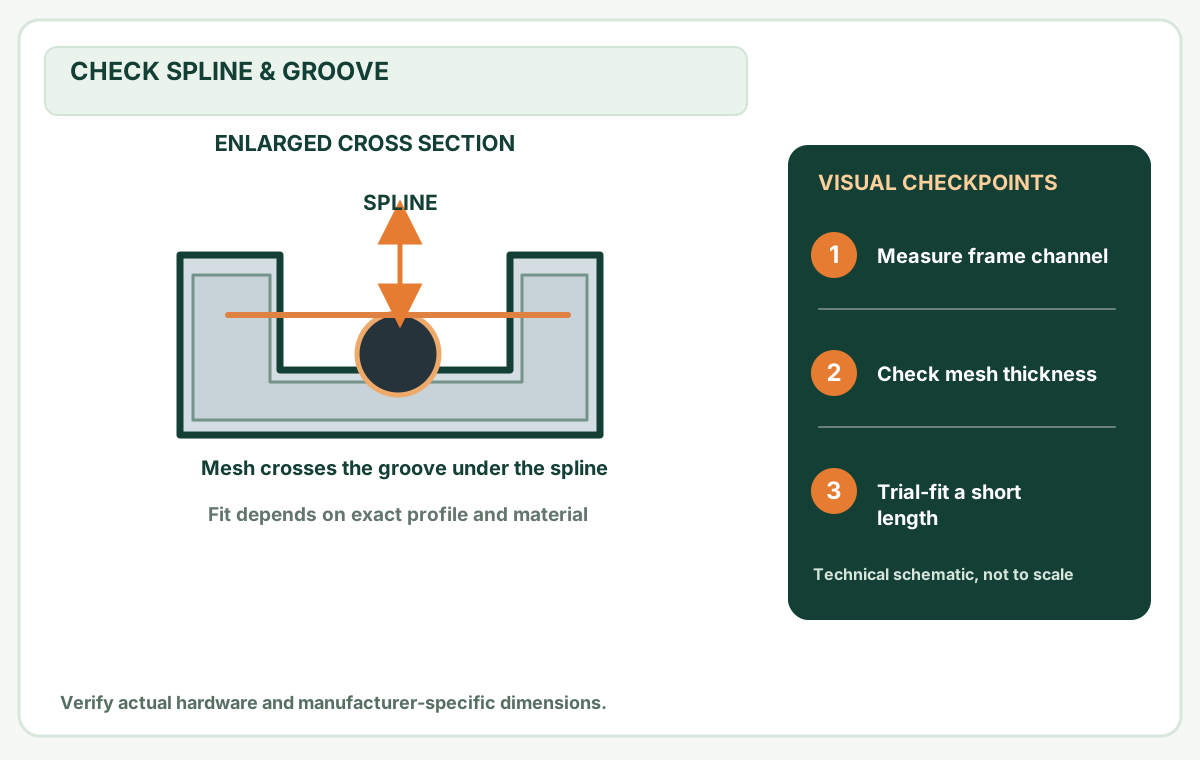
This hub puts our screen guides in a practical order. Start with identifying the type of failure, then measure the frame, select materials, and finally decide whether the repair is reasonable. Not every window is intended to have a user-removable screen; follow the window manufacturer's instructions and avoid working at height or leaning outside an opening.
Screen-retention repairs and window moisture: choose the correct problem
Before buying a replacement screen, distinguish a sound mesh panel with failed retaining hardware from a frame that no longer fits. Plunger pins and clips are different components. If the problem is foggy window glass, do not replace insect screening or apply caulk to glass seals.
On a narrow screen, scroll this table sideways to see every column.
| What the homeowner sees | Guide | Value of the first check |
|---|---|---|
| A white-capped spring pin does not snap back | Replace screen plunger pins | Check the spring, receiver and exact carrier geometry before drilling |
| Screen holds with rotating clips or a missing turn button | Choose screen retainer clips | Distinguish flush clips, turn buttons and pins before ordering |
| Fog on a pane or moisture on the sill | Inside/outside/between-pane condensation | Separate indoor humidity, outdoor dew and possible sealed-glass failure |
| Screen is a sliding patio door rather than a window | Sliding screen door diagnosis | Check track, roller and frame fit before buying new parts |
The screen-retaining system must be inspected from a safe position. Do not climb or lean out to release a screen, and do not cover manufacturer drainage holes. Save the product label and observed failure in your local Workbench notes before visiting a supplier.
Which measurement method can you actually trust?
The safest measurement depends on what exists today. Two measurements can be individually accurate yet describe different surfaces. Use this reference table to pick the correct workflow before opening a calculator.
On a narrow screen, scroll this table sideways to see every column.
| Case | Read or measure | Documented source | MendNook next step |
|---|---|---|---|
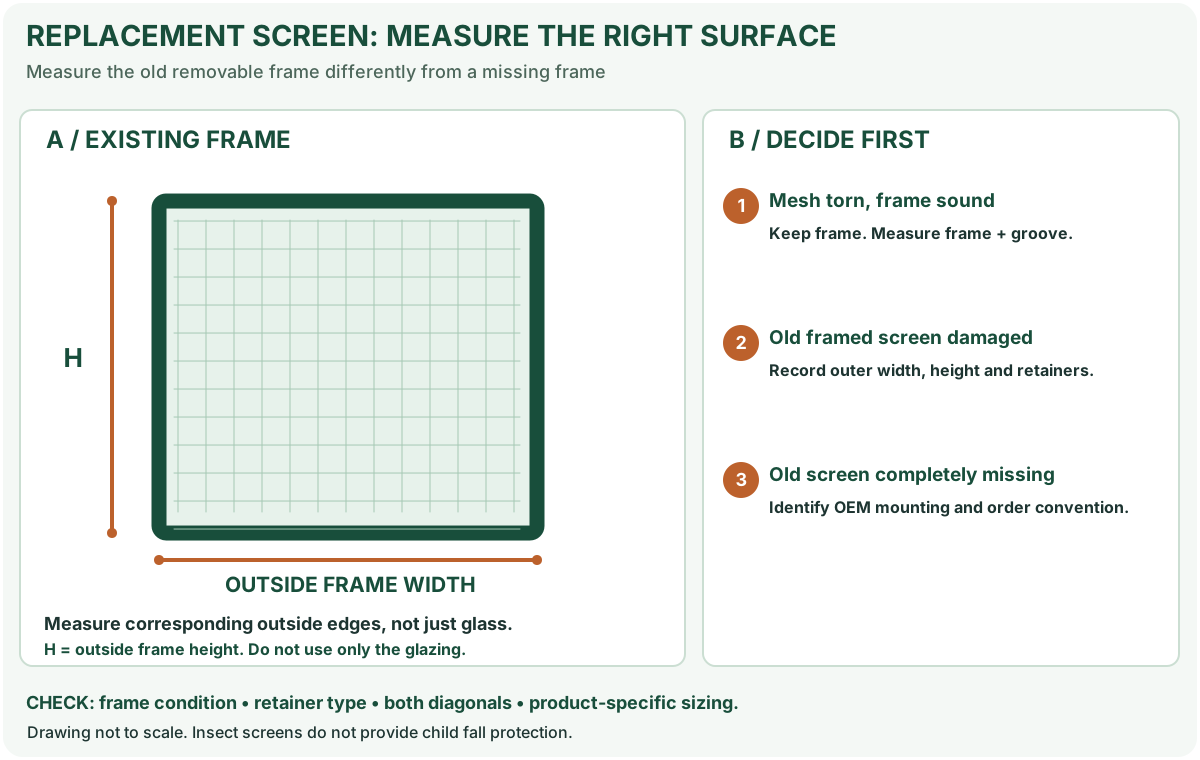
| Existing framed screen fits the opening | Outer frame dimensions, profile thickness, clips and spring position; record width and height at multiple points | Metro Screenworks — measuring an existing screen | Four-point measurement check |
| Old screen missing | Retaining lip, deep/shallow track orientation, frame thickness and hardware type | Metro Screenworks — measuring without a screen | Choose the hardware-specific path |
| Reusing a frame, changing mesh | Groove/frame profile and exact mesh category, not just the old spline diameter | Phifer — published chart | Look up a published combination |
| Cutting from a material roll | Every frame's dimensions, loose cutting allowance, roll width and usable length | Phifer — installation overview | Plan several mesh cuts |
Why this matters: Metro Screenworks documents several opening-measurement conventions for different hardware. Its guidance for one mounting style is not an industry-wide subtraction formula. Phifer's spline chart leaves some frame/mesh combinations unlisted; an unlisted cell is not permission to interpolate a diameter. These are specific vendor references, not universal fits or an independent installation test.
Choose the right starting point
On a narrow screen, scroll this table sideways to see every column.
| What you notice | Start with | Why |
|---|---|---|
| Mesh is torn, but frame is straight | Rescreen fiberglass mesh | Reuse a sound frame if the design supports replaceable spline |
| Mesh is sagging or spline is loose | Loose mesh diagnosis | A worn channel or spline may be the actual failure |
| Daylight or insects at frame edges | Screen perimeter gaps | Clips, rails or incorrect frame dimensions may be at fault |
| The frame rocks or corners move | Frame squareness and damage | New mesh cannot straighten a damaged extrusion |
| You need a replacement frame | Measure replacement screen | Outer dimensions and hardware location matter |
For a missing screen or unidentified mounting hardware, start with the screen measurement decision assistant rather than a generic width deduction.
A safe, repeatable screen project
- Identify how the screen is retained. Look for tabs, springs, clips, retainers, or a permanently integrated assembly. Do not pull on fragile glazing or pry against glass.
- Photograph both sides and mark the top before removing a screen, where manufacturer instructions allow. If the frame is high or difficult to access safely, use a qualified installer.
- Measure the frame's outside width and height at corresponding points. Write the unit and whether you measured outside-to-outside or inside the channel.
- Check both diagonals on a flat surface. If the difference is consistent, inspect joints and long rails; equal diagonals do not rule out twisting.
- Compare material choices. Standard fiberglass, aluminum and specialty pet or insect fabrics can have different thicknesses, visibility and spline requirements. Read the exact maker's fit chart.
- Test a short length of the chosen spline with your actual mesh before committing to a full replacement.
- Trim carefully, reinstall using the correct hardware, and confirm the screen seats securely without forcing or damaging the frame.
What your measurements do not tell you
A width and height can help estimate a rectangular mesh cut, but they do not identify the spline diameter, predict manufacturer tolerances, prove that a frame fits the opening, or guarantee protection against a particular insect species. A strong-looking mesh may still be incompatible with the frame groove.
For one frame, start with the free screen mesh and spline calculator. If you are rescreening multiple windows, use the multi-screen project planner to list every cut size and sum the material requirements; check the widest individual cut against the actual roll, rather than relying on total area alone. Use the printable project worksheet to preserve measurements. All three are planning aids rather than purchase guarantees.
Reference and limitations
Consult Phifer's spline sizing instructions for groove and fabric-thickness relationships. The Home Depot's screen repair guide provides examples of common removable-screen repairs. Exact mechanisms differ by window and mesh brand; verify model-specific instructions. Our diagrams are instructional schematics, not proof of completed physical tests.
GUIDES BY PROJECT
Continue with a specific task
Open the guide that matches your measurement or repair problem.
 Illustrative imageMeasuring & fit
How to Measure a Window Screen Before Replacing Mesh or Frame
Measure an existing window screen frame accurately, check squareness and avoid mixing frame dimensions with opening dimensions.
Read guideIllustrative imageSpline & suppliesHow to Choose Window Screen Spline Size
Learn how to check spline diameter, mesh thickness and groove width before buying replacement screen spline.
Read guide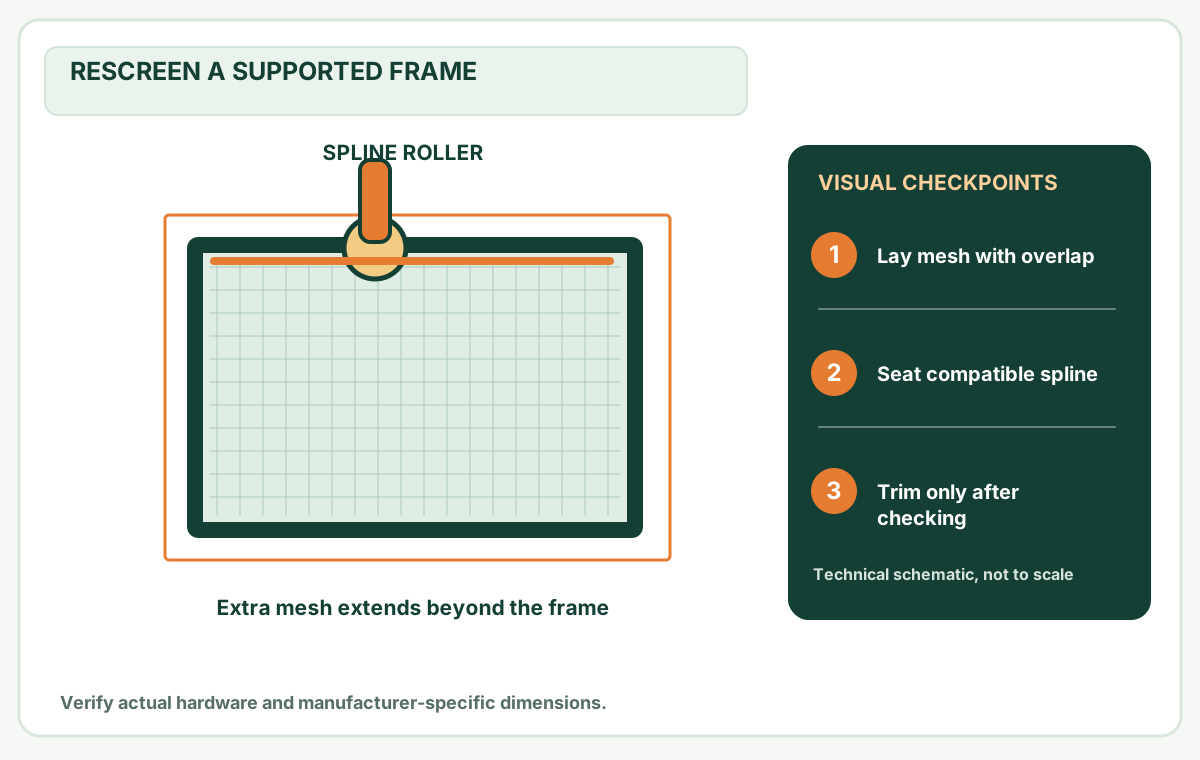 Illustrative imageMesh installation
How to Replace Fiberglass Window Screen Mesh
Step-by-step fiberglass screen mesh replacement for intact window frames using spline and groove retention.
Read guide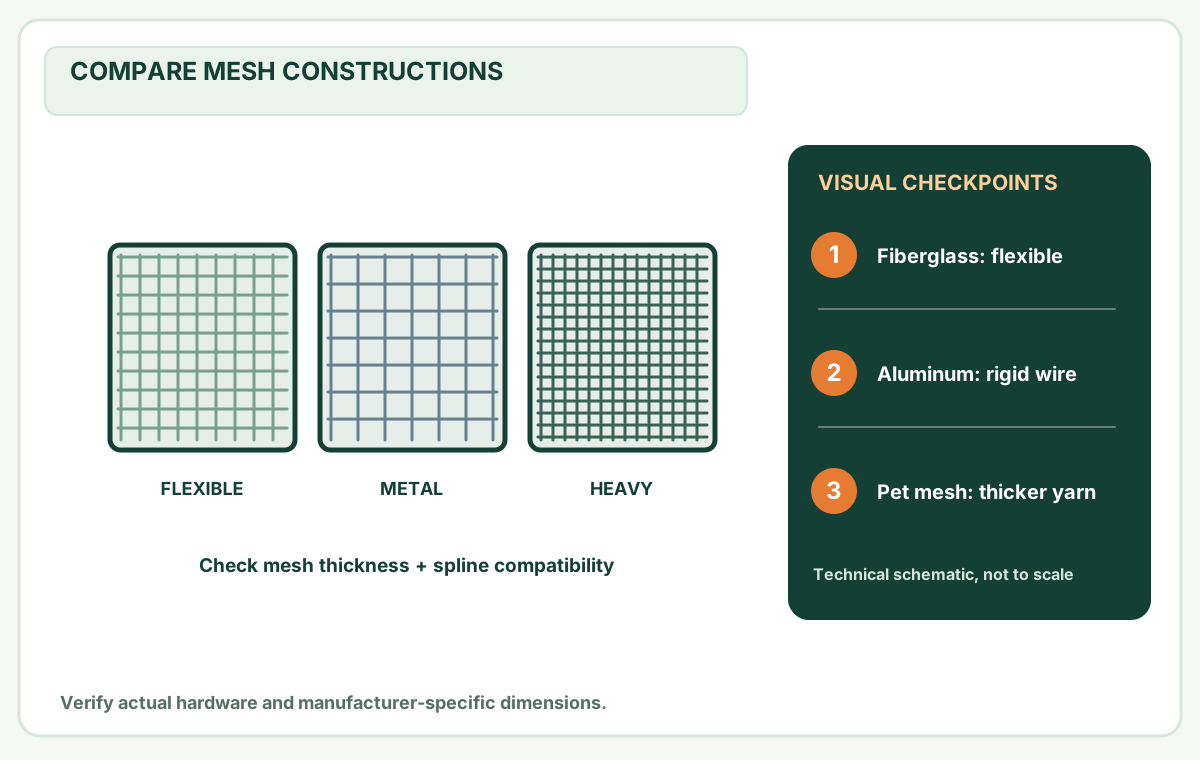 Illustrative imageMaterial selection
Fiberglass vs Aluminum vs Pet-Resistant Window Screen Mesh
Compare common screen mesh materials by handling, visibility, durability and installation considerations.
Read guide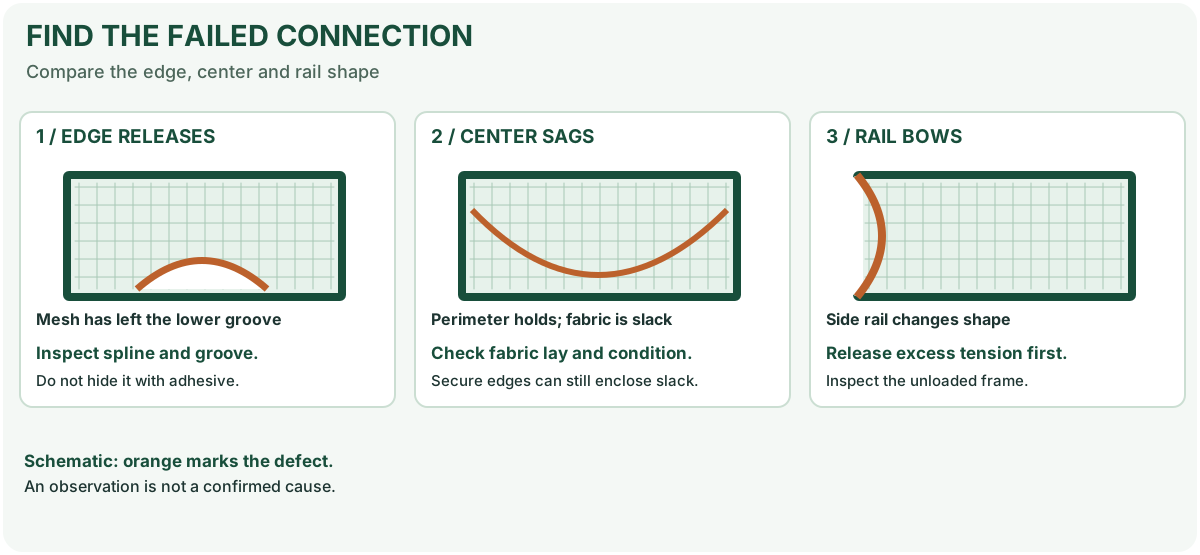 Illustrative imageCommon problems
Why Is My Window Screen Mesh Loose or Wrinkled?
Troubleshoot sagging screen mesh, loose corners and spline that will not stay in the groove.
Read guide Illustrative imageFrame inspection
Bent Window Screen Frame: Repair It or Replace It?
Inspect screen rails, corners, diagonal measurements and mounting hardware before deciding whether a frame is reusable.
Read guide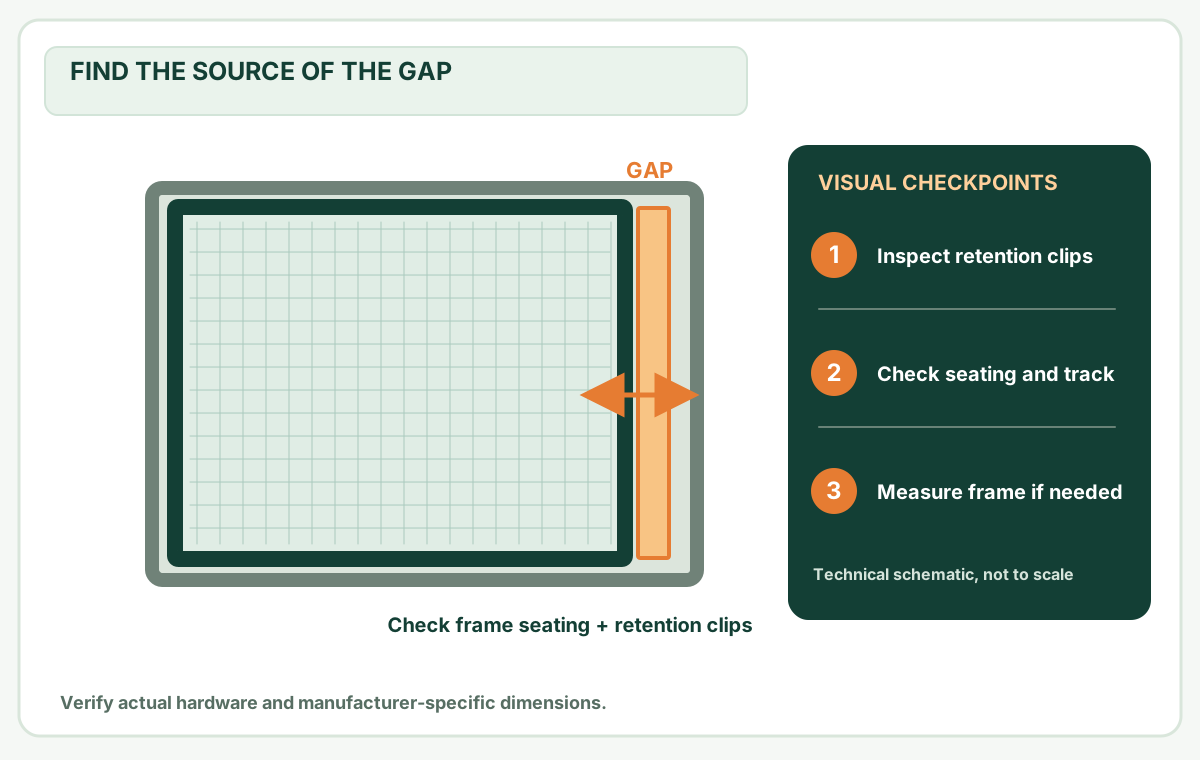 Illustrative imageFit & troubleshooting
How to Fix Gaps Around a Window Screen (Without Guessing the Size)
Identify mesh-edge versus screen-frame gaps, use a four-edge seating test, diagnose springs and tracks, and decide whether to repair hardware or replace the frame.
Read guide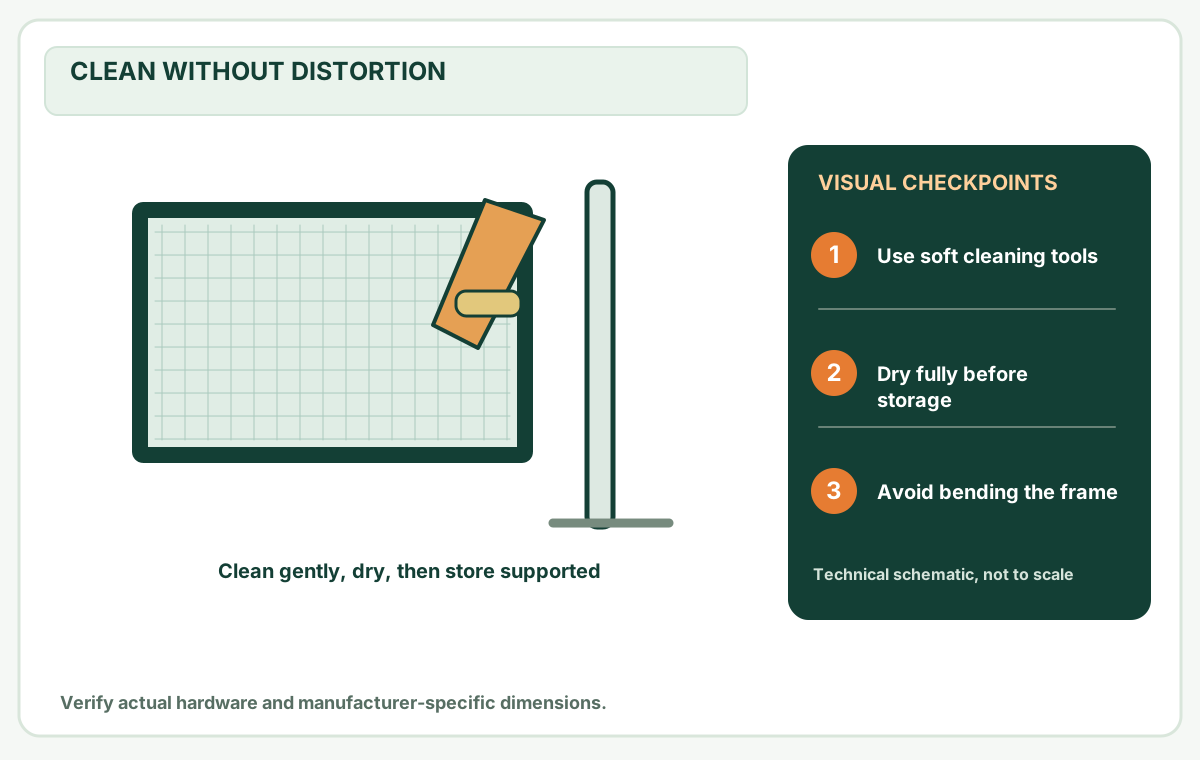 Illustrative imageCare & maintenance
How to Clean and Store Window Screens Without Damaging Them
Clean metal, vinyl-coated, gliding and retractable window screens using manufacturer-specific care rules, then store removable frames without bowing.
Read guide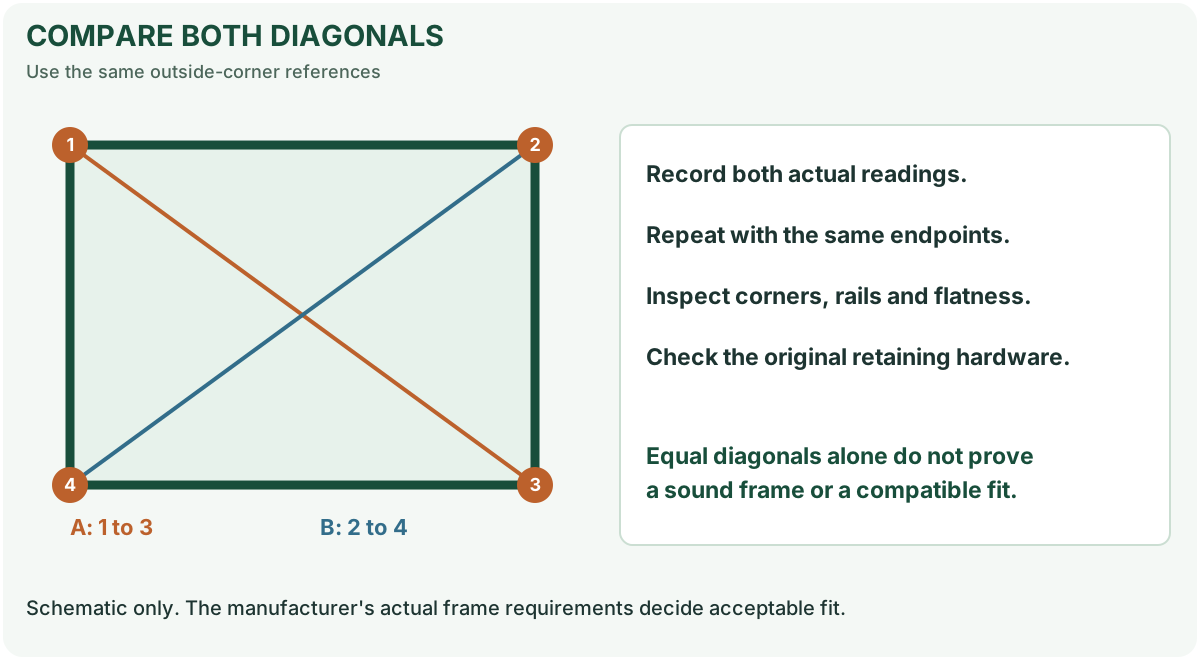 Illustrative imageWindow screens
Is Your Window Screen Frame Square? A Diagonal Check
Use two diagonal measurements and a simple checklist to check a rectangular screen frame before replacing mesh.
Read guide Illustrative imageWindow screens
Screen Mesh Count Explained: 18×16, 20×20 and Open Area
Compare screen mesh counts using a worked yarn-diameter example, understand aperture versus open area, and choose the right screen without guessing airflow or spline fit.
Read guide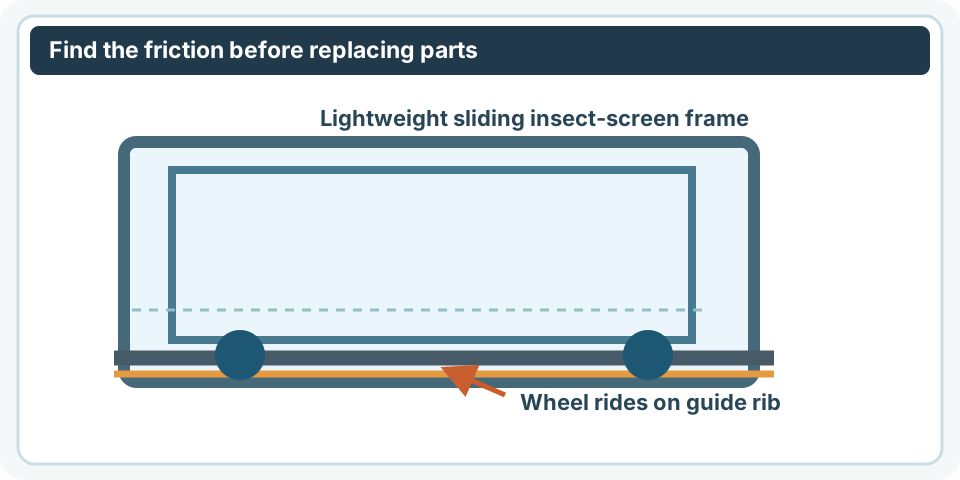 Illustrative imageWindow screens
Sliding Screen Door Won't Slide? Diagnose Track, Rollers and Fit
A practical troubleshooting path for a sticking sliding screen door: distinguish dirt, roller height, damaged wheels, bent rails and incorrect installation.
Read guide Illustrative imageWindow screens
Replace Sliding Screen Door Rollers Without Guessing the Part
Identify the correct roller assembly, inspect the wheel pocket, compare manufacturer designs and safely confirm sliding-door screen fit after replacement.
Read guide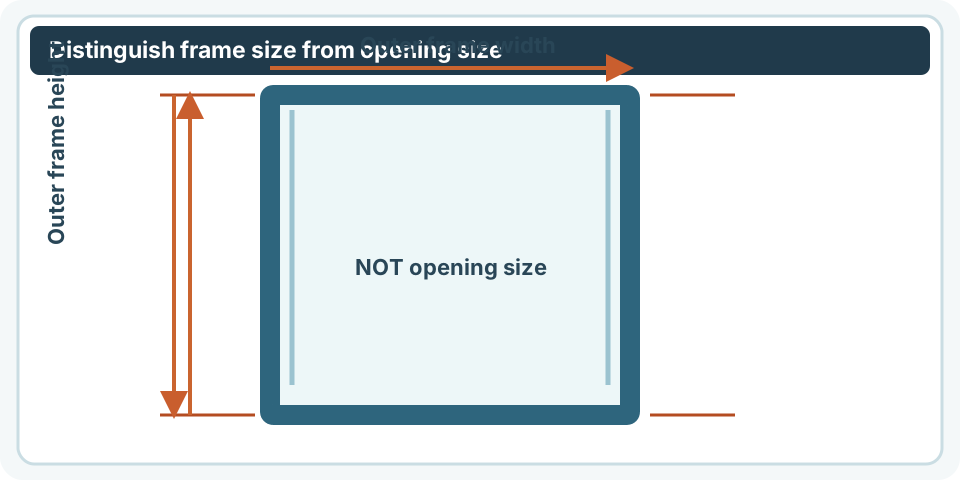 Illustrative imageMeasuring & fit
Measure a Replacement Sliding Screen Door: Frame vs Opening
Use a model-aware worksheet to distinguish existing screen size from patio-door opening size before ordering a replacement sliding insect-screen panel.
Read guide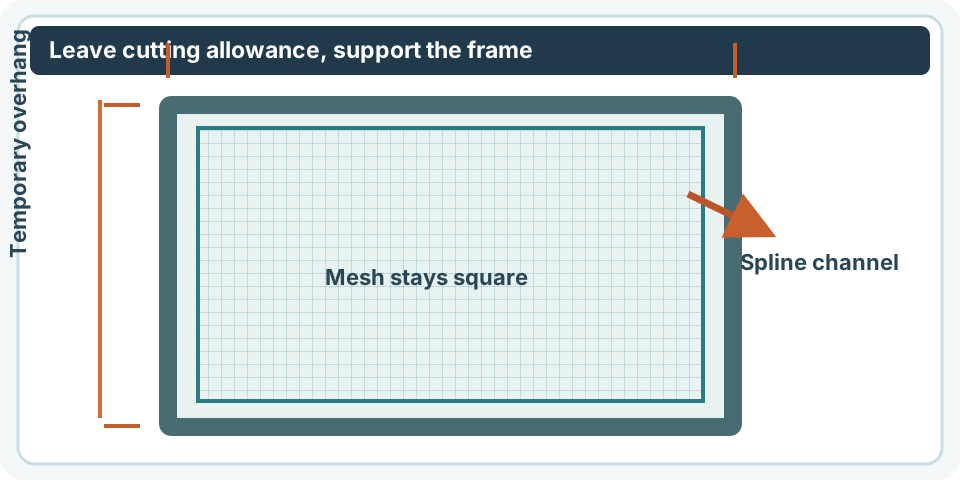 Illustrative imageWindow screens
How to Rescreen a Sliding Screen Door Without Warping the Frame
Replace damaged patio screen-door mesh with a supported, model-aware workflow for spline, cut allowance, tension and final roller/latch checks.
Read guide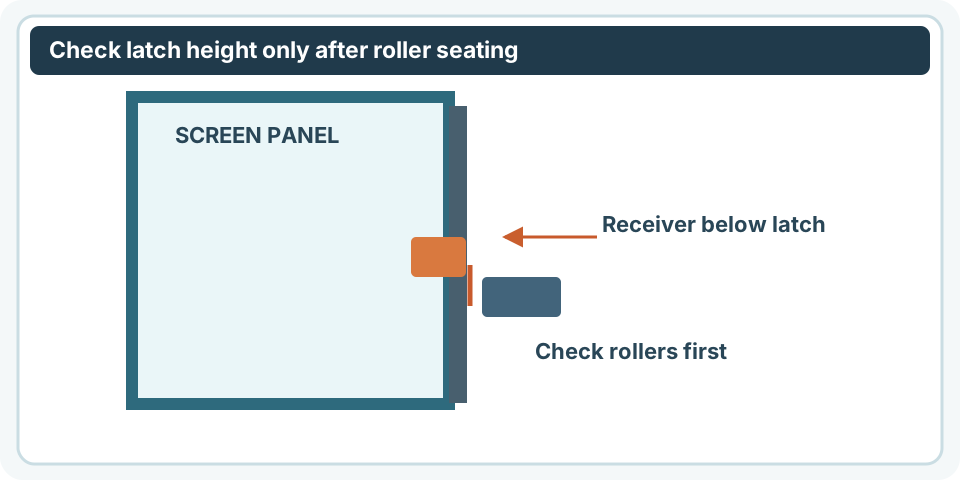 Illustrative imageWindow screens
Sliding Screen Door Latch Not Catching? Check Alignment First
Diagnose a patio insect-screen latch that misses its receiver, distinguish roller or panel orientation problems, and identify safe replacement hardware.
Read guide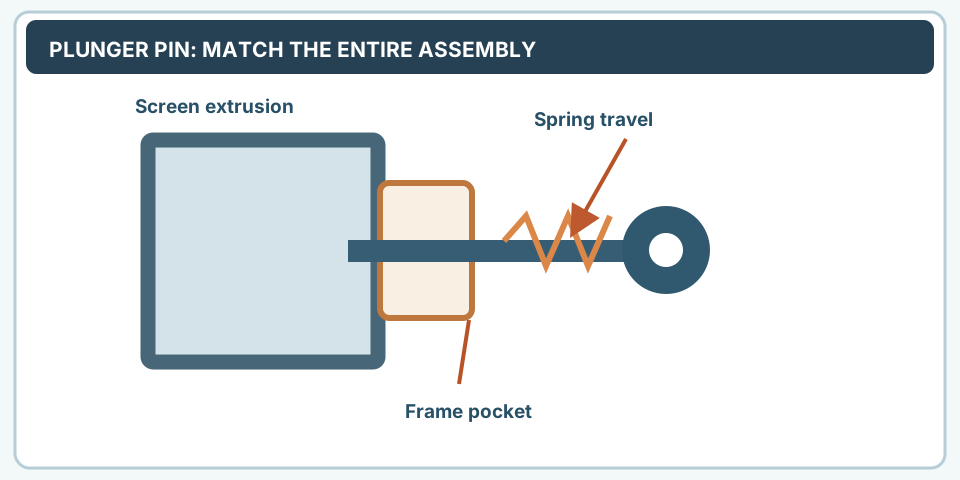 Illustrative imageWindow screens
Replace Window Screen Plunger Pins: Identify Size, Spring and Frame Fit
Diagnose broken or stuck window-screen plunger pins and match spring, cap, frame wall and receiving hole before replacement.
Read guide Illustrative imageWindow screens
Window Screen Retainer Clips: Turn Buttons, Flush Clips or Plunger Pins?
Choose the correct insect-screen retainer style and measure placement and frame thickness before buying clips, turn buttons or spring hardware.
Read guide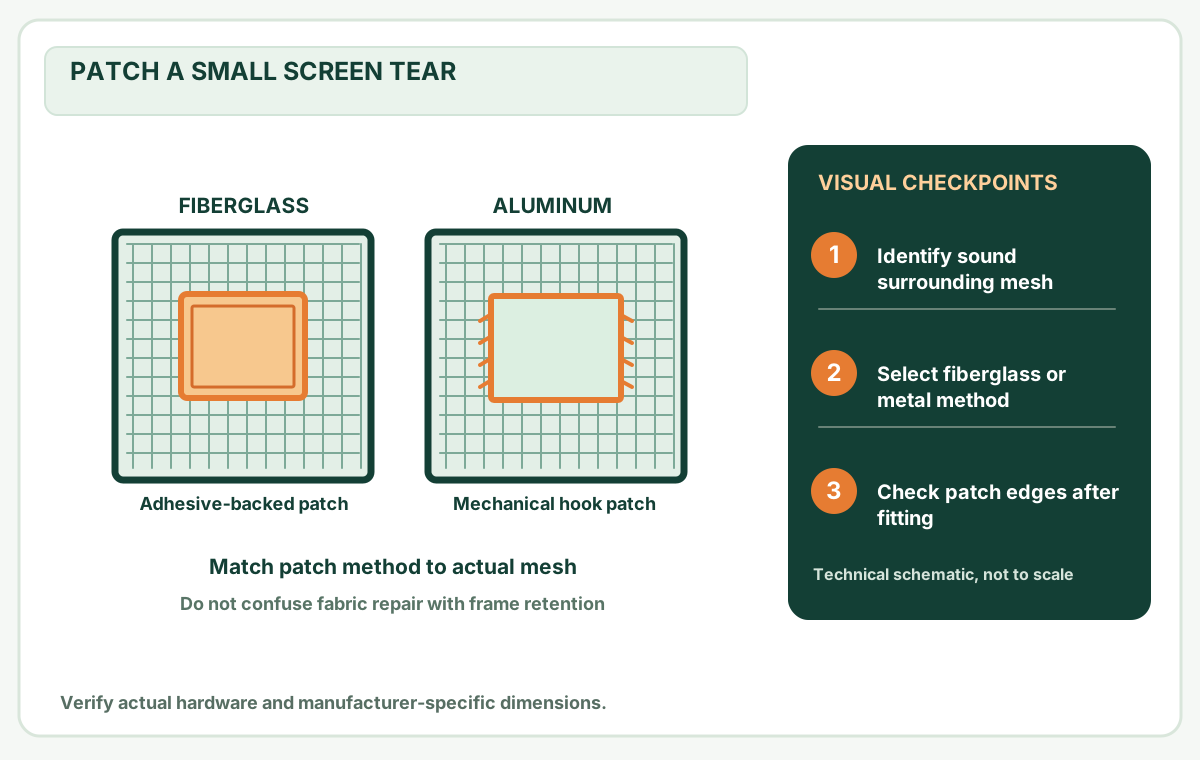 Illustrative imageWindow screens
How to Patch a Torn Window Screen: Fiberglass vs Aluminum Methods
Choose a safe patch for a small fiberglass or aluminum screen tear, measure the affected area, follow the right attachment method, and know when to rescreen.
Read guide