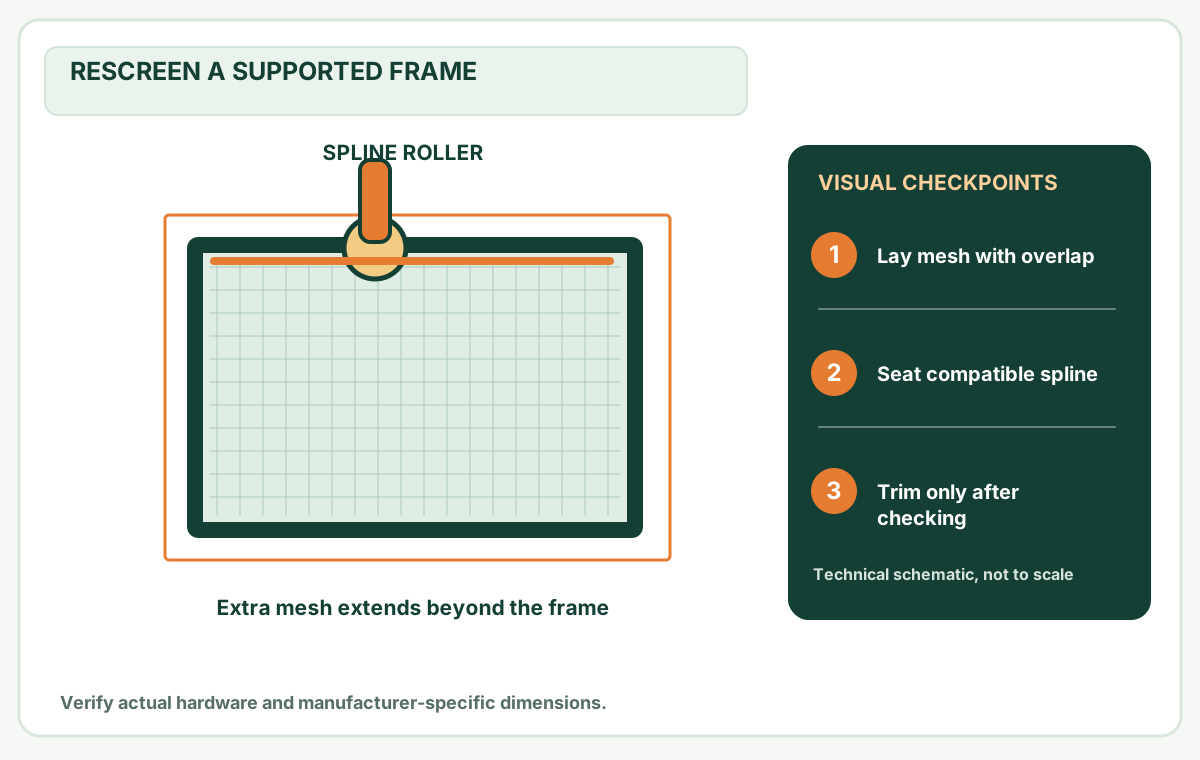
Do not choose spline by appearance alone. Match the frame groove and screening material to the manufacturer chart, then test a short length.
Before you buy or repair
- Record first
- Groove/profile, existing retainer shape and actual new mesh type
- Make the decision
- A supplier chart for that frame/mesh combination plus a short fit trial
- Stop & verify if
- The groove is cracked, the retainer is proprietary, or the frame bows when seated
Jump to a section
- Diagram checkpoints
- What to inspect before shopping
- Diagnose fit without forcing the channel
- How to measure an old spline
- Why mesh thickness changes the answer
- Chart coverage is incomplete by design
- Do not confuse a general FAQ with a part-specific sizing chart
- Test before replacing the whole screen
- Safety and four-edge retention check
- How much spline to buy
- Decision checklist when an old sample is missing
- Reference
- After the project: did it work?
Open desktop diagram ↗ Open mobile diagram ↗
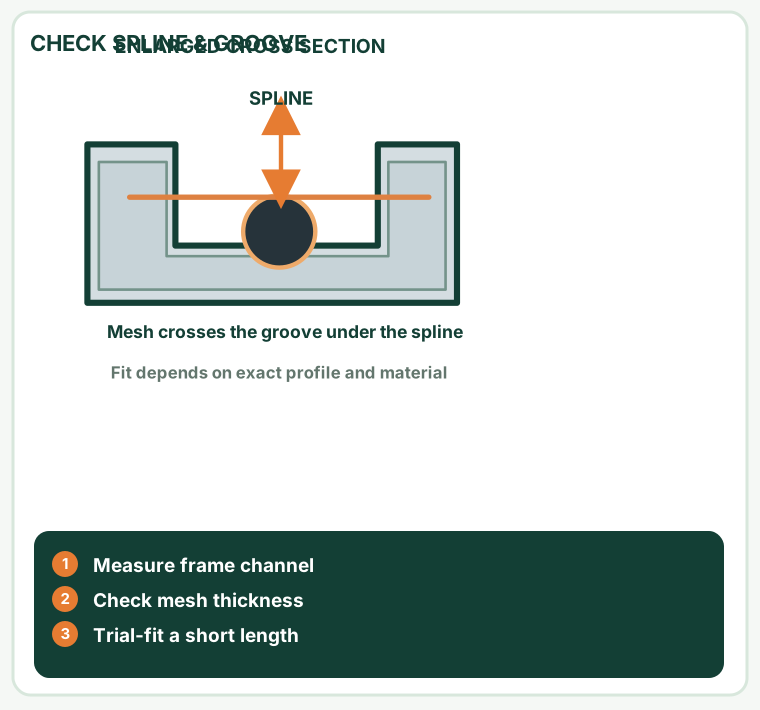
Read the diagram: three checkpoints
- Measure frame channel
- Check mesh thickness
- Trial-fit a short length
Screen spline is the flexible strip that presses mesh into a screen frame's channel. When it is too small, the mesh can loosen. When it is too large, installing it can become difficult or distort the frame. The correct size depends on both the channel and the screening material.
What to inspect before shopping
Look at a clean, undamaged section of the old spline. Is it a round cord, a flattened strip or a specialized retention system? Common home screen frames use round spline, but not all frames do. If your frame uses clips, a rigid retainer or a proprietary insert, generic round spline guidance may not apply.
The most useful information is the manufacturer's original size recommendation. If that is unavailable, measure an uncompressed piece of spline and the groove carefully and test fit with the actual mesh you plan to use.
Diagnose fit without forcing the channel
On a narrow screen, scroll this table sideways to see every column.
| Trial result | Most useful next check | Avoid |
|---|---|---|
| Cord will not start in a straight section | Confirm actual mesh product and compare its thickness with the manufacturer's listed combination | Forcing a larger cord into a delicate frame |
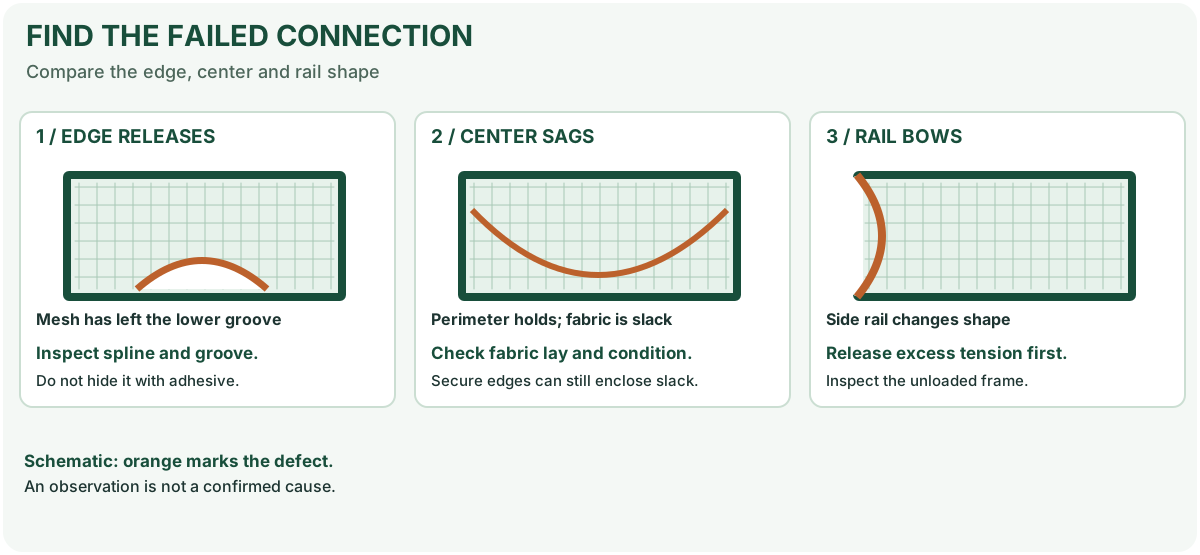
| Cord installs but pulls back out when mesh is gently tensioned | Check groove wear, profile, and whether you measured a stretched old spline | Automatically adding adhesive |
| Cord works on straight runs but fails at corners | Inspect corner joints, channel shape and insertion angle | Reusing crushed spline from a damaged corner |
| Cord holds, but screen twists | Check working surface and how evenly mesh was tensioned | Assuming more tension will straighten the frame |
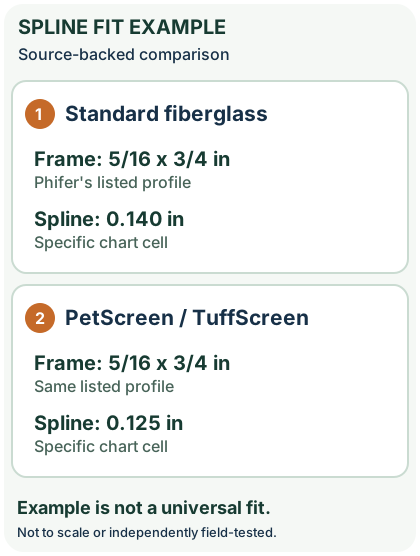
Worked compatibility example: For the specific 5/16 × 3/4 in frame profile in Phifer's chart, standard fiberglass lists 0.140 in, while PetScreen/TuffScreen lists 0.125 in. In another frame profile or brand, the chart may not apply. This illustrates why mesh and frame profile must be checked together, not a rule that all pet mesh takes 0.125 in. Inspect Phifer's original chart.
Label conversion: Phifer lists 0.140 in (9/64 in) and 0.125 in (1/8 in) in these frame/material examples; the fractional labels are common nominal equivalents, not proof that another maker’s channel is identical. Not on the chart? Treat the pair as unlisted and ask for the exact frame and mesh specification; do not interpolate.
Before buying a spool: write down the frame profile, spline-groove measurement, exact mesh product name and whether the old retainer was round. If one of these is unknown, a test piece or supplier confirmation is better than buying a bulk length.
How to measure an old spline
- Pull out a short undamaged section, preferably away from a crushed corner.
- Wipe away dust so the edges are easy to see.
- Use calipers, if available, to measure the outside diameter. Write the measurement down in inches or millimeters.
- Inspect the groove in the screen frame. A worn or distorted channel may not retain spline properly even if the diameter seems correct.
- Compare your results with the screen material manufacturer's chart. Buy a short test length if you are unsure.
For orientation, common round spline sizes are labeled in decimal inches, such as .125, .140, .160 or .175. They are examples, not a universal list of sizes that fit every frame.
Why mesh thickness changes the answer
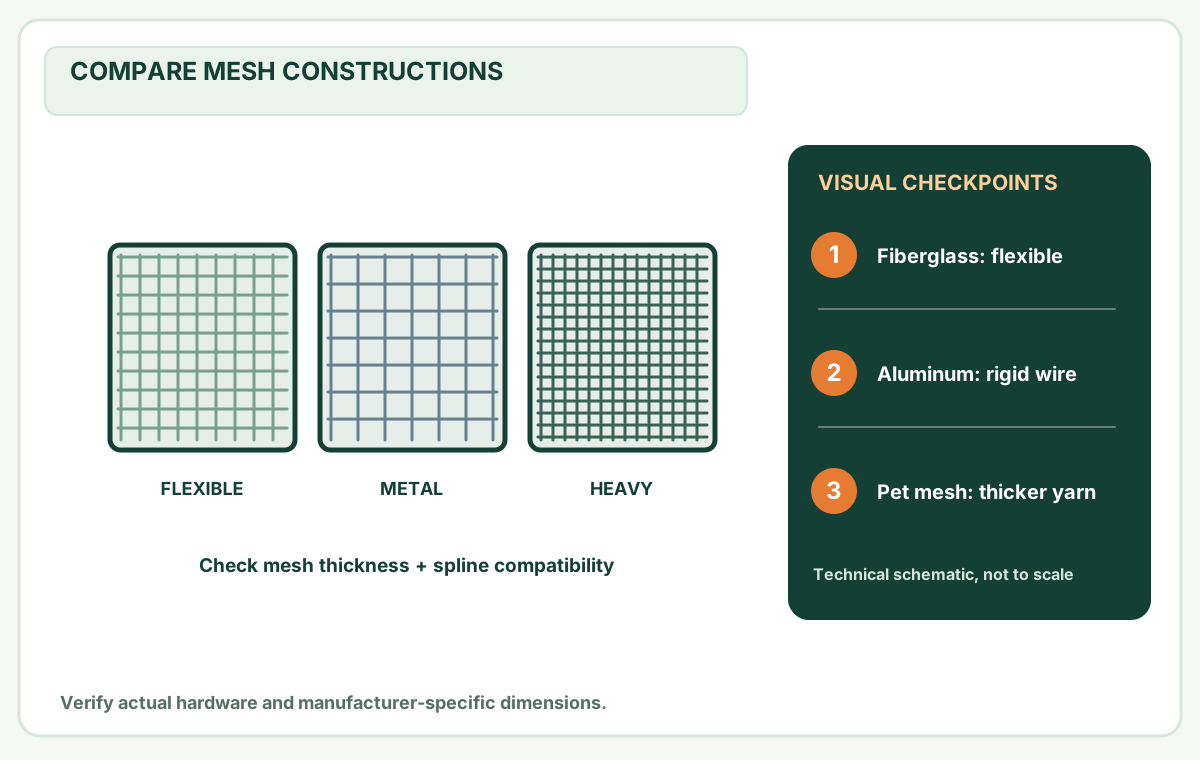
Thick pet-resistant or solar screening takes up more space in the frame's groove than many standard insect meshes. Some manufacturers therefore specify a smaller spline for those thicker materials, even in the same frame.
For example, Phifer's published sizing guidance says to measure the groove width and check the listed frame/material pairing; it identifies smaller-spline exceptions for several thicker specialty products, while aluminum also has its own specific chart entries. Do not assume aluminum and ordinary fiberglass always share a spline diameter. Use the chart relevant to your specific frame profile and screening product rather than copying a size from an unrelated screen.
Chart coverage is incomplete by design
An empty cell in a manufacturer chart must not be filled by extrapolating from another frame profile. In Phifer's published sizing chart, standard fiberglass is shown for the listed 5/16 × 3/4-inch and 7/16 × 3/4-inch frame profiles, but the 7/16 × 1-inch column does not provide an entry for that same screening type. That blank means no published recommendation in that table cell — it does not mean the material fits, and it does not mean the material is forbidden.
On a narrow screen, scroll this table sideways to see every column.
| Your evidence | Next decision |
|---|---|
| Exact frame profile and mesh combination appears in the chart | Treat the spline number as a manufacturer's starting recommendation; confirm fit with a short trial |
| The combination is unlisted | Obtain the frame or screening maker's latest recommendation; do not select an adjacent cell |
| Groove is damaged or profile unknown | Identify/repair the channel or consult a supplier rather than forcing a larger cord |
The Phifer chart lookup deliberately returns “not listed” rather than guessing a size. This is especially important with specialty mesh or a frame with an unknown retention system.
Do not confuse a general FAQ with a part-specific sizing chart
Phifer has both a DIY FAQ and a more detailed screening-and-spline size chart. Their simplified wording is not identical for every material. The published chart cells and the exact named screen/frame combination are the safer starting point; if their language seems to conflict or your combination is blank, ask Phifer or the screen-frame maker for clarification rather than choosing a number from the general FAQ.
For example, the currently published chart lists this specific 5/16 × 3/4-inch frame configuration:
On a narrow screen, scroll this table sideways to see every column.
| Named fabric in the chart | Listed spline size | What this proves |
|---|---|---|
| Standard fiberglass insect screening | 0.140 in | One standard-mesh pairing for the stated frame profile |
| Aluminum insect screening | 0.125 in | This chart cell differs from the fiberglass cell |
| PetScreen / TuffScreen | 0.125 in | A specialty material can use a smaller retainer |
| An unspecified coated mesh or different frame groove | Unknown | No inference from a similar-looking product or adjacent column |
Important: do not measure only the outside frame thickness and use that as a spline diameter. The narrow retaining channel/groove, its condition and the precise fabric system govern the fit. A flattened old spline may give a misleading caliper reading.
A compatible local test should satisfy all four conditions: the spline seats without crushing the profile; the mesh remains retained during normal handling; no corner key opens; and the frame remains straight. If the groove has split, stop—forcing a bigger cord is not a structural repair.
Test before replacing the whole screen
Cut a small sample of your actual mesh, place it over a clean section of the groove, then roll a short length of the intended spline into position. The mesh should stay engaged without forcing the frame out of shape. Remove the sample if the fit is plainly wrong.
Do not use heavy pressure or sharp metal tools in a way that can damage the mesh or frame. A purpose-made spline roller is usually easier to control.
Safety and four-edge retention check
Before removing or reinstalling a screen, support the complete frame from a safe indoor position. If the screen can only be reached by leaning outside an upper-floor window, stop and arrange safe professional help. A window insect screen is not a child fall barrier; use appropriate independent window-safety protection rather than trusting new spline to prevent a fall. Keep sharp cut frame edges and utility knives away from hands and glass.
Once you have followed the exact screen manufacturer's approved installation procedure, check all four spline runs and each corner, not just the easiest straight section:
- Look for a lifted spline, pinched mesh, open corner joint or bent frame rail.
- Confirm the actual window's retaining springs, tabs or clips engage their original receiving points; spline only retains the fabric within the screen frame.
- Open and close the window normally and verify the screen stays seated without creating an obstruction. If the frame moves or mesh lifts, do not leave the screen in service while guessing at a larger cord.
This separates a mesh-to-frame retention problem from a frame-to-window mounting problem. Phifer's published guidance addresses the spline-and-groove method, while the window manufacturer's instructions control its separate mounting hardware.
How much spline to buy
For a simple rectangular frame, calculate 2 × (width + height) and add some extra for mistakes. A 30-inch by 24-inch frame has a 108-inch perimeter, or 9 feet. Adding 10% as a shopping allowance gives approximately 9.9 feet, so purchase enough to complete the job in one continuous run where the frame design allows.
Try the material calculator for other rectangular dimensions.
Decision checklist when an old sample is missing
On a narrow screen, scroll this table sideways to see every column.
| Situation | Safer next action |
|---|---|
| Original spline present but compressed or stretched | Measure an undamaged section and cross-check the manufacturer chart |
| No old spline remains | Identify frame profile and mesh type, then ask supplier for the correct diameter rather than guessing from perimeter |
| Switching from fiberglass to thick pet mesh | Recheck spline specification for the new mesh |
| Frame has a rigid or flat retainer | Identify the proprietary retention system before buying round spline |
| Channel is visibly damaged | Repair/replace the frame component first; a larger spline is not a structural fix |
The shopping dimensions that matter here are spline diameter and retention fit. A linear-length calculator answers a different question: how much cord you need after choosing the correct material.
Reference
Phifer — DIY installation FAQs — installation context from the same manufacturer, not independent test evidence.
Phifer — How to Choose the Right Size of Screen Spline — published frame/material chart, not a guarantee of fit for a different manufacturer.
U.S. CPSC — Childproofing Your Home — insect screens do not prevent child window falls.
After the project: did it work?
After completing only product-approved work, document what you actually observe instead of assuming a replacement part resolved the fault.
- Success looks like
- New mesh stays seated around the channel without looseness, and the screen frame remains straight after reinsertion.
- If it still fails
- If the spline pops out or a rail bows, stop forcing it; check mesh thickness, groove and the maker's compatible spline range.
- Keep for next time
- Mesh product; original spline sample; channel dimensions; test-section result
Keep your actual measurements and observed result in your private project notebook. This is a verification checklist, not a product certification.
My project record: progress and take-home checklist
Select a progress stage if helpful. This is a personal record only, not a claim that MendNook verified your repair.
Includes this guide's specific diagnosis, decision, safety, and outcome checks, plus any note entered above. Nothing is sent to MendNook; downloads and copy operations stay under your control.