Patch isolated damage only when sound surrounding mesh and the exact patch instructions allow it. Fiberglass adhesive and aluminum hooked patches attach differently.
Before you buy or repair
- Record first
- Original screen material, tear width and height, intact mesh overlap and patch kit model
- Make the decision
- An attachment method specified for the fiberglass or metal mesh, or rescreening if sound fabric is insufficient
- Stop & verify if
- The screen is elevated, the tear reaches the groove, metal hooks are exposed, or the frame is unsafe
Jump to a section
- Diagram checkpoints
- Is the fabric suitable for a patch?
- Identify fiberglass and metal patch attachment
- Measure damage and check patch coverage
- Fiberglass: manufacturer-compatible adhesive patch workflow
- Aluminum: mechanically attached hook patch workflow
- A small-hole exception is not a reason to use household glue everywhere
- After patching: what counts as a useful result?
- Sources and method limitations
- After the project: did it work?
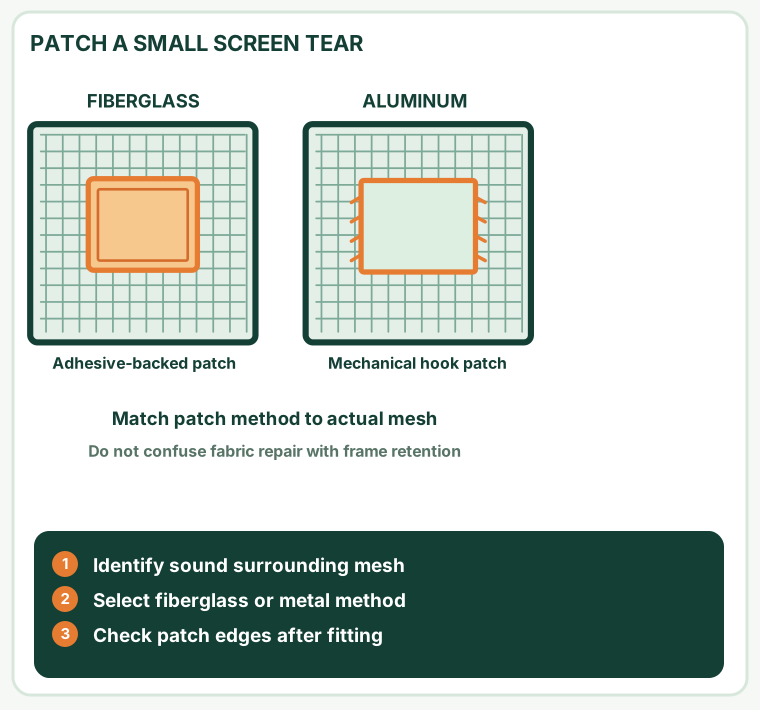
Open desktop diagram ↗ Open mobile diagram ↗
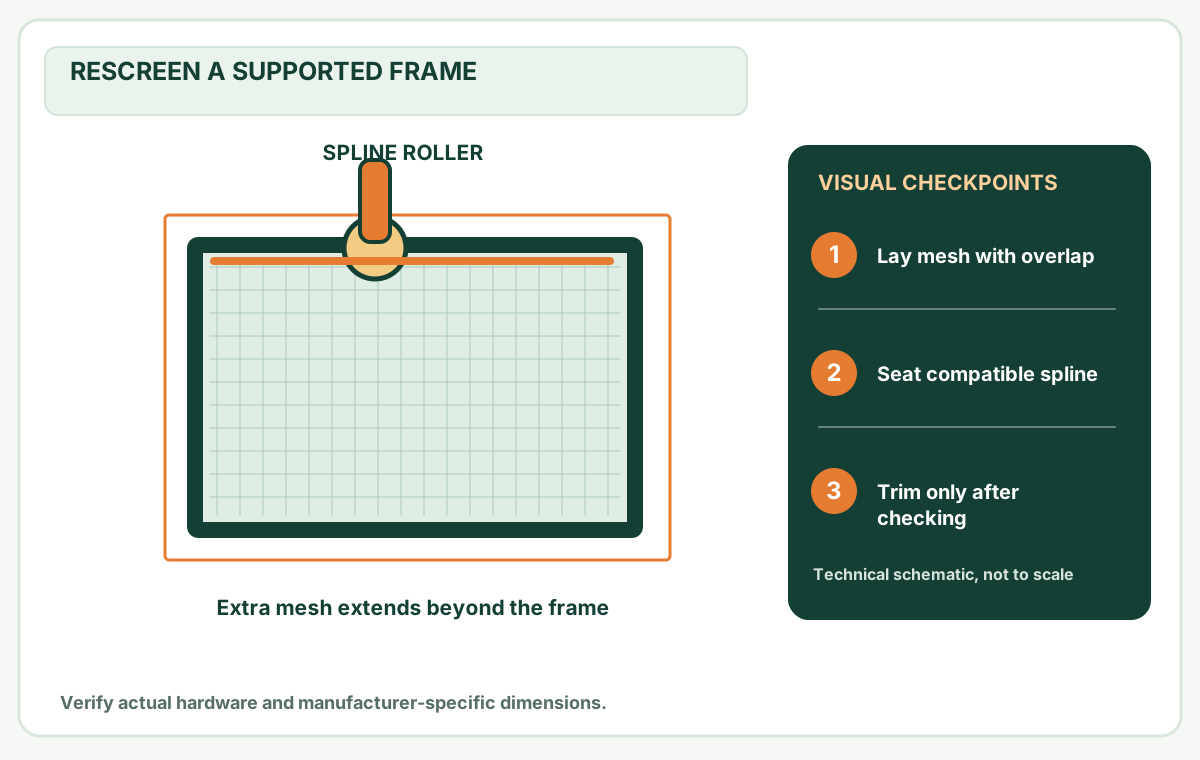
Read the diagram: three checkpoints
- Identify sound surrounding mesh
- Select fiberglass or metal method
- Check patch edges after fitting
A torn insect screen does not always need a new frame or a full roll of mesh. But a patch that looks neat on day one may peel, snag or reopen if it was fitted to the wrong material or damaged mesh. First check whether the tear is isolated, the surrounding fabric is sound and the frame still retains the mesh. This guide compares two materially different repair methods: an adhesive-backed fiberglass patch and a mechanically hooked metal patch.
These are screen-fabric repairs, not repairs to window glass, security glazing, window locks or fall-prevention hardware. If the complete screen moves in its opening, start with frame and retainer diagnosis instead.
Is the fabric suitable for a patch?
Before buying, observe the damage from a safe, supported position. Never lean through an upstairs opening or treat an insect screen as a support.
On a narrow screen, scroll this table sideways to see every column.
| What you see | Why it matters | Choose the next step |
|---|---|---|
| One small puncture, sound mesh all around | A compatible patch may cover and grip intact fabric | Compare a patch made for your mesh type |
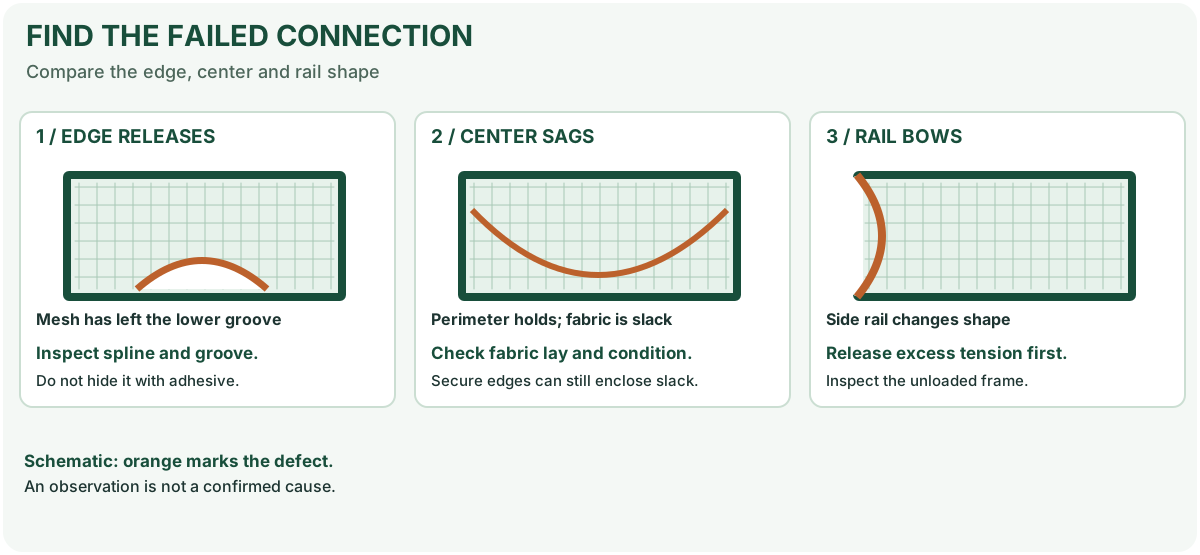
| Tear reaches the spline groove or outside edge | There may be too little undamaged mesh for the repair to hold | Inspect spline and consider rescreening |
| Several holes, brittle fabric or widespread fraying | The surrounding fabric may fail beyond the patch | Compare full mesh replacement, not repeated overlapping patches |
| Frame bends or a corner separates | A fabric patch cannot restore frame geometry | Follow the frame inspection |
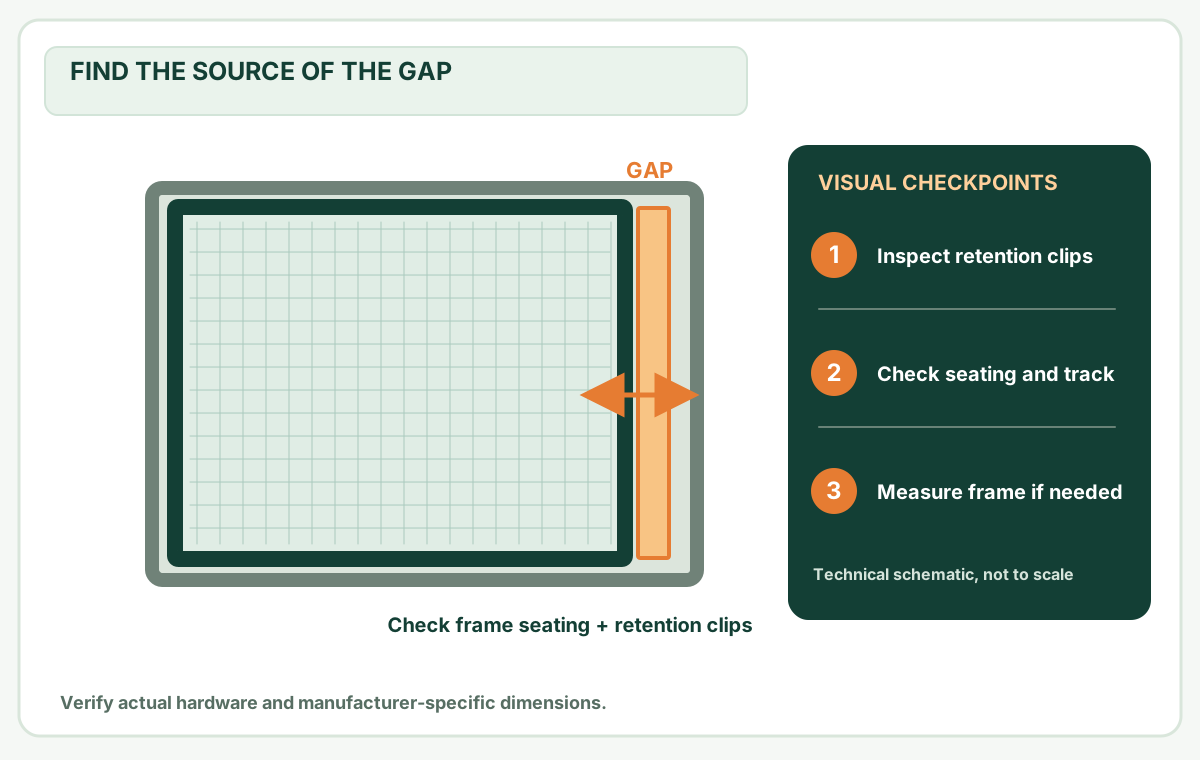
| Whole screen falls out or lacks clips | The defect is frame-to-window retention, not a fabric puncture | Check screen retaining hardware |
A quick patch is less attractive if it would cover a substantial viewing area, interfere with sliding clearance or require pressing against fragile glazing. Manufacturer product instructions determine compatibility; a visually similar black mesh patch is not automatically appropriate for coated, pet-resistant or specialty screen material.
Identify fiberglass and metal patch attachment
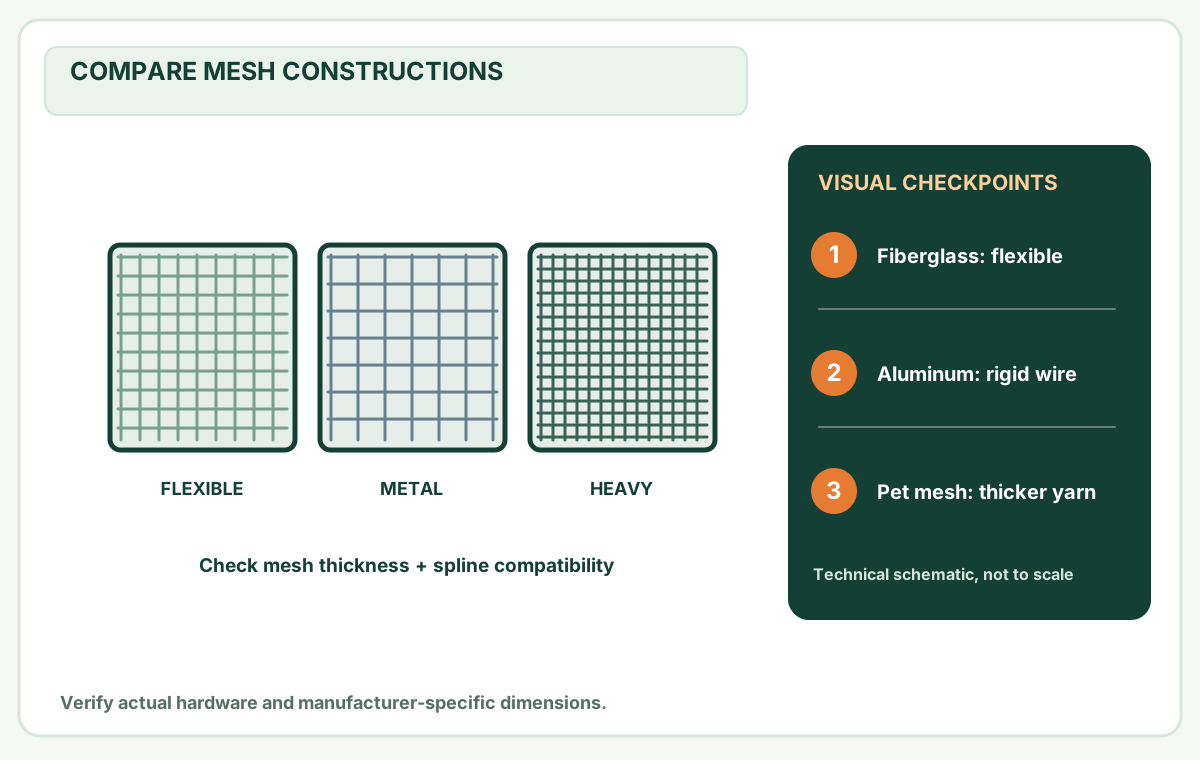
Fiberglass adhesive-backed patch. This commonly uses a mesh patch with an adhesive perimeter or backing; it depends on a clean, compatible receiving surface. Lowe's fiberglass repair instructions give a cut, place and adhere sequence. Some specific heat-activated patches have additional instructions. Do not assume that every patch requires heating, and do not use a hair dryer near a heat-sensitive frame or film without the actual kit's approval.
Aluminum hook-on patch. A mechanically retained patch can have small metal hooks or bent strands that connect through the existing weave. Phifer's repair-kit instructions describe a particular 2 × 2 in aluminum patch with hooks at its edges. Its dimensions and hook method describe that kit, not every aluminum repair product. Wear suitable protection for sharp ends. Do not press exposed wire tips toward glass or fingers.
For a different wire-patching method, iFixit's illustrated guide explains forming and bending exposed strands. It is a separate procedure. Do not combine iFixit's strand-forming dimensions with a ready-made Phifer hook patch as though they were one tested assembly.
Measure damage and check patch coverage
- Identify the original screen fabric. If uncertain, save a small photograph of its weave and any product label; ask a supplier rather than assuming black mesh means fiberglass.
- Measure the damaged bounding area. Record the widest width and height, including ragged ends that a kit instructs you to trim. Record inches or millimeters consistently.
- Read the actual patch package. Confirm the supported base fabric, attachment method, patch size, edge overlap and any curing or cleaning requirements.
- Check the intact fabric available on every side. A tear close to a frame channel cannot be repaired using the same overlap as a centrally located hole.
- Check interference. A raised patch near a sliding track, latch or spline may snag even if it covers the opening.
Worked measurement: compare the cut, not just the tear
Suppose a hypothetical small tear occupies a 1 × 1 in bounding rectangle. A particular fiberglass tutorial calling for 1 in of extra patch on each side would imply a 3 × 3 in cut (1 + 1 + 1 in across both width and height). This is illustrative arithmetic from that method, not an independently tested universal allowance. By contrast, Phifer's ready-made hook kit is 2 × 2 in; it does not follow the fiberglass cut-size formula. Compare each patch against its own supplier instructions.
A patch must cover sound surrounding weave in the approved manner. If the required overlap or attachment cannot be achieved, stop and consider rescreening a sound frame instead of trimming away necessary engagement.
Fiberglass: manufacturer-compatible adhesive patch workflow
- Support the screen on a flat surface if removal is safe and allowed by its window manufacturer. Do not work on an unsupported elevated screen.
- Confirm the mesh is dry, sound and clean using the cleaning procedure approved for the product. Dust and old adhesive can compromise attachment.
- If the patch instructions require trimming loose fibers, cut only the damaged loose strands without enlarging the hole unnecessarily.
- Cut the compatible patch to the manufacturer-specified dimensions; dry-position it to verify coverage without obstructing the frame.
- Peel, place and press as directed by the exact patch kit. Apply heat, cure time or bonding products only if that specific kit requires and permits them.
- Inspect every edge after installation and again after the applicable curing interval. If an edge lifts, don't assume a second layer of incompatible adhesive will fix it.
A cosmetic patch can reduce an insect-entry gap but cannot make a deteriorated full panel structurally sound.
Aluminum: mechanically attached hook patch workflow
- Match a metal patch with the original metal screen and verify its available undamaged weave. If the tear has reached the frame channel, rescreening may be more reliable.
- Put on suitable gloves and support the patch and screen so the screen fabric cannot bow into glass.
- Trim ragged wire only to the extent required by the chosen kit. Keep sharp offcuts contained.
- Following the metal patch manufacturer's directions, engage the prepared hooks or strands with sound original weave. Bend them only as described for that patch; do not force hooks into a rigid frame or coating.
- Carefully check that no wire tips protrude toward a person or could catch on moving window hardware.
- After securing, inspect the complete patch perimeter and the original screen's separate mounting retainers.
Phifer describes optional added bonding agent for its hook kit; this is not permission to glue any mesh or coated surface. Follow the kit's stated material compatibility and safety instructions.
A small-hole exception is not a reason to use household glue everywhere
Lowe's screen-repair guide also describes nail polish for a tiny hole of about 1/8 in or smaller; this is a separate, limited tutorial technique, not the Phifer aluminum hook kit, not a replacement for a 2 × 2 in patch, and not a universal repair for vinyl-coated, solar, pet-resistant or unknown screening. A liquid coating can change appearance or adhesion and may interact with a proprietary finish. Follow the original fabric maker and product safety instructions first; if compatibility is unknown, choose a documented compatible patch or replace the mesh.
The edge-distance check before opening a patch kit
Suppose an adhesive patch method needs 1 in of sound material on each side and a tear is 3/4 in from the spline groove. Even though the tear might measure just 1/4 in, the one-inch margin cannot be achieved on the frame-facing side without running into the retainer channel. That is a geometric rejection, not evidence that stronger glue will work. Check the other sides too, and do not trim intact spline or apply adhesive into a drainage or sliding channel.
Before declaring a repair complete, record the same three observations on both accessible sides: full damage covered, edge attached with no exposed sharp ends, and window/screen operation unchanged. After normal reinstallation, check the repaired area again at the interval required by the chosen product. This is a user-observed inspection, not a measured load or durability test.
After patching: what counts as a useful result?
Look at the repair from both accessible sides without leaning through the opening. The tear should be completely covered, and the patch edge should remain attached when the screen is handled normally in accordance with the product directions. There must be no exposed sharp wire, lifted adhesive edge or interference with the sash, sliding track or clip. Reinstall the screen using its original window-specific method, confirm every retainer engages, and open/close the window as designed.
Stop and reconsider the repair if a patch detaches, the hole grows, fabric tears around it, or the screen frame itself rocks. If the frame is sound but the fabric has multiple weak points, replace the full mesh rather than stacking patches. If the frame is distorted, compare repair versus replacement before purchasing a screen.
For your next repair, keep a record of fabric type, patch product, hole dimensions, attachment method and recheck date in the browser-local project notebook on this page. It is a personal note, not third-party proof that the patch passed a field test.
Sources and method limitations
- Phifer: Screen repair and replacement — named aluminum hook patch kit and its attachment approach.
- Lowe's: How to Patch a Screen — different aluminum and adhesive-fiberglass patch procedures and sizing guidance.
- iFixit: How to Patch a Torn Window Screen — a worked alternative wire-strand method; not equivalent to every packaged patch.
- The Home Depot: How to Repair or Replace Screens — distinction between patching localized holes and replacing screen material.
Editorial disclosure: MendNook has not performed or photographed an installation of these specific patch kits. Measurements are hypothetical teaching examples, not compatibility guarantees, and product packaging may change. Follow the latest instructions for the exact screen and patch rather than mixing incompatible repair methods.
After the project: did it work?
After completing only product-approved work, document what you actually observe instead of assuming a replacement part resolved the fault.
- Success looks like
- The selected patch fully covers the original tear, has secure edges with no exposed wire, and the separately retained screen stays seated during normal window use.
- If it still fails
- If adhesive lifts, a wire hook catches, surrounding mesh tears or the frame itself moves, stop using the patch as a fix; assess full rescreening or retention repair.
- Keep for next time
- Original mesh material; tear measurements; exact patch kit; attachment instructions; inspection date and recheck outcome
Keep your actual measurements and observed result in your private project notebook. This is a verification checklist, not a product certification.
My project record: progress and take-home checklist
Select a progress stage if helpful. This is a personal record only, not a claim that MendNook verified your repair.
Includes this guide's specific diagnosis, decision, safety, and outcome checks, plus any note entered above. Nothing is sent to MendNook; downloads and copy operations stay under your control.