Turn buttons, flush clips and plunger pins retain different screen systems. Identify the original mounting method before buying.
Before you buy or repair
- Record first
- Original mounting point, receiving surface, screen thickness, hardware profile and part number
- Make the decision
- Use the same approved retaining system instead of substituting hardware by appearance
- Stop & verify if
- New drilling would enter a proprietary frame, drainage channel or unsafe elevated window
Jump to a section
- Diagram checkpoints
- First, identify how the screen is held in place
- Diagnose the fault before changing a part
- Make a parts-identification card
- Choose retention by the exact motion, not the product photo
- Molded number versus visible size: a manufacturer part-selection example
- Safe replacement workflow
- Which option delivers the best value?
- A one-page fit record before placing an order
- Sources and limitations
- After the project: did it work?
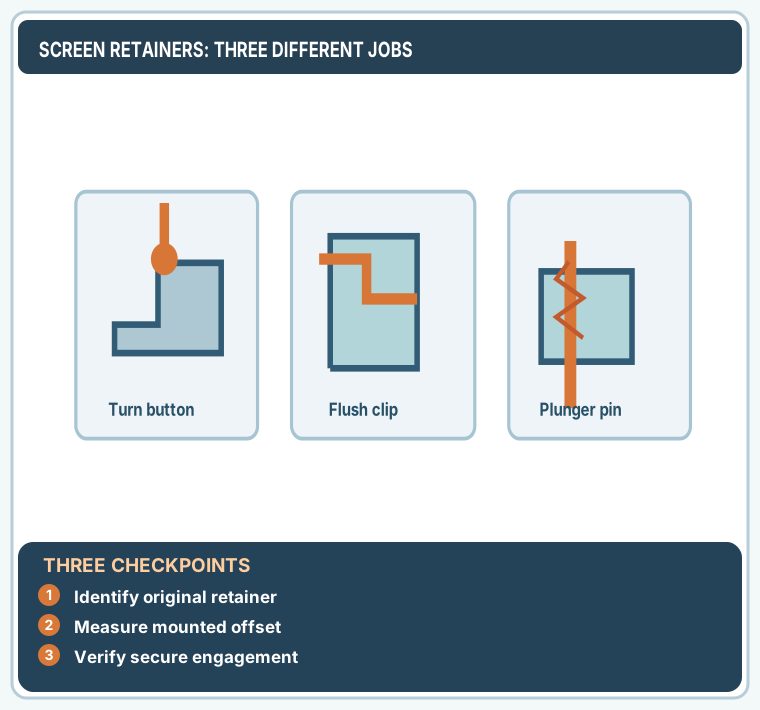
Open desktop diagram ↗ Open mobile diagram ↗
Read the diagram: three checkpoints
- Identify original retainer
- Measure mounted offset
- Verify secure engagement
Window screen retainer clips, turn buttons, pull tabs and plunger pins are often all called “screen clips,” but they do different jobs. A pull tab helps you remove a screen. A turn button rotates to capture an edge. A flush clip is shaped to sit in a specific mounting plane. A plunger pin engages a matching receiver. Buying the wrong type may leave the screen unsecured.
First, identify how the screen is held in place
With the screen supported safely from inside, observe all four corners and the side tracks. Does one edge insert into a channel? Does a small tab rotate against the frame? Is there a spring or a metal pin that retracts? Record which side is top and where removal is intended. Do not copy the fasteners of a neighboring window unless it is the same series and mounting system.
On a narrow screen, scroll this table sideways to see every column.
| Hardware | Primary function | Key fit question |
|---|---|---|
| Turn button | Rotates over a screen edge | Does it overlap the screen frame without bending it? |
| Flush clip | Retains a screen flush to a reference surface | Does its step match the mounted frame profile? |
| Plunger pin | Locks into a receiving hole | Is the pin assembly and hole compatible? |
| Pull tab | Gives a grip when withdrawing the screen | What actual retaining mechanism holds the screen? |
| Tension spring | Presses screen against opposing guide | Does manufacturer specify its position and load? |
Prime-Line's clip categories contain flush clips, turn buttons and other profiles. The wide range is a warning: appearance alone is not a fit specification.
Diagnose the fault before changing a part
A falling screen may have intact clips but a bent frame. A screen that is hard to remove may have a damaged channel or has been installed in the wrong orientation. A missing tab is not evidence that a screw should be driven through the extrusion. Photograph the frame seated in the window and look for existing holes or molded attachment points.
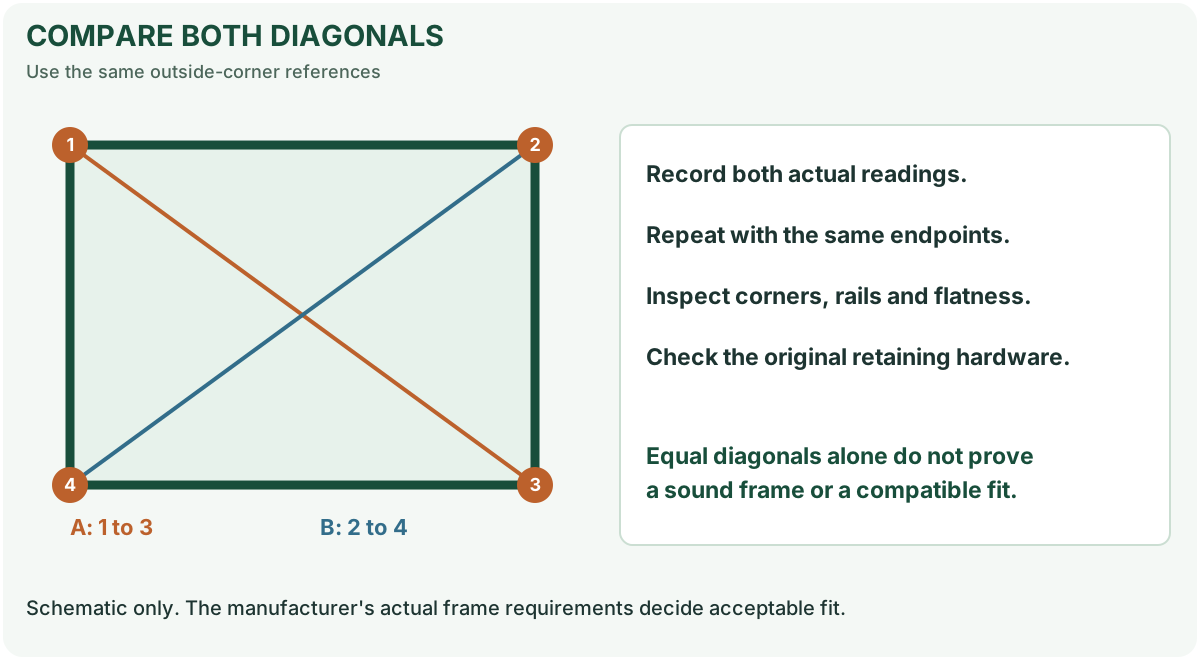
For frame distortion, compare diagonal measurements before attempting to add more hardware. If spline has pulled out, spline selection is a different repair.
Make a parts-identification card
Record four things: window manufacturer/series, screen frame cross-section, original retainer shape, and receiving surface. Photograph a surviving clip with a ruler and note its hole spacing, offset or step, width, material and mounting orientation. Verify against the exact product image and dimensioned drawing.
Illustrative example: the screen edge is roughly 7/16 inch thick, but the retaining surface sits 1/8 inch behind the frame face. A flush clip chosen by “7/16-inch screen” alone may not have the correct offset. Measure the installed geometry, not merely the screen's nominal thickness.
Choose retention by the exact motion, not the product photo
This observational decision table prevents a common category error: a tab that helps remove a screen is not automatically a clip that locks it in place.
On a narrow screen, scroll this table sideways to see every column.
| Test without forcing a part | What the result means | What to send the supplier |
|---|---|---|
| A small lever rotates across the rigid frame edge | Likely a turn-button style retainer; test its existing receiver and overlap | Photo of turn radius, center hole, frame edge and overlap |
| A metal/plastic plate holds the frame flush against a fixed surface | Likely a stepped/flush clip; the offset is as important as width | Face-on and side-profile photos with ruler, existing screw location |
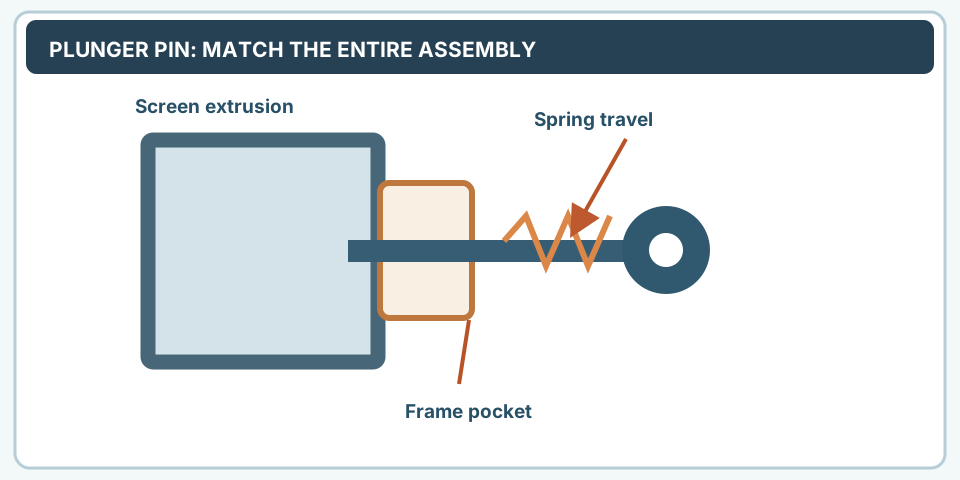
| A capped shaft retracts against a spring and enters a hole | Plunger system rather than a simple flat clip | Shaft/cap and receiver photos; plunger-pin guide |
| A fabric/plastic loop lifts the screen but has no independent catching surface | Pull tab only; locate the actual spring/track/clip retention | Installed track and top/bottom spring arrangement |
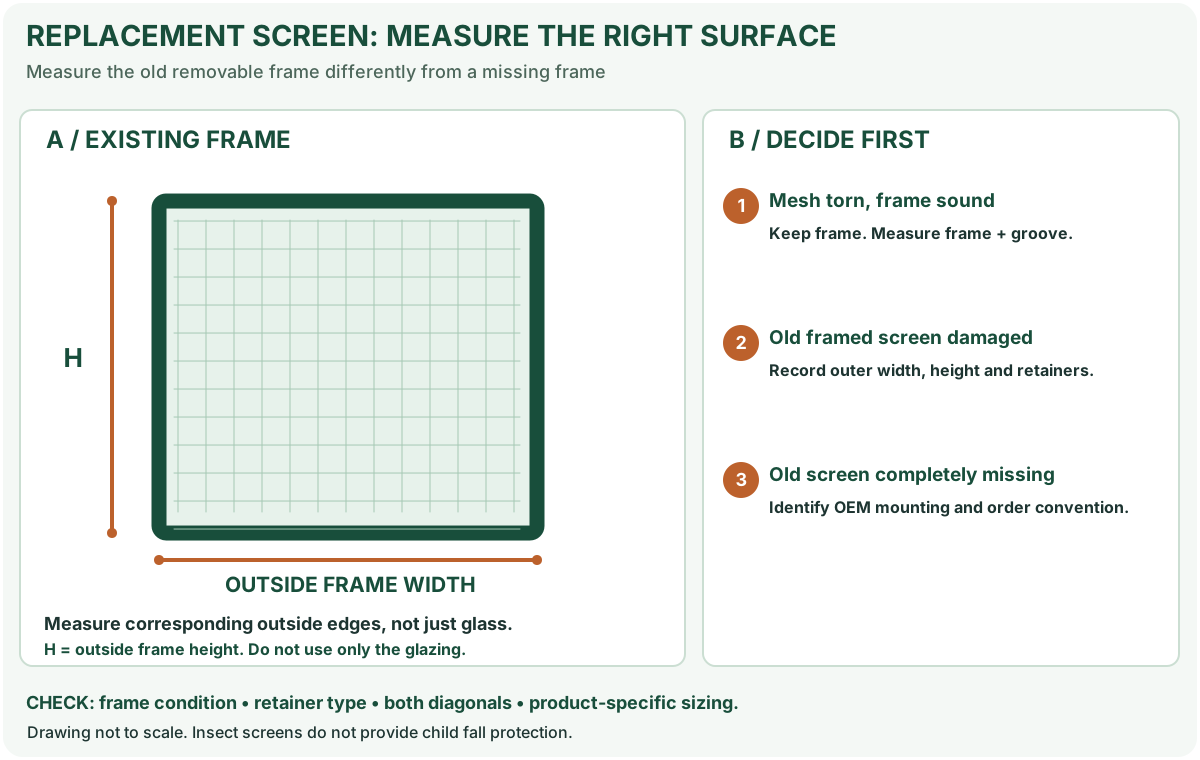
| Frame is loose despite intact hardware | Possible misfit, bent rail, misplaced channel or worn receiving surface | Old outside frame dimensions plus maker/series; fit guide |
Supplier-ready record: avoid a wrong generic clip
Record a part's actual installed plane, not just its retail label: screenshot/photograph of the original clip with the screw center, required offset, frame thickness, mounting substrate and the distance it must overlap the solid frame. A 7/16-in frame does not necessarily use a 7/16-in flush clip when the seat is set back.
Worked hypothetical mismatch: one candidate clip overlaps the aluminum rail by 1/8 in on a flat tabletop, but does not reach the same rail once the screen sits behind an outer mounting lip. The part may be correctly sized by nominal thickness and still provide zero useful retention in the installed geometry. Do not solve this by bending the clip or using an oversize screw. Ask for the matching original retainer profile.
Prime-Line's manufacturer catalog separates multiple screen clip and turn-button assemblies. A retailer's category name alone is not an installation authorization. The window manufacturer's fastener location and removal sequence remain controlling.
Molded number versus visible size: a manufacturer part-selection example
A useful real-world exception appears in Prime-Line's clear plastic screen retainers. These clips are sold in similar-looking families, but the original molded identification number can be a stronger starting clue than the color or approximate width. These are examples of published catalog specifications for particular products—not an instruction to install them in an unrelated window.
On a narrow screen, scroll this table sideways to see every column.
| Marking or catalog listing | What the manufacturer actually publishes | What it does not establish |
|---|---|---|
| #523 / L 5623 | Prime-Line #523 lists 3/4 in depth, 3/16 in offset, 1-5/8 in overall width and a 1/2 in backer; its description names certain aluminum storm-door screen applications | That every screen with a roughly 3/4-in rail uses #523 |
| #524 / L 5624 | Prime-Line #524 explicitly instructs buyers to use the number molded into the plastic for exact replacement | That #524 matches #523, #525 or #1029 simply because all look clear |
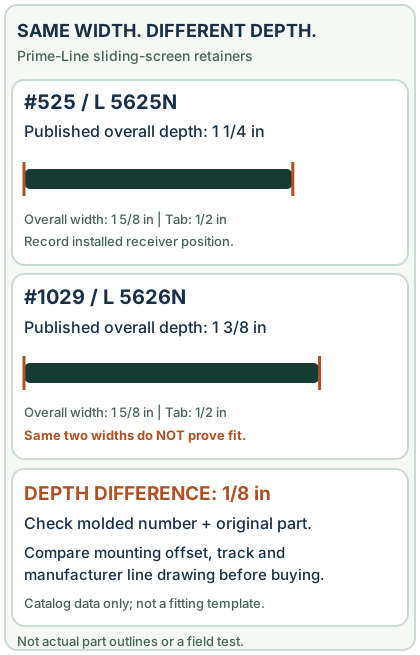
| #525 / L 5625N | Prime-Line #525 lists 1-5/8 in overall width, 1/2 in tab width and 1-1/4 in overall depth for a sliding-window retainer | That the partial fourth dimension in the listing can be guessed without a line drawing |
| #1029 / L 5626N | Prime-Line #1029 also lists 1-5/8 in overall width and 1/2 in tab width, but 1-3/8 in overall depth | That its 1/8-in depth difference from #525 is harmless in the actual track |
| L 5926 adjustable diecast | Prime-Line's adjustable clip advertises a flush-to-7/16-in reach using stackable rings | That “universal” overrides original screw locations, safe removal, frame geometry or the window maker's specified retainer |
Two-part purchase check: First read the original molded number where present; photograph it without damaging the old retainer. Then compare the installed geometry and the manufacturer's dimensioned drawing: overall depth, tab/backer width, offset, mounting point and receiving frame. If the original is broken beyond identification, photograph a surviving retainer from the same opening and orientation.
Worked wrong-part case: a buyer sees a 1-5/8-in overall width and 1/2-in tab width on both #525 and #1029. Those two values match, but the listed depths are 1-1/4 in versus 1-3/8 in—an 1/8-in difference. Choosing by the two matching widths discards a relevant dimension. The actual window still decides whether either part fits. Do not bend a new retainer, stack washers without instructions or drill a new mounting hole to compensate.
Canadian context, not universal suitability: the #525 and #1029 listings describe applications in western Canada; this is supplier catalog context, not a specification for every Canadian window. Verify availability separately from compatibility.
Safe replacement workflow
- Keep the panel supported and protect glass and painted surfaces.
- Confirm that an existing original hole is sound. Never assume that a nearby gap is a drilling guide.
- Remove a failed clip according to the hardware manufacturer's method; retain the fastener for length/thread comparison.
- Dry-fit the replacement against the screen while holding it in the same installed plane.
- Check that it captures the frame without pressing against mesh, crushing a hollow extrusion or obstructing the window sash.
- Install using suitable specified hardware only into a permitted substrate; avoid glass, hidden drainage channels and proprietary frame cavities.
- Gently test normal operation, removal and reinstallation. The screen must remain retained with the window in its permitted operating position.
Do not use adhesive tape or improvised magnets as a substitute for required retaining hardware in an elevated opening.
Which option delivers the best value?
Replacing an individual broken original clip may be simple when the exact manufacturer part exists. Switching from spring clips to turn buttons can require new receiving points and may not be approved, so it is not automatically a cheap upgrade. If the panel is a proprietary shape or the opening is high above ground, a screen shop or authorized service is safer than a field modification.
Use the screen measurement decision assistant if the existing frame seems too small for its tracks. When the original hardware is a spring plunger, use our dedicated plunger replacement guide.
A one-page fit record before placing an order
Different retaining hardware belongs to different screen systems; the most valuable shopping record is the original installed assembly, not a guess from clip color.
On a narrow screen, scroll this table sideways to see every column.
| Record from the original screen | How it prevents a wrong part |
|---|---|
| Retainer function: turning, spring plunging, pressure clip or pull tab | A pull tab is not a securing device; the proposed part must provide the original retention function |
| Window series and existing holes | Different frame designs cannot be drilled to accept each other's hardware without approved instructions |
| Installed frame thickness and mounting offset | A similarly sized flush clip can miss the screen edge if its step is wrong |
| Exact original fastening and receiving surface | A matching-looking screw can penetrate a drainage path or damage the extrusion |
| Remaining sound original clips and quantity | One surviving part can give a better manufacturer match than replacing every clip with a generic kit |
Example: A flush clip catalog description matches the visible screen-frame thickness, but its bend/offset does not reach the actual installed mounting plane. Buying a larger screw or bending the new clip is not a safe correction; identify the original profile and approved fit instead.
Critical child and fall-safety distinction
The U.S. CPSC childproofing guide says insect screens do not prevent children falling through an open window. Replacing a plunger or turn button may hold a screen for normal insect protection, but it cannot transform the screen into a protective window guard. Do not lean against an insect screen or leave an elevated loose panel unsecured.
After installing a compatible retainer, re-check all four sides, normal window motion and intended screen removal, without pushing on the mesh as a load test. Keep the SKU and photographs in your local project record. If there is no safe original fastening point or the screen falls out under normal handling, stop and seek the window manufacturer's authorized service route.
Sources and limitations
- Prime-Line: Screen retaining clips and turn-button catalog.
- Prime-Line: Clear #523 retainer with 3/16-in offset.
- Prime-Line: #524 molded-number replacement warning.
- Prime-Line: #525 sliding-window retainer.
- Prime-Line: #1029 sliding-window retainer.
- Prime-Line: L 5926 adjustable retainer.
- Prime-Line: Screen plunger hardware differs from standard clips.
MendNook did not inspect your specific frame. Part drawings and the window maker's original design govern fit and safe fastening.
After the project: did it work?
After completing only product-approved work, document what you actually observe instead of assuming a replacement part resolved the fault.
- Success looks like
- Each approved clip/turn button captures the screen frame without bending it or obstructing opening, and intentional removal remains possible.
- If it still fails
- If the mounting offset or original hole does not fit, stop before drilling or improvising a different retaining system.
- Keep for next time
- Retainer type; offset/hole details; exact part; secure-seat check
Keep your actual measurements and observed result in your private project notebook. This is a verification checklist, not a product certification.
My project record: progress and take-home checklist
Select a progress stage if helpful. This is a personal record only, not a claim that MendNook verified your repair.
Includes this guide's specific diagnosis, decision, safety, and outcome checks, plus any note entered above. Nothing is sent to MendNook; downloads and copy operations stay under your control.