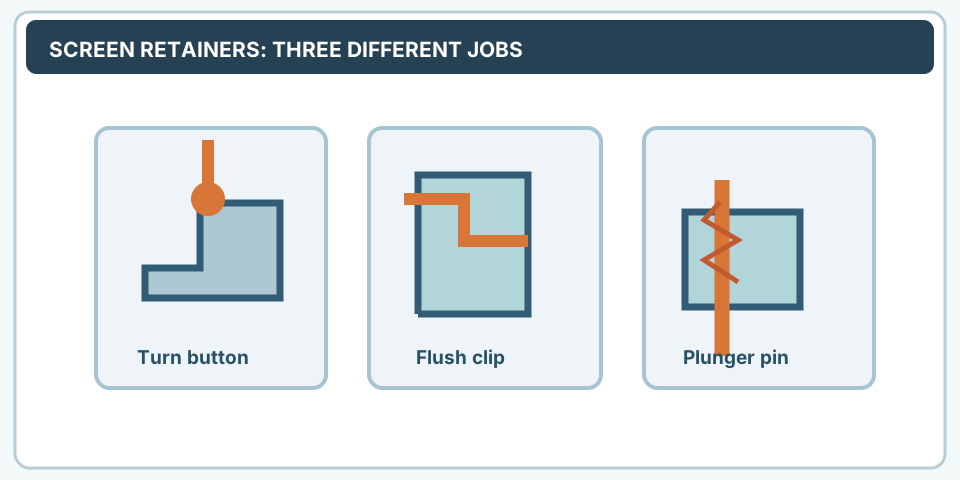
A plunger pin must match frame profile, spring travel and receiver hole; a similarly colored cap does not establish compatibility.
Before you buy or repair
- Record first
- Surviving pin assembly, frame pocket dimensions, cap/spring and receiving hole condition
- Make the decision
- Verify exact original hardware geometry before replacing a pin or modifying the window frame
- Stop & verify if
- The screen is elevated, the frame is cracked or no safe retainer match can be established
Jump to a section
- Diagram checkpoints
- Start with a no-drill diagnosis
- Identify the exact part before measuring
- Why a similar-looking pin is not necessarily compatible
- Manufacturer catalog: why the frame label alone is not enough
- SWISCO's two pin diameters: choose from the existing pin, not the cap color
- Removal and replacement decision path
- Worked fit worksheet
- When to stop or get help
- Sources and verification limits
- After the project: did it work?
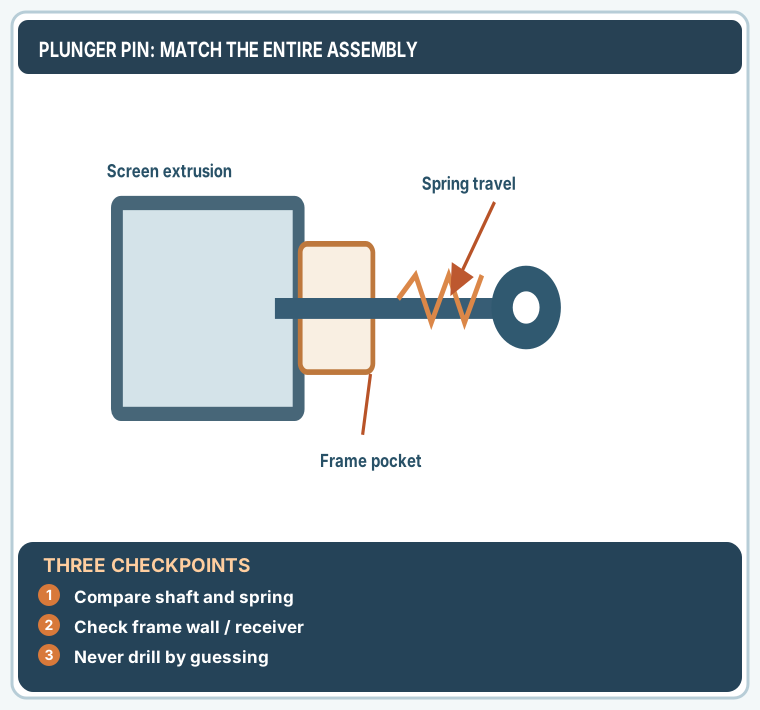
Open desktop diagram ↗ Open mobile diagram ↗
Read the diagram: three checkpoints
- Compare shaft and spring
- Check frame wall / receiver
- Never drill by guessing
A loose insect screen with spring-loaded plunger pins can look like it needs a new frame when the real failure is a missing cap, seized spring or damaged retaining hole. The opposite mistake is forcing a generic pin into a thin frame. Plungers are mechanical retainers, not interchangeable decorations. Before ordering, determine whether your screen originally used this hardware, how it engages the window frame and whether the retaining hole is sound.
Start with a no-drill diagnosis
Secure the screen from inside before inspecting its retaining hardware; never lean outward from an elevated window. Have a second person support a large panel. Use a flashlight to inspect each cap, spring and pin while the panel is safely supported. Note whether the pin retracts when the cap is pulled and returns without sticking. A screen that may fall must not remain in use until all retainers work.
On a narrow screen, scroll this table sideways to see every column.
| Symptom | Likely cause to check | Better next step |
|---|---|---|
| White cap missing but metal pin remains | Lost cap or damaged snap fit | Identify matching cap and pin assembly |
| Pin stays retracted | Spring corrosion, dirt or damaged housing | Replace matching assembly; do not lubricate blindly |
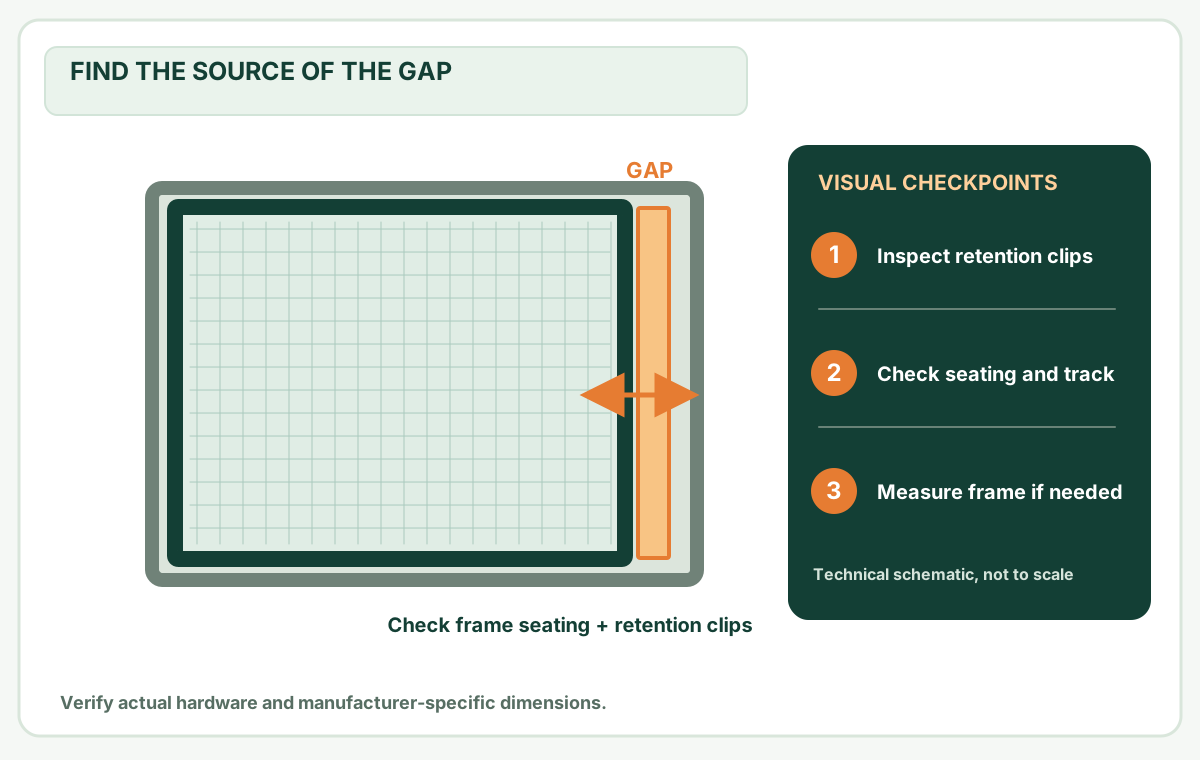
| Pin moves but panel falls out | Receiving hole misaligned, worn or oversized | Diagnose frame/track alignment first |
| No pin on either side, only clips | Different mounting system | Use screen retainer clip guide |
| Screen frame corner is split | Structural damage | Repair/replace the frame before adding hardware |
Identify the exact part before measuring
Prime-Line's plunger latch catalog shows different products for different frame sizes and mounting geometries. A 1-inch frame carrier is not interchangeable with a 1/4-inch frame carrier merely because both have white caps. Check for an original manufacturer label and take photographs of the cap, shaft, spring and retainer position. Note whether the assembly passes through one or more walls of the screen extrusion.
A precise comparison record includes frame extrusion width/depth, pin shank diameter, total length, spring travel, cap locking feature and the position of the receiving hole. Measure with the damaged unit safely removed where the maker permits it, and compare against a product drawing. Wear does not establish the original specification.
Why a similar-looking pin is not necessarily compatible
For example, two products may both use a roughly 1/8-inch pin shaft, but one may be intended for a wider frame profile or use a different cap and retainer body. When installed, one can bind because the spring has inadequate clearance. Another can project too far and damage the window track. The key check is the manufacturer's full assembly drawing, not just one caliper value.
Do not order a 100-pack because the unit price is lower if you cannot confirm one correct sample part. An approved small replacement set is cheaper than a bent screen and enlarged frame holes.
Manufacturer catalog: why the frame label alone is not enough
Prime-Line sells several distinct plunger-retainer families. These examples come from its public screen plunger catalog and demonstrate compatibility questions—not endorsements or a part-number fit chart for your window.
On a narrow screen, scroll this table sideways to see every column.
| Example product listing | Published identification detail | What you must still verify |
|---|---|---|
| PL 14663 nylon latch | For 1/4 to 5/16 in frame; plastic bolt and cap, steel spring; listed 5/32 in diameter | Retaining-wall profile, original cap, hole layout and length |
| PL 14666 nylon latch | For 3/8 to 7/16 in frame; nylon bolt/cap and steel spring; listed 1/8 in diameter | The actual hole/shaft relationship, spring travel and receiver location |
| MP5541 diecast latch | For 3/8 to 7/16 in frame; diecast body with spring and nylon cap | Whether original hardware calls for diecast versus nylon and the entire geometry |
Practical consequence: even in a similar nominal frame-size range, construction and shaft dimensions can differ. Do not decide by cap color, one shaft measurement or a photograph of a package. Compare the complete published assembly against an undamaged original.
Same frame range does not mean same pin: a three-option rejection test
When the original screen extrusion measures 3/8 in at the relevant mounting profile, two Prime-Line catalog options may look plausible, but their compatibility is not proven by that fact:
On a narrow screen, scroll this table sideways to see every column.
| Candidate for a hypothetical 3/8-in screen | Published manufacturer evidence | Decision before touching the frame |
|---|---|---|
| PL 14663 nylon | Prime-Line states 1/4–5/16-in frame, with a listed 5/32-in diameter | Reject by published frame range if the actual original mounting profile is 3/8 in; don't enlarge the hole to use it |
| PL 14666 nylon | Prime-Line states 3/8–7/16-in frame, with a listed 1/8-in diameter | A candidate to compare, not an automatic fit; match the original shank, cap, travel and receiving hole |
| MP5541 diecast | Prime-Line also lists 3/8–7/16-in frames but describes a different diecast assembly | Still an unapproved substitution until the complete original model and installed geometry match |
What to do if the old part is missing: identify the window and screen series and photograph both retaining holes, their distance from frame corners, the opposite surviving pin and the mating receiver. Ask the window maker or parts desk to identify the factory retainer. The published frame-range label alone is not enough to choose replacement diameter or installation drill.
Replacement versus conversion: do not confuse the procedures
Existing correctly drilled plunger mounting: Identify the original part and reuse an intact original hole only where the maker instructs it. If a hole is deformed or the receiving frame is cracking, drilling a larger hole will not establish safe retention.
Converting a frame that never used plungers: This is a separate fabrication task, not a routine “pin replacement.” SWISCO's step-drill installation tutorial shows a particular screen-extrusion hole and spring/cap sequence, but only for that installation method. Do not apply it to an unknown or warranty-covered frame. The installation can intersect the spline pocket; an incorrect hole may permanently damage the frame.
Use the retainer selection guide to establish whether your screen originally used plunger pins, turn buttons or clips.
SWISCO's two pin diameters: choose from the existing pin, not the cap color
A separate hardware supplier documents a different product family from the Prime-Line examples above. SWISCO's June 2, 2023 support response says the appropriate replacement for its 70-008 versus 70-009 screen plungers depends on the diameter of the existing metal pin, or, if it is missing, the receiver-hole dimensions. Its published examples are 70-008 at 7/32 in versus 70-009 at 5/32 in. Those labels are the supplier's pin-size examples, not a universal dimension chart for Prime-Line latches or the hole you should drill.
On a narrow screen, scroll this table sideways to see every column.
| Candidate | Published SWISCO tip/part distinction | What a buyer must record first |
|---|---|---|
| 70-008 | Example 7/32-in pin; see SWISCO's diameter comparison | Original pin diameter, receiver aperture and full installed body profile |
| 70-009 | Example 5/32-in pin; compare with its 70-008 diagram | Same checks; a smaller tip is not automatically a better fit because a screen will still need secure retention |
| No original pin survives | Seller's answer says measure the receiver hole and compare manufacturer diagrams | Identify screen extrusion, receiver style, installation generation and any original caps before selecting either option |
Worked rejection: You measure a safely removed intact original pin tip at 5/32 in, and a merchant offers a 70-008 because its nylon pull cap looks identical. SWISCO's 7/32-in candidate is dimensionally different: do not use the appearance of the cap as approval to replace a 5/32-in original tip with that part. A matching tip diameter alone still does not certify installed shaft length, cap locking style, spring travel or window receiver compatibility.
A second hidden trap — the cap may not be reusable: In a February 24, 2020 SWISCO removal response, its representative says to cut the nylon cap to remove certain older pins. That means the cap is destroyed, not threaded off and reused. Do not cut an unidentified cap while the screen is unsupported, or treat that statement as a universal removal instruction. Obtain the replacement pin/cap set and original product disassembly instructions before undertaking a destructive step.
Important source-link fix: SWISCO's official plunger installation article uses the URL without a trailing slash. Its new-hole, stepped-drill process belongs to compatible newly fabricated screen extrusions. Existing replacement work with sound manufacturer-provided holes should not be converted into drilling just because an installation tutorial includes it.
Removal and replacement decision path
- Record the original pin orientation and photograph it alongside a ruler. Support the panel fully on a padded workbench if removal is required.
- Confirm the frame has no crack or distortion where the retainer is fitted. If the receiving hole is torn, stop; a new pin does not repair the extrusion.
- Follow the correct product instructions for releasing the old cap or carrier. Some caps snap on; others are integral to the assembly.
- Compare the replacement to the undamaged original and check all specified dimensions before applying force.
- Fit the assembly only by the documented procedure. Avoid crushing an aluminum rail or puncturing mesh with tools.
- Return the screen to its installed position, retract each plunger and ensure both sides engage the intended receivers.
- Test that the screen can be removed intentionally without unexpectedly releasing during normal window operation.
Prime-Line also sells a dedicated stepped drill for certain new plunger installations. That does not mean drilling should be part of every replacement. Do not enlarge existing holes without written fit guidance, especially in vinyl or insulated window components.
Worked fit worksheet
Suppose your notes read: screen profile 3/8 inch; existing retainer is spring-loaded; cap damaged; receiving hole intact; other pin still works. The next question is whether the proposed replacement's approved frame range and carrier geometry match the surviving unit. Your order sheet should contain original part reference or a verified equivalent, not simply “white window screen pin, 3/8 inch.” This is an illustrative decision example, not a measurement tolerance.
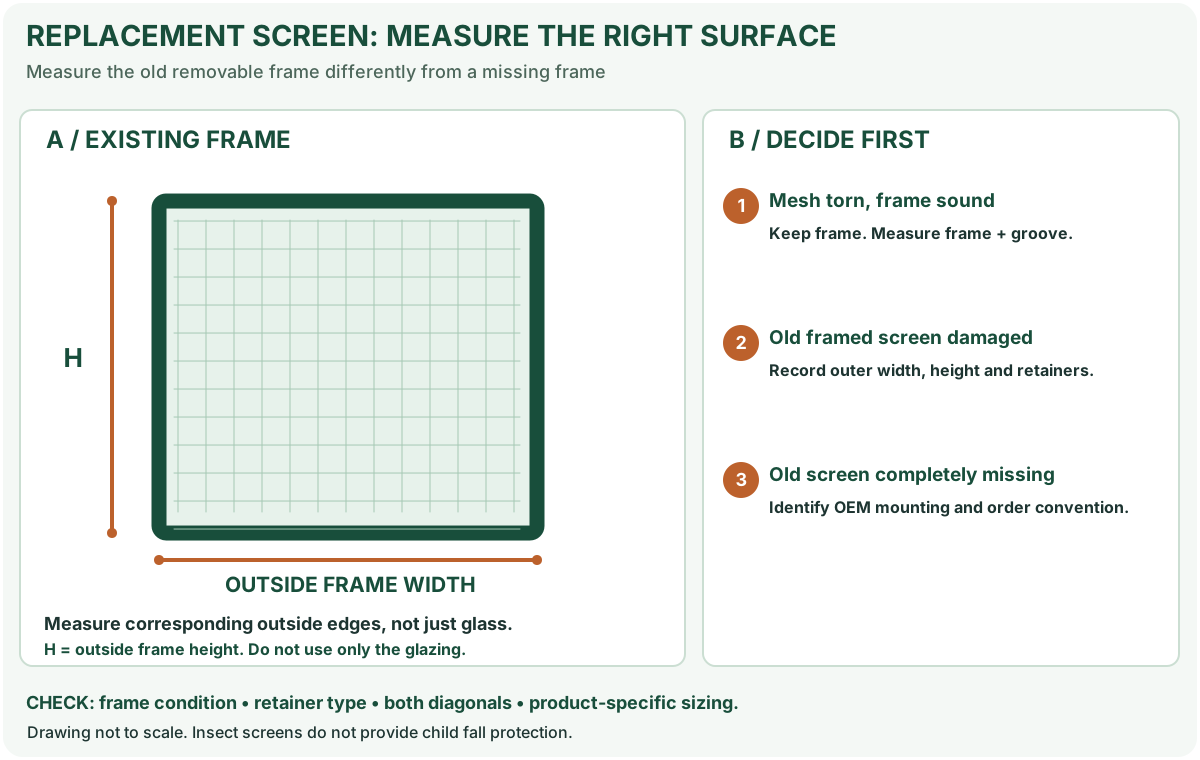
Keep photos in your own device gallery; the Keep your project notes feature at the top of this page saves text only. Use it to record the exact model, part reference and where you stored your photos. Before replacing the screen mesh, check how to measure the complete screen frame.
When to stop or get help
Stop if the screen is above the ground floor with no safe inside support, glass can be damaged by the work, the frame is cracked, the pin's receiving hole is torn, or you cannot identify the correct hardware. Improvised screws or drilling through a window frame may affect drainage, warranty or safety.
Sources and verification limits
- Prime-Line: Window screen plunger latch catalog — demonstrates multiple incompatible hardware formats.
- Prime-Line: Stepped drill for plunger systems — a product-specific installation accessory, not a general drilling recommendation.
- Prime-Line: PL 14663 nylon plunger for a specified narrow frame.
- Prime-Line: PL 14666 nylon plunger for a different frame range.
- Prime-Line: MP5541 diecast retainer series.
- SWISCO: 70-008 versus 70-009 plunger tip selection — supplier support identifies existing tip/receiver size as the decision, not cap color.
- SWISCO: Pin removal may destroy a nylon cap — only for the named design and when a replacement cap is available.
- SWISCO: step-drill plunger installation example — new fabrication on documented compatible screen extrusion only.
MendNook has not field-tested your particular window. Verify model and hardware fit before purchasing or modifying the frame.
After the project: did it work?
After completing only product-approved work, document what you actually observe instead of assuming a replacement part resolved the fault.
- Success looks like
- Both plunger pins spring back, engage sound original receivers and hold the screen securely during normal window movement.
- If it still fails
- If a pin binds or frame holes are torn, do not enlarge openings or leave a high screen unsecured.
- Keep for next time
- Frame profile; replacement part number; spring travel; both retention tests
Keep your actual measurements and observed result in your private project notebook. This is a verification checklist, not a product certification.
My project record: progress and take-home checklist
Select a progress stage if helpful. This is a personal record only, not a claim that MendNook verified your repair.
Includes this guide's specific diagnosis, decision, safety, and outcome checks, plus any note entered above. Nothing is sent to MendNook; downloads and copy operations stay under your control.