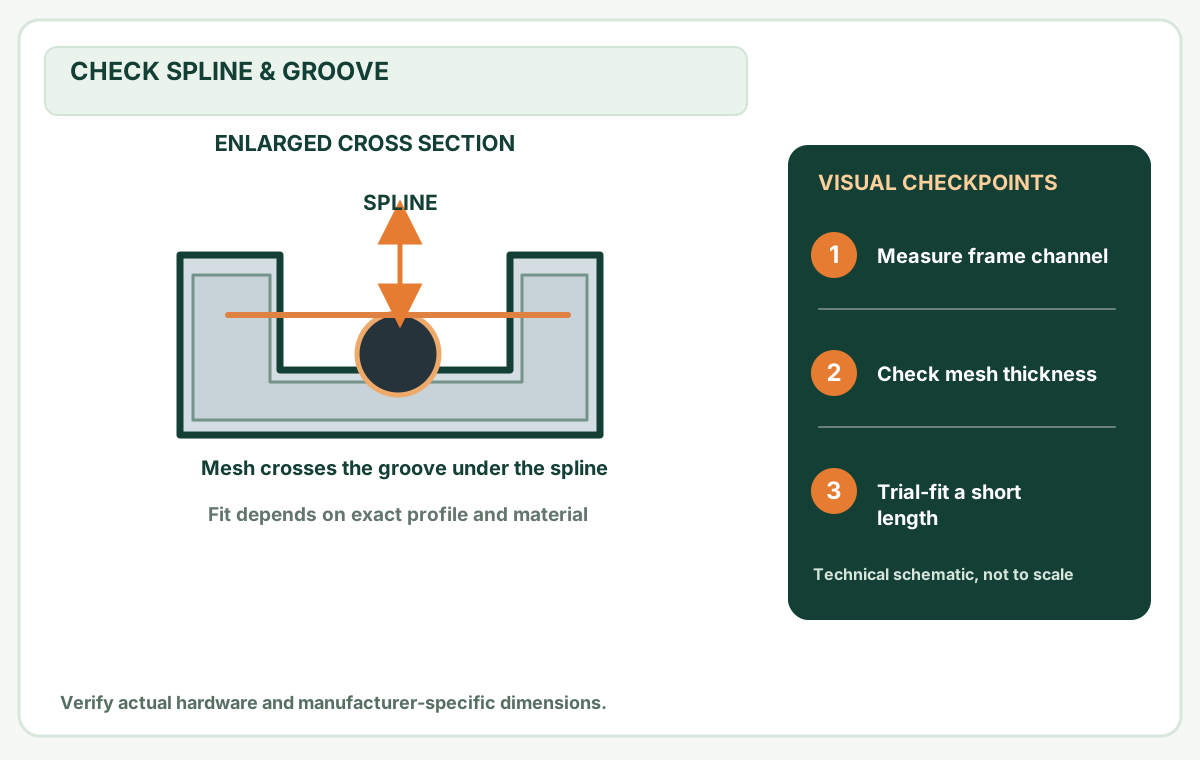
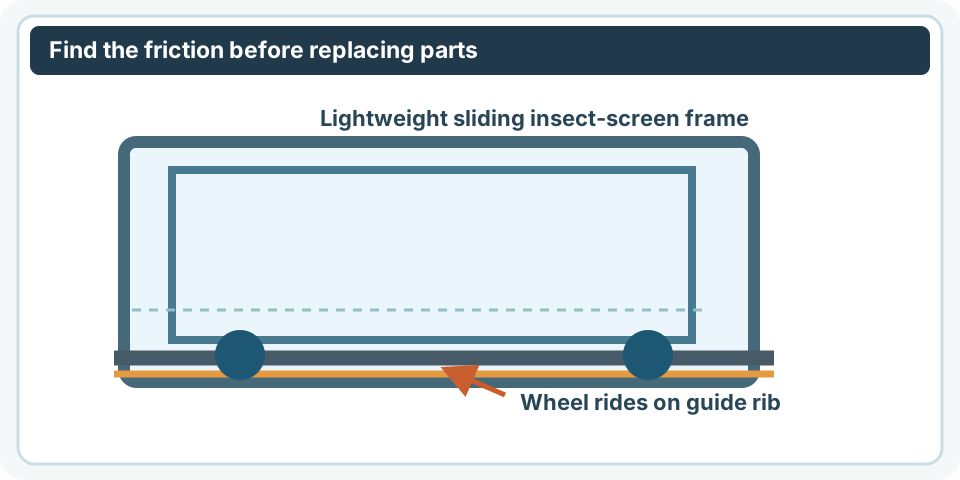
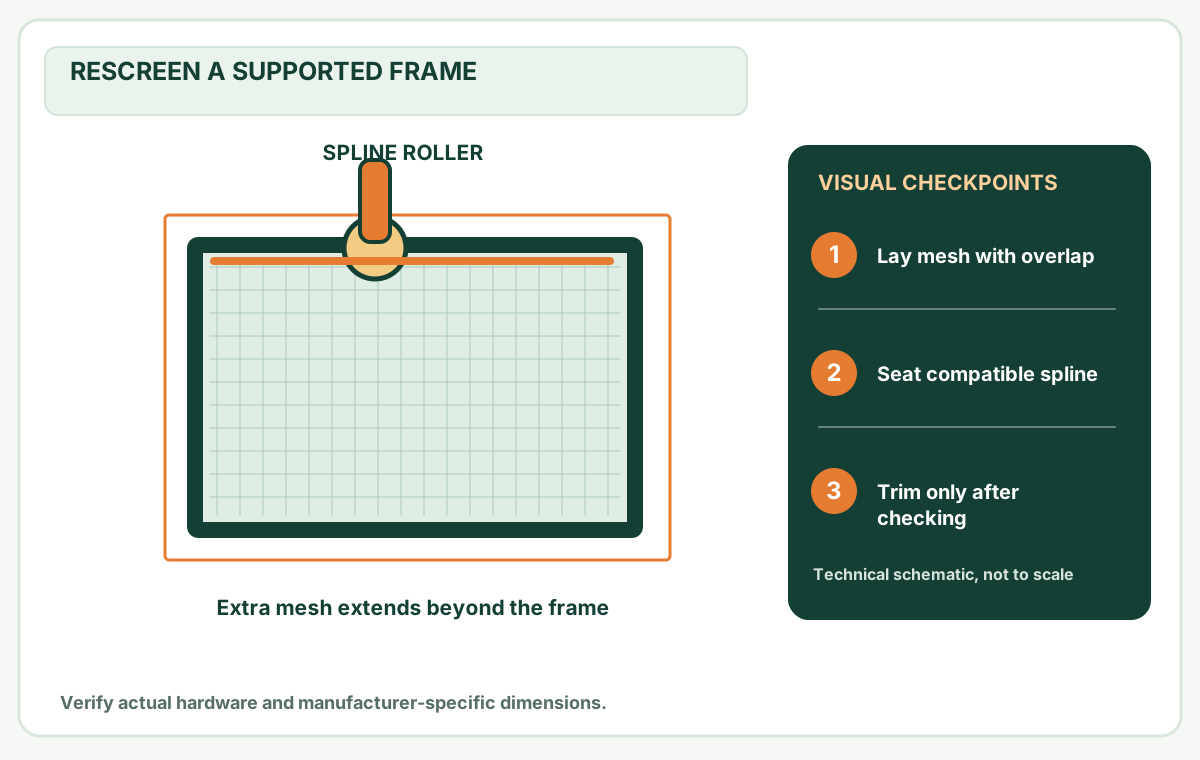
Support the full-size door frame flat, match spline to mesh and leave safe temporary cutting overlap.
Before you buy or repair
- Record first
- Mesh opening, spline groove, panel squareness and screen type
- Make the decision
- Select mesh/spline compatibility and safe temporary overlap
- Stop & verify if
- Frame corners, rails or wheel carriers are damaged
Jump to a section
- Diagram checkpoints
- Should you rescreen or replace the frame?
- Identify the retention system and material
- Plan the actual fabric blank before cutting
- Tools and safe work surface
- Step-by-step rescreening method
- Fix the symptom you see during rolling, not the whole screen blindly
- Two pre-trim quality gates that save a full panel
- Final quality checks before reinstalling
- Mistakes that waste a replacement roll
- Sources and limitations
- After the project: did it work?
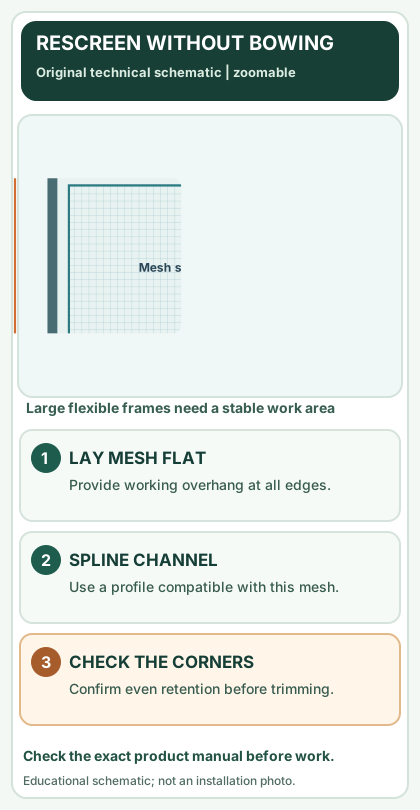
Open desktop diagram ↗ Open mobile diagram ↗
Read the diagram: three checkpoints
- Support frame flat
- Overlap mesh for handling
- Roll spline without distortion
A tear in a sliding patio screen door often requires replacing only the mesh, not the entire screen panel. The door frame is taller and easier to distort than a small window screen, so supporting it and controlling mesh tension are crucial. This guide covers spline-retained insect-screen fabric; retractable cassette screens and proprietary cartridge systems require separate manufacturer instructions.
Should you rescreen or replace the frame?
Check the rails, four corners, spline groove and wheels before buying fabric. If a corner has separated, the frame is cracked, the profile is bent or the roller carrier has pulled free, correcting those issues comes first. New mesh will not make a damaged panel square or keep a wheel seated on a missing track rib.
For a frame in reasonable condition with a torn mesh, proceed to measure the fabric area. See the repair or replace decision for the broader comparison.
Identify the retention system and material
Look for a continuous flexible spline seated in a channel along the interior edge of the screen opening. If you instead see a rigid glazing-like strip, stapled mesh, a spline under a concealed cover or a sealed retractable cassette, stop and identify the product.
Mesh choice changes spline compatibility. Phifer cautions that material thickness influences the size required for the spline groove. A heavier pet-resistant or solar mesh may need a different retainer than basic fiberglass. Use the spline compatibility guide and test a short section before rolling the whole perimeter.
Plan the actual fabric blank before cutting
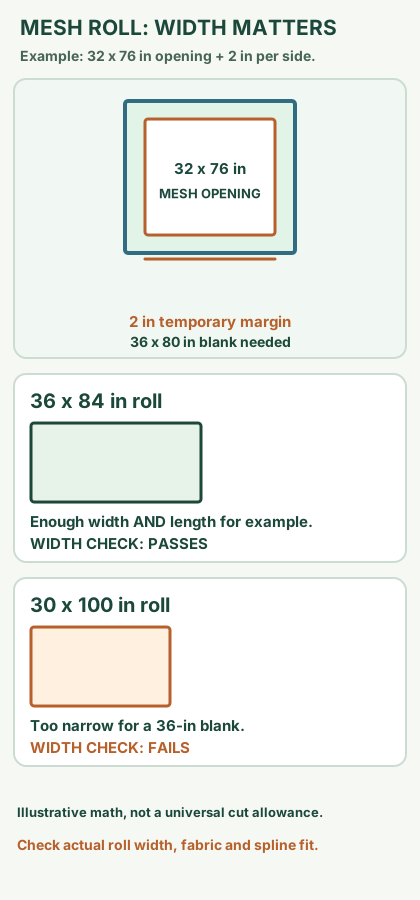
The mesh opening, working overhang and supplier roll size are three different measurements. For example, an opening of 32 × 76 in with an illustrative 2-in handling margin on every side needs a starting rectangle of 36 × 80 in. These are fabric-preparation dimensions only, never finished screen-frame order dimensions.
Phifer's official installation tutorial separates a window-screen procedure that uses approximately 1/2 in of handling overlap per edge from a door-screen procedure that calls for a few extra inches. It also describes different planning allowance for large patio/pool screen panels. Do not transfer the window tutorial's smaller allowance to every tall door, or treat this page's 2-in arithmetic as a maker-approved minimum. Check which procedure applies to the actual material and screen-frame design.
On a narrow screen, scroll this table sideways to see every column.
| Proposed stock / installation situation | Size gate for the example 36 × 80-in blank | Correct action |
|---|---|---|
| 36 × 84-in kit, and its usable fabric width really is 36 in | The raw rectangle fits on paper, leaving 4 in of length not allocated to the blank | Check whether the manufacturer permits that handling margin, whether usable width is as stated and whether orientation is allowed |
| 30 × 100-in roll | Too narrow for a 36-in cross-roll cut, regardless of total area | Choose an appropriately wide roll rather than assuming two narrow strips can be joined |
| 36 × 84-in kit, but the maker's actual procedure needs more than 2 in per side or the selvage is unusable | The nominal roll dimensions no longer establish a sufficient blank | Recalculate from the product's real allowance and usable stock width before purchase |
| Proprietary retractable cassette or fastened screen cartridge | Continuous spline-and-groove workflow is not established | Stop and obtain its dedicated service instructions |
Do this on the workbench: measure the real visible opening at two positions, choose a manufacturer-supported working allowance, calculate cut width = opening width + 2 × allowance and cut height = opening height + 2 × allowance only for a uniform-margin example, and compare each against the usable roll dimensions. If the supplier requires a different margin or fabric orientation, use its instruction instead. The screen material calculator is an arithmetic aid; the multi-screen planner does not certify actual factory material or join methods.
Before-and-after frame geometry: capture the baseline
Measure both diagonal distances across corresponding rigid frame corners before installing new material. Note corner separation, rail straightness and roller pocket condition. Repeat after spline seating but before trimming. A significant change relative to your own initial frame dimensions signals that tension or an already weak frame needs inspection; there is no universal acceptable difference across all screen-frame models.
Use the frame diagonal calculator as an observation worksheet. A numeric diagonal result alone does not certify a safe or square installation.
Tools and safe work surface
You will typically need an appropriate roll of mesh, verified compatible spline, a spline roller, masking tape, scissors, a tape measure, soft cloth and a sharp utility knife. Support the entire door panel on a flat, padded surface. Do not leave one long rail hanging over the edge of a table.
Wear eye protection and use cut-resistant gloves where sharp cut aluminum or blades are present. Never lean the screen against fragile glazing while rolling spline. Protect children and pets from exposed blades and removed retainers.
Step-by-step rescreening method
- Photograph the existing spline path and corners, then remove the screen panel using its correct model instructions.
- Lay the frame flat and check both diagonals and corner joints before removing the old spline.
- Lift an end of the spline gently without damaging the groove; remove worn mesh and clean loose dirt.
- Cut the new mesh with working overhang, align it square to the frame and tape a couple of outside edges to prevent wandering.
- Begin pressing the verified spline and mesh into one straight side with a rolling tool; work around the next side while keeping mesh smooth.
- Do not pull the material so hard that the long frame rail bows inward. Adjust tension gradually and check square as you proceed.
- Seat the spline securely in corners using a safe, non-damaging tool; do not gouge aluminum with a blade.
- Trim excess mesh along the outside edge of the spline channel so you do not cut the new fabric at the retention point.
Manufacturer instructions always take priority. Phifer describes a door-screen process with extra material, careful tape positioning, spline insertion and trimming.
Fix the symptom you see during rolling, not the whole screen blindly
On a narrow screen, scroll this table sideways to see every column.
| What appears during installation | Check immediately | Action to avoid |
|---|---|---|
| A long rail bends inward | Pulling tension and frame support | Tightening the other side harder to compensate |
| One corner's spline pops up | Groove, spline profile, fabric thickness, joint condition | Repeated force or guessing a thicker cord |
| Weave develops a diagonal wrinkle | Fabric alignment and edge progress | Trimming excess while wrinkle remains |
| Mesh is taut but corner joint opens | Structural corner connection | Treating new fabric as a structural brace |
| Panel now drags after reinstalling | Roller and top guide seating | Stretching the mesh again to adjust a latch |
For some Andersen gliding screens, the official service guidance explicitly identifies 200 Series, 400 Series and A-Series units that can be rescreened using a manufacturer's kit. That list is a reminder to identify the model, not proof that all door screens use the same spline path.
Finish with a recorded outcome: frame diagonals before/after, spline held at every corner, no fresh mesh holes, rollers centered on their intended guide, latch works without lifting the panel and repeated gentle sliding without binding. If these fail, stop: replacing fabric again is unlikely to fix track or frame hardware.
Two pre-trim quality gates that save a full panel
Gate A — after the first two spline runs: check whether the mesh lines remain parallel to the rigid frame, the long unsupported rail is straight, and the opposite corners have enough uncut working fabric left for the actual installation method. A diagonal crease or a growing bow means stop and reposition while the fabric is still removable; tightening the last side harder can distort the door frame.
Gate B — after all four runs but before trimming: compare diagonals with the recorded empty-frame baseline, inspect every corner for raised spline, confirm the wheel-pocket/latch region is not covered and run a gentle hand check of retainer seating. If a corner separates or a wheel carrier is loose, stop and repair the frame or hardware, not the mesh. These are observable checkpoints, not numerical tolerances or simulated field-test results.
Final quality checks before reinstalling
Inspect the mesh for wrinkles, slack spots and torn corner threads. Measure both frame diagonals again, then make sure no spline protrudes into roller housings, handle hardware or latch openings. Reinstall the panel and complete multiple open/close cycles. The latch should engage without twisting the screen.
If the door now scrapes, inspect its track and roller seating rather than tightening the mesh further. Try the sliding screen troubleshooting guide.
Mistakes that waste a replacement roll
On a narrow screen, scroll this table sideways to see every column.
| Avoid | Why | Better check |
|---|---|---|
| Cutting fabric to opening size | No edge to hold while rolling | Provide compatible temporary handling overlap |
| Reusing flattened spline blindly | Mesh can release from channel | Compare groove, fabric and spline |
| Pulling one side very tight | Can rack long door rails | Keep the panel supported and check diagonals |
| Cutting toward the mesh opening | Blade may sever new fabric | Cut to the safe side of the groove |
| Rescreening a failed frame | New fabric cannot repair damaged corners | Check frame structure first |
Sources and limitations
- Phifer: Replacing a door screen and installing screening.
- Phifer: Spline and mesh selection FAQs.
- Andersen: Which gliding insect screens can be rescreened and how to maintain them.
MendNook did not physically rescreen the panel in these examples. For a screen under warranty, verify whether DIY removal affects service terms.
After the project: did it work?
After completing only product-approved work, document what you actually observe instead of assuming a replacement part resolved the fault.
- Success looks like
- The supported full-size frame remains square, mesh is smooth and firmly retained, and rollers/latch work after reinstallation.
- If it still fails
- If long rails bow or the spline releases, stop stretching the mesh and reassess support and retention fit.
- Keep for next time
- Mesh cut allowance; spline type; frame diagonals; final glide and latch test
Keep your actual measurements and observed result in your private project notebook. This is a verification checklist, not a product certification.
My project record: progress and take-home checklist
Select a progress stage if helpful. This is a personal record only, not a claim that MendNook verified your repair.
Includes this guide's specific diagnosis, decision, safety, and outcome checks, plus any note entered above. Nothing is sent to MendNook; downloads and copy operations stay under your control.