Locate the actual air path first: jamb weatherstrip and bottom threshold problems require different fixes.
Before you buy or repair
- Record first
- Where air enters: door perimeter, threshold, glazing or adjacent wall
- Make the decision
- Targeted seal only after confirming the leak and door operation
- Stop & verify if
- The gap indicates movement, damage, water entry or an exterior-door safety issue
Jump to a section
- Diagram checkpoints
- Step 1 — Check the five likely leak zones
- Step 2 — Make one safe controlled observation
- Step 3 — Choose the right repair family, not the first search result
- Cold surface or actual moving air? A useful observation matrix
- Worked case A — One bottom corner leaks
- Worked case B — The jamb leaks but the bottom is fine
- Step 4 — Make a purchasing record you can actually use
- Safety and regional differences that change the decision
- Primary sources and scope
- After the project: did it work?
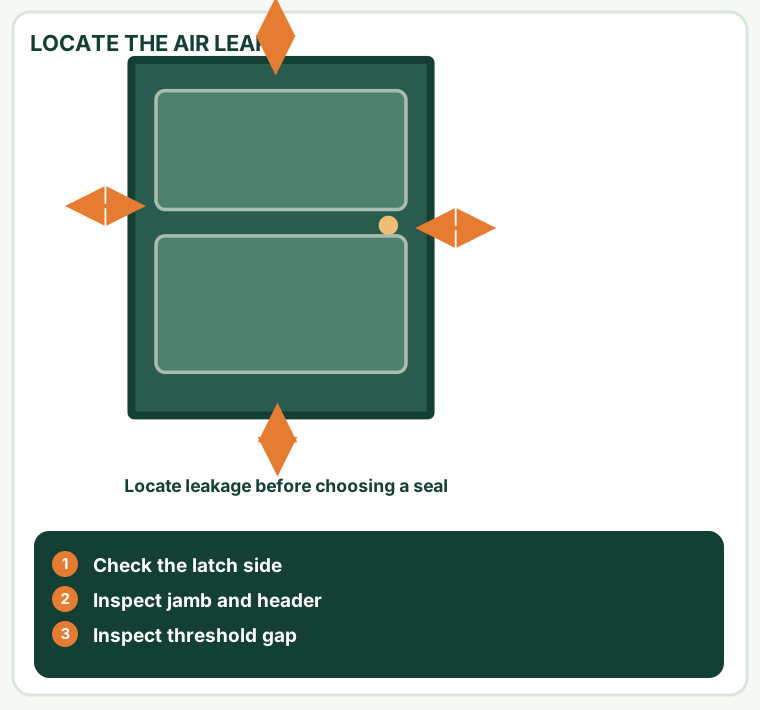
Open desktop diagram ↗ Open mobile diagram ↗
Read the diagram: three checkpoints
- Check the latch side
- Inspect jamb and header
- Inspect threshold gap
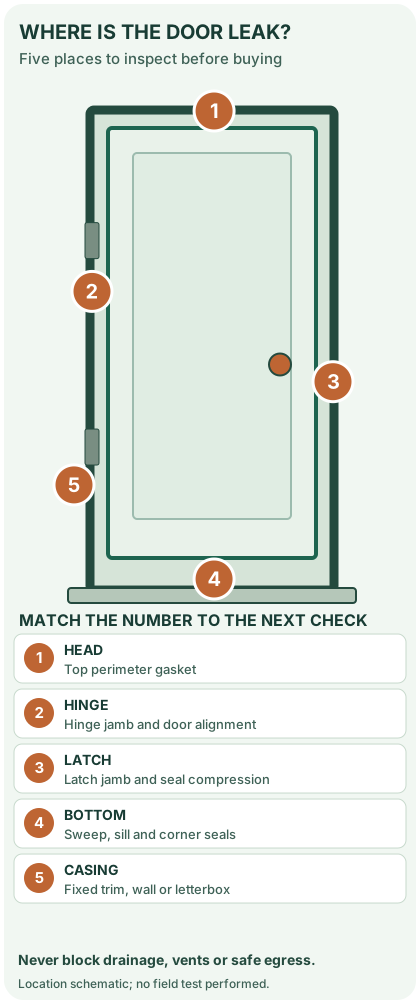
If you feel cold air near an exterior door, a new door sweep is not automatically the right repair. The air path may be beside the latch, through a damaged jamb seal, under the threshold, around the fixed casing or through a separate letterbox. Door misalignment can also prevent a good gasket from compressing.
Start here: With the door closed and normally latched, inspect five locations from indoors. You do not need to remove the door, unscrew a hinge or buy a replacement part to make the first diagnosis. This procedure describes an ordinary residential exterior door, not a fire- or smoke-rated door, security exit or specialist glazing assembly.
Step 1 — Check the five likely leak zones
Use daylight, a flashlight and, where safe, a small piece of light tissue to observe airflow. A draft may change with wind or extractor-fan operation; a single observation is not definitive. Do not use a candle, open flame or uncontrolled smoke for this home check.
On a narrow screen, scroll this table sideways to see every column.
| Zone to inspect | What to look for with the door latched | Most useful next action |
|---|---|---|
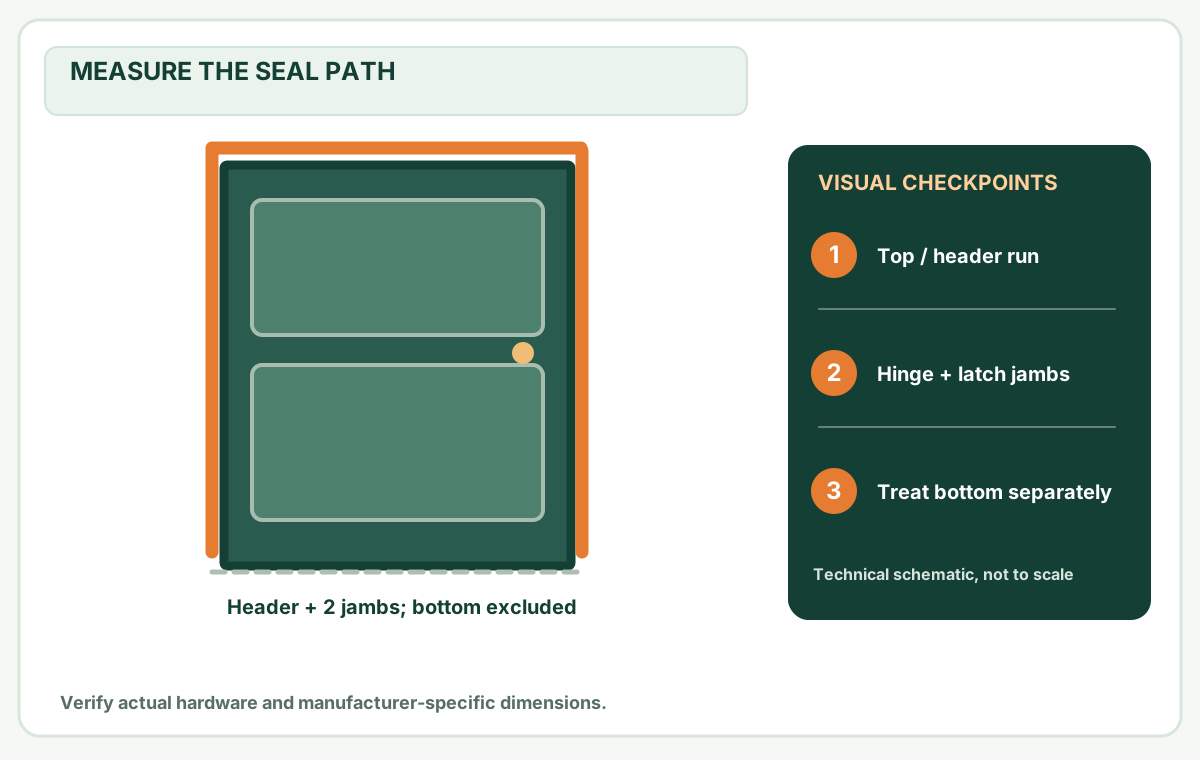
| 1. Head (top edge) | Missing, flattened or detached seal; visible uneven reveal | Inspect head-jamb seal and alignment |
| 2. Hinge-side jamb | Gasket not touching, loose hinge leaf, uneven compression | Inspect hinges and exact seal profile |
| 3. Latch-side jamb | Seal touches at one spot but not another; latch requires lifting | Diagnose latch / hinge alignment before installing a thicker gasket |
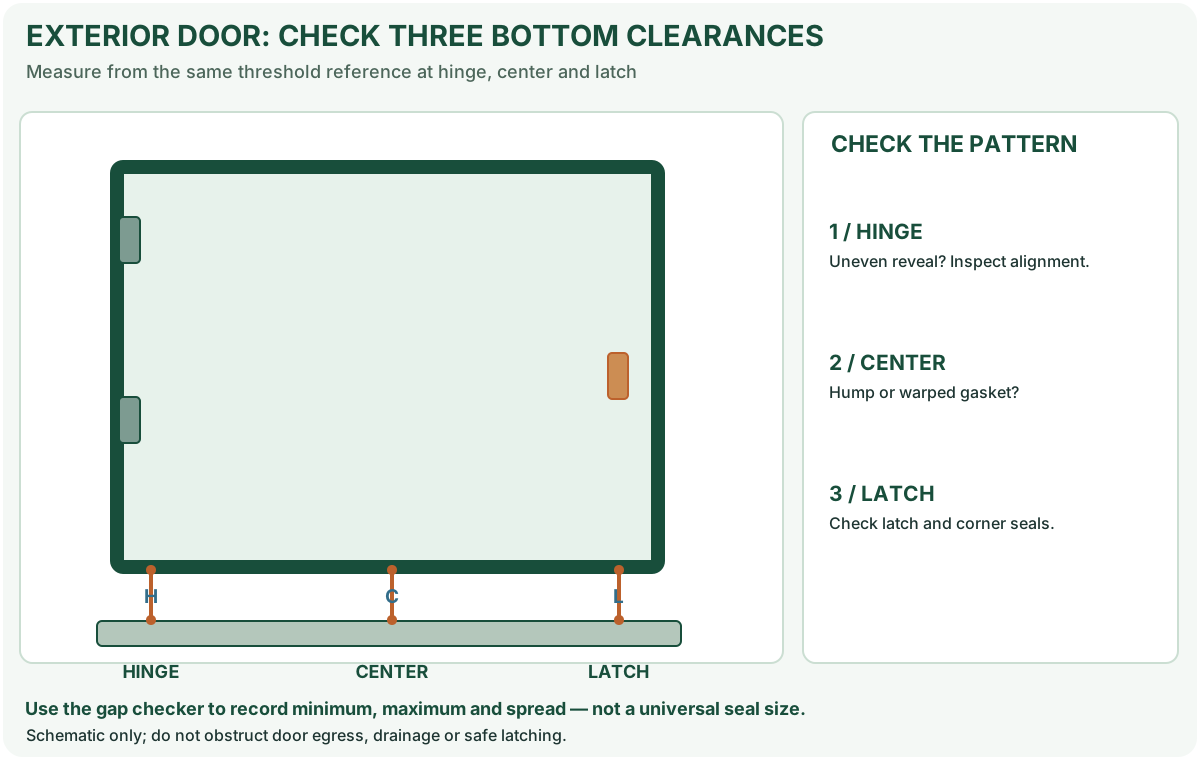
| 4. Door bottom / threshold | Sweep only touches one end, light at a corner, damaged sill | Measure hinge, center and latch gaps; check sweep and sill separately |
| 5. Fixed casing, letterbox or nearby wall | Air emerges beyond the moving door edge or through a flap | Choose the correct stationary-joint / letterbox / building-envelope check |
These are diagnostic zones, not five products to purchase. Air that enters at one location may become noticeable somewhere else. If there is no visible daylight, a draft may still be present; and feeling a cold surface does not prove air movement.
Step 2 — Make one safe controlled observation
- Check that the door is not dragging, unexpectedly unlocking or failing to latch. If it is, fix door operation before adding seals.
- With the door shut, identify the exact edge and height where you notice movement. Keep the same normal latch position for each comparison.
- Observe at a second time or in a different wind condition if practical. Do not deliberately create pressure imbalances or run a combustion appliance test to chase a weak draft.
- Photograph the gap, existing weatherstrip profile and intact fixing points without dismantling the assembly.
- Make a small map labelled head / hinge / latch / bottom / casing. Write down the observation, rather than deciding immediately which product to buy.
Natural Resources Canada lists doors, frames, trim and other nearby envelope joints as different possible air-leak locations; its air-leakage guide also warns that major air-sealing changes can affect ventilation and combustion air. Professional blower-door and smoke diagnostics are not the same as a casual DIY tissue check.
Step 3 — Choose the right repair family, not the first search result
On a narrow screen, scroll this table sideways to see every column.
| Confirmed condition | What to measure or identify | Guide / tool |
|---|---|---|
| Torn perimeter gasket but door opens and latches normally | Seal cross-section, retention type, jamb/head lengths, manufacturer | Kerf-style gasket matching |
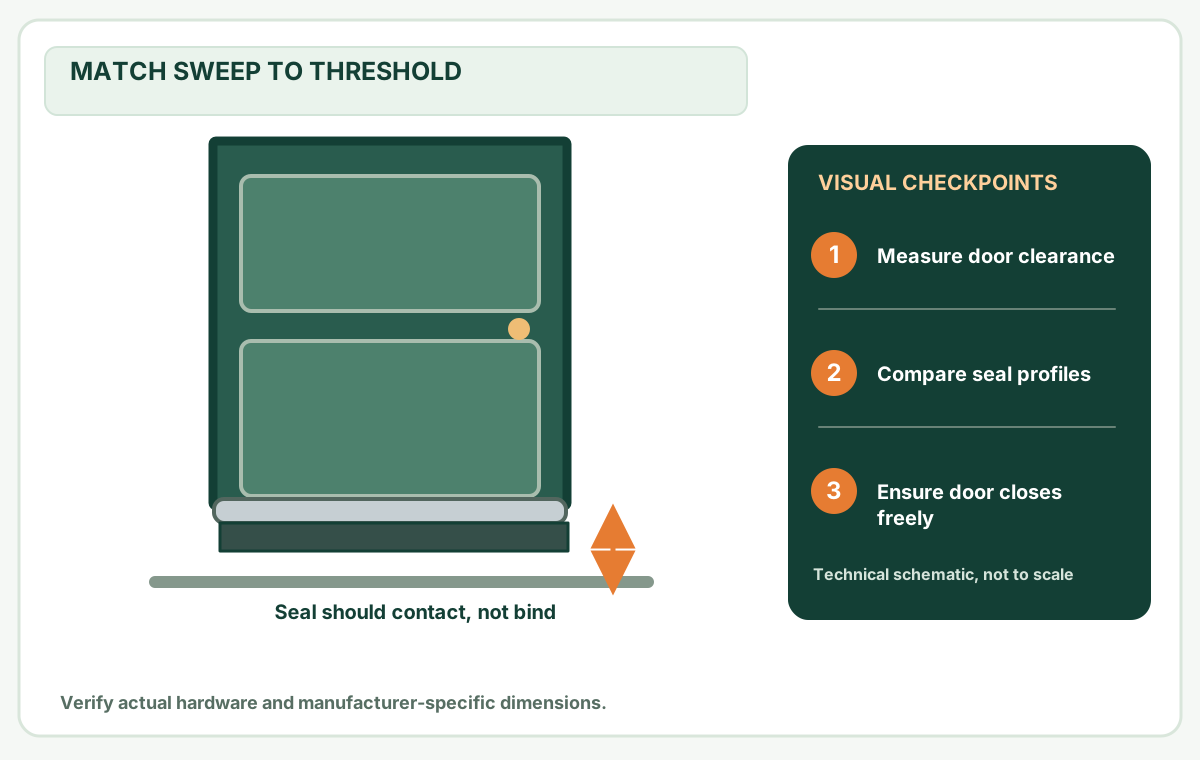
| Bottom seal does not contact the sill across its full width | Door width, three bottom clearances, sweep style and sill condition | Door-bottom gap guide and gap checker |
| Jamb gap changes dramatically near the upper latch corner | Door reveal, hinge and strike alignment, loose hardware | Sagging-door diagnosis |
| Air passes through fixed interior trim-to-wall joint | Exact stationary joint, moisture condition and approved sealant | Window/trim caulking principles — apply only where product/building guidance allows |
| Letterbox, keyhole or purposeful opening is the source | Compatible plate, flap or brush dimensions | Seek the matching hardware instructions; do not block designed ventilation |
A sweep is not a jamb gasket, and neither is a repair for a damaged threshold or a failed wall air barrier. Likewise, a door that requires force to latch after adding a gasket has not passed the repair.
Cold surface or actual moving air? A useful observation matrix
A hand that feels cold beside a door has not yet proved air is leaking through that edge. Cold glass, metal or a surface exposed to outdoor temperatures can create local cooling and air circulation even without a visible opening. Conversely, a tissue that moves at a trim joint can respond to normal room airflow, wind or mechanical ventilation. Treat these as clues, not certified leakage measurements.
On a narrow screen, scroll this table sideways to see every column.
| What you observe without changing equipment | What you have established | What to do before buying |
|---|---|---|
| Door edge feels cold, but tissue shows no consistent movement | The surface may be cold; a draught path is unconfirmed | Repeat at the same door position and inspect gaskets, then request a professional test if it persists |
| Tissue moves consistently at the same latched-door perimeter gap in multiple normal conditions | A local air path is plausible | Identify its exact zone and matching original seal, check door alignment |
| Tissue moves at the fixed casing/wall seam, not the opening leaf | The leak may be at a stationary rough opening | Investigate air-barrier/trim condition, not a larger door sweep |
| Water staining begins below a sill after rain | Water intrusion may matter more than air movement | Inspect flashing, subfloor and drainage; don't seal over moisture |
| Draft appears only when a powerful fan or extractor runs | Pressure differences may change a real air path | Do not alter combustion/ventilation systems for this DIY test; seek building-envelope help if necessary |
Three observations worth recording: door normally latched with handle released, weather/wind noted, and same identified edge and height on a second check. Do not use a candle, flame, incense or deliberate negative-pressure experiment. The DOE/PNNL Building America door air-sealing guidance treats moving door perimeter, fixed rough openings and water flashing as separate building-envelope responsibilities. A tissue check cannot quantify changes in air infiltration or certify correct ventilation.
Worked case A — One bottom corner leaks
Suppose the hinge-side bottom clearance is 1/8 inch, the center reads 3/16 inch, and the latch-side reads 5/16 inch on the same threshold reference. These are hypothetical readings, not acceptable fit tolerances.
The difference between smallest and largest is 3/16 inch. A rigid sweep selected from the 5/16-inch corner alone might scrape where clearance is smaller. Record all three readings in the door-gap checker and compare them with the exact candidate sweep's published working range. If the door itself is sagging, address the alignment first. A threshold designed to drain water must not be blocked by a quick fix.
Worked case B — The jamb leaks but the bottom is fine
The bottom sweep touches across the sill; at the upper latch edge, however, the gasket is compressed only when you pull on the handle. That pattern calls for an alignment and latch engagement check, not a thicker bottom sweep. Photograph the original seal and mark where the latch-side gap changes. If the hinge is loose, the strike is damaged or the door is fire-rated, stop rather than filing the strike or stacking seals.
Step 4 — Make a purchasing record you can actually use
Copy these fields into the free measurement worksheet or your browser-local project notes:
- Door ID: room / exterior location, visible brand and model, inswing or outswing.
- Leak zone: head, hinge, latch, bottom or fixed casing — plus the precise corner.
- Operating condition: latches normally? rubs? visible water or decay? photos.
- Measurement: three bottom clearances where relevant; separate head and jamb lengths for a perimeter strip. Record units and the reference surface.
- Compatibility: existing gasket or sweep cross-section, kerf or adhesive mount, sill type, exact manufacturer instructions.
- Outcome check: door still closes and opens normally, seal contacts as intended, required ventilation/drainage unobstructed.
For example, two 80-inch jambs and a 36-inch head total 196 inches of perimeter sealing run before any shopping margin. That does not mean a 196-inch retail package fits: compare each separate cut with the stock length and the product's approved corner joins. Use the weatherstrip length calculator only after identifying the correct seal profile.
Safety and regional differences that change the decision
The U.S. Department of Energy door-weatherstripping job aid specifically checks that sealing improves leakage without preventing proper door operation. It describes contractor procedures; it is not permission to modify a rated assembly or use improvised fasteners on an unknown door.
Canadian government guidance recommends comparing the original profile and considering material flexibility in cold weather. A label reading coupe-froid, weatherstripping or draught seal does not prove interchangeability.
In the UK, Energy Saving Trust distinguishes unwanted leakage from deliberate ventilation and describes letterbox and keyhole accessories separately from door brushes. Do not block vents, open-flued combustion-air paths or needed internal airflow. Follow local egress and fire-door requirements; these vary by building and jurisdiction.
Stop and seek qualified help if the door is structurally unstable, has rotten jambs, has a recurring water leak, fails to secure or latch, is a listed fire/smoke assembly, or the repair would change required ventilation. An airtight-but-unusable exterior door is not a successful outcome.
Primary sources and scope
- DOE / PNNL Building America: Air Sealing Doors Adjacent to Unconditioned Space — separate moving door seals, fixed rough-opening air barrier and external water flashing.
- U.S. DOE / NREL: exterior-door weatherstripping job aid, June 2024 (PDF) — inspect fit, measure edges and preserve correct door operation.
- Natural Resources Canada: comprehensive air leakage control — distinguish door/frame leaks and maintain ventilation and combustion air.
- Natural Resources Canada: weatherstripping materials — existing seal sample, product profile and cold-temperature performance.
- Energy Saving Trust: draught-proofing — leakage paths, letterboxes and designed-ventilation exceptions.
Evidence limits: The two worked cases are instructional examples, not physical diagnoses or measured results from MendNook repairs. Manufacturer product-fit documentation and local safety rules govern every actual installation.
After the project: did it work?
After completing only product-approved work, document what you actually observe instead of assuming a replacement part resolved the fault.
- Success looks like
- You have identified whether the leak occurs at the head, latch jamb, hinge jamb, threshold, glazing or nearby trim, with door functioning normally.
- If it still fails
- If the door binds or moisture enters through the frame, investigate alignment/water intrusion before installing more seals.
- Keep for next time
- Leak zone; weather conditions; door latch behavior; next inspection or part
Keep your actual measurements and observed result in your private project notebook. This is a verification checklist, not a product certification.
My project record: progress and take-home checklist
Select a progress stage if helpful. This is a personal record only, not a claim that MendNook verified your repair.
Includes this guide's specific diagnosis, decision, safety, and outcome checks, plus any note entered above. Nothing is sent to MendNook; downloads and copy operations stay under your control.