Uneven exterior-door margins may be hinge or frame alignment, not a weatherstrip problem; measure reveals before modifying the seal.
Before you buy or repair
- Record first
- Door reveal at multiple corners, hinge fastener condition and latch behavior
- Make the decision
- Diagnose hinge and jamb geometry before thicker seals, strike changes or threshold height
- Stop & verify if
- The structural attachment is weak, the door is fire-rated or lock/egress fails
Jump to a section
- Diagram checkpoints
- Quick symptom map: which corner tells the story?
- Build an alignment record worth using
- Inspect the hinges without taking the door off
- Understand what is not an adjustment
- Safe decision path from diagnosis to repair
- Three Therma-Tru troubleshooting causes that look like the same draft
- Check the weatherstrip after the margins are even
- Compare two observations before changing any hardware
- Stop conditions and source references
- After the project: did it work?
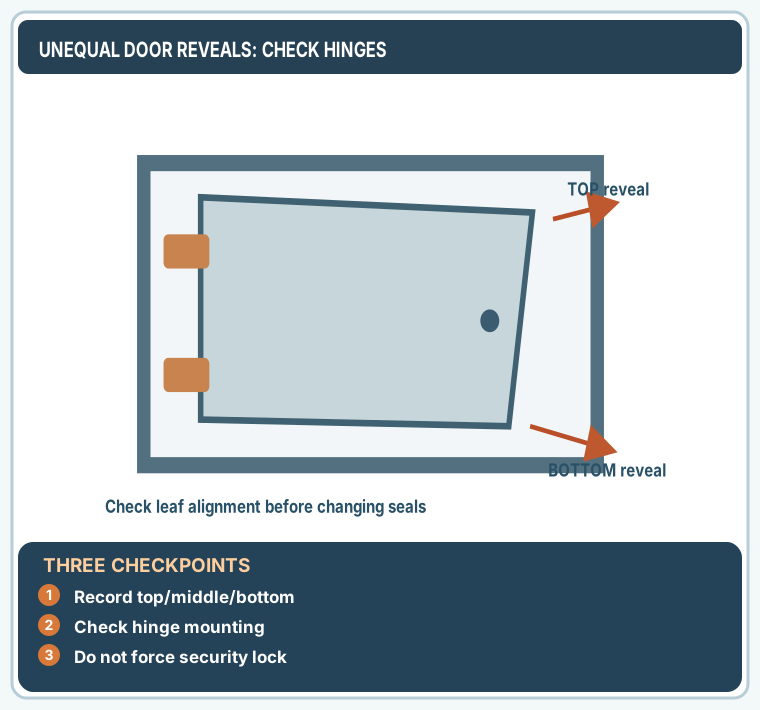
Open desktop diagram ↗ Open mobile diagram ↗
Read the diagram: three checkpoints
- Record top/middle/bottom
- Check hinge mounting
- Do not force security lock
A heavy exterior entry door that rubs at the top latch corner or leaves daylight along the jamb can appear to need thicker weatherstripping. But if the door leaf has sagged or shifted within the frame, a new seal may hide the symptom while making latching harder. The safest first task is to map the gaps and decide whether the issue is loose hardware, damaged jamb material, frame twist or threshold alignment.
Quick symptom map: which corner tells the story?
Close and latch the door gently without using force. From indoors, look at the gap between door edge and jamb at the top, center and bottom on both sides. Observe whether the door rubs only near the top latch corner, catches at the threshold or contacts weatherstripping unevenly. Use a non-metal ruler or feeler where permitted, and never place fingers in a closing hinge.
On a narrow screen, scroll this table sideways to see every column.
| Visible pattern | Possible cause | First safe check |
|---|---|---|
| Door drops toward latch side, top reveal widens | Loose top hinge or settled attachment | Inspect hinge screws and jamb anchoring |
| Bottom latch-side edge scrapes threshold | Leaf sag, sill hump or flooring change | Check margins before raising sill |
| Jamb gap is much tighter at top than bottom | Twisted frame or leaf | Check jamb straightness and door level |
| Door closes but deadbolt needs lifting | Hinge/alignment, strike location | Inspect leaf position before filing strike |
| Only small localized air leak with even gaps | Weatherstrip loss | Inspect exact seal profile and corner pads |
Therma-Tru's door troubleshooting guide explicitly identifies improper alignment, jamb twist and top-hinge anchoring as possible causes of door contact and water/leak problems.
Build an alignment record worth using
Draw a simple door rectangle with six recorded reveal points: hinge and latch edges near top/middle/bottom. Label the hinge side and swing direction. Record whether the gap changes with the deadbolt engaged, the floor condition, and visible hinge screw movement. Photographs from the same camera angle before and after work help distinguish a genuine alignment change from a different viewing position.
Example: the top latch-side reveal is 3/16 inch while the bottom latch side appears nearly closed, and the latch engages only if the handle is lifted. That pattern suggests an alignment investigation. It does not specify any universally acceptable door reveal or an authorized number of screw turns.
Inspect the hinges without taking the door off
With the leaf supported and secured, check whether the top hinge leaf sits flat against door and jamb. Look for stripped screws, rust, cracks, bent knuckles or screws that spin without tightening. If the jamb wood is soft, wet or splitting, a screw swap will not fix underlying damage. Do not remove all screws at once from a heavy door: the leaf can drop unexpectedly.
A long structural screw is specified in some manufacturer installation systems to secure a top hinge through the jamb into framing. Length and material must match the product and structural assembly. Do not blindly replace any screw with a longer one that could hit hidden wiring, services or metal reinforcement.
Understand what is not an adjustment
Shimming a hinge, bending a knuckle, filing a strike, moving a sill cap or planing a door edge can each change other interfaces. These are not interchangeable. If the frame is twisted, adjusting a single hinge may only hide the problem until the weather changes. A bent security hinge, damaged fastener or fire-rated assembly requires a qualified service process.
Therma-Tru's maintenance checklist recommends reviewing seal condition and door hardware regularly. That preventive inspection is different from attempting structural realignment.
Safe decision path from diagnosis to repair
- Photograph the full leaf and all hinge locations from the indoor side.
- Check for water intrusion and visibly damaged jamb material; stop if the frame is unsound.
- Determine whether the door is unusually heavy, fire-rated, security-rated, or has a sidelite requiring specialist service.
- If only a loose accessible screw is present and the maker permits it, restore its original specified fastening without removing supporting hardware.
- Close and latch slowly, then compare the six reveal points and threshold clearance.
- If the door still binds or the deadbolt will not engage smoothly, consult the manufacturer or professional installer for re-hanging/reshimming.
- Only after alignment is corrected, evaluate door weatherstripping and threshold height.
Do not plane the door, drill new strike holes or remove a hinge just because daylight appears. Those changes can compromise security, egress and the manufacturer's warranty.
Three Therma-Tru troubleshooting causes that look like the same draft
The manufacturer Therma-Tru door troubleshooting guide distinguishes a sagging leaf, a twisted jamb, and a door that does not contact its weatherstrip evenly. Those are materially different repair scopes. Do not choose a hinge screw or thicker gasket until you know which condition matches your observation.
On a narrow screen, scroll this table sideways to see every column.
| Manufacturer-described condition | Evidence to record from your installed door | Different service path to request |
|---|---|---|
| Door sagging out of square (uneven head margin) | Door's top horizontal margin tilts, one edge drops and a hinge leaf/screw may move | For the specified Therma-Tru system, the maker identifies properly installed original long top-hinge screws that secure through jamb to stud. Check part set, door maker, stud position and approved fastening; not a universal screw length or a reason to drill blindly |
| Jamb twisted along its length | Hinge side and latch side do not meet the seals evenly despite a seemingly sound leaf; frame shows an in/out twist | Therma-Tru identifies reshimming jamb alignment to remove twist. This involves a structural installation assessment, not bending a hinge to make a single gap close |
| Door hits one part of the weatherstrip before the rest | Contacts weatherstrip at the top but not the bottom, or vice versa; apparent daylight remains elsewhere | Maker refers to realignment/reshimming or adjustment of lock-side jamb for even contact. Do not compensate with random extra foam or file the strike first |
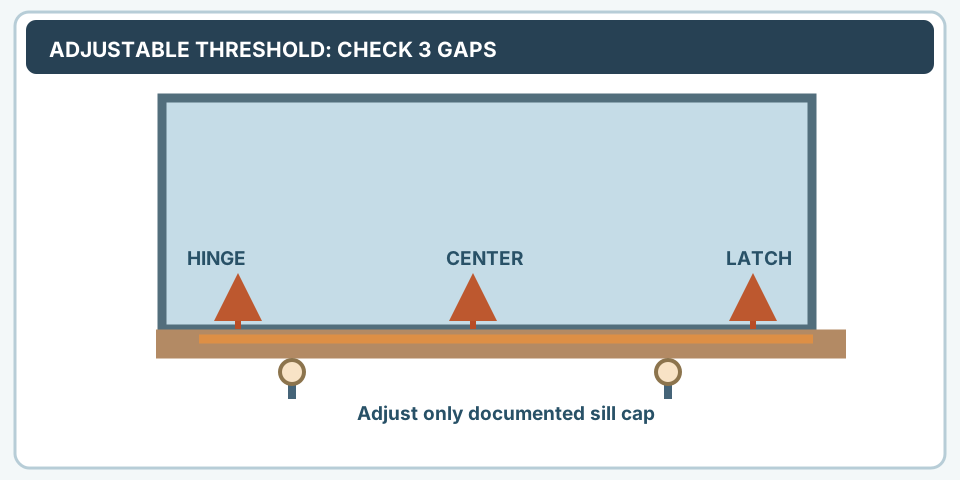
| Bottom seal leaks while the reveal remains even | Head and side margins appear stable, but sill cap/door-bottom contact is inconsistent | Inspect the named sill and door-bottom gap before touching the top hinge |
Two-observation rejection example (hypothetical): the door's head margin looks even, both top hinge leaves remain immobile during normal movement, yet the latch-side weatherstrip seals at the top but leaves daylight at the bottom. The manufacturer's top-hinge-sagging symptom is not established. Document jamb alignment and weatherstrip contact; request the appropriate installation assessment rather than installing an unapproved long screw.
Risk boundary: An exterior door that is heavy, fire-/smoke-rated, security-rated, glazed, connected to a sidelite, or visibly moving at the frame requires product-specific qualified service. The manufacturer may describe reshimming or stud anchoring, but that is not authorization for an untrained homeowner to remove a leaf, open wall finishes or change rated hardware.
Check the weatherstrip after the margins are even
A perimeter seal should make consistent contact without requiring abnormal force. Use a paper-strip comparison at hinge, center and latch where the design allows; it is a rough relative feel check, not a calibrated airtightness test. Verify that the door opens freely and the lock works without lifting or pushing sideways. Record any remaining draft at top, sides or sill separately.
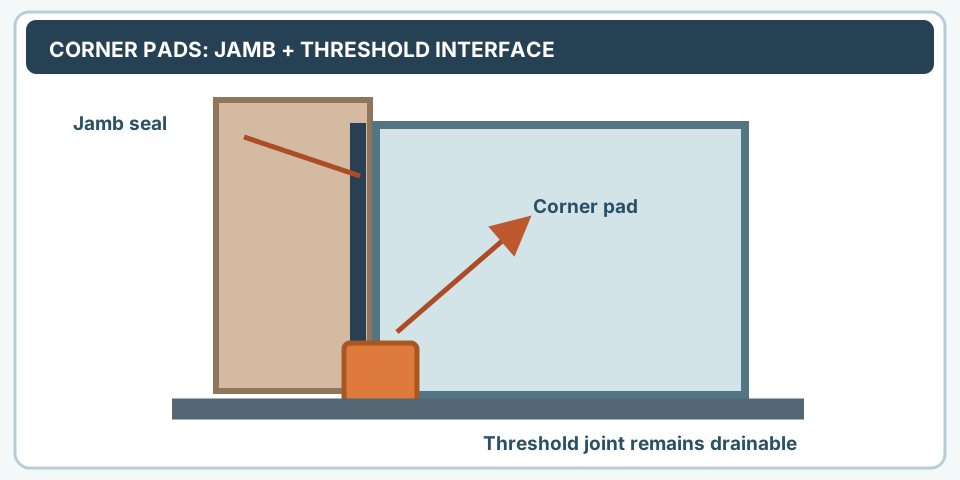
If a gap persists only at the threshold junction, see door corner pads — a missing pad is different from a dropped leaf.
Compare two observations before changing any hardware
A reveal measurement is meaningful only with a consistent door position. A photograph taken with the door resting against the seal can look different from one taken while lifting the handle. Record the state and the actual edge instead of claiming an unsupported “allowable gap.”
On a narrow screen, scroll this table sideways to see every column.
| Evidence from the same closed-door position | Check before proceeding | Safer next action |
|---|---|---|
| Latch-side gap changes from top to bottom and top hinge leaf moves or has loose screws | Hinge anchor, jamb condition, installed hardware type | Ask the maker for its correct fixing and support method |
| Both reveal edges are even but bottom seal rubs or daylight appears below | Existing sweep, sill cap and the three bottom clearances | Measure the bottom gap and identify the threshold |
| Door only needs pressure to throw the deadbolt | Weatherstrip compression, latch/strike alignment, door distortion | Do not file the strike or bypass the lock; diagnose before modifying |
| Water staining appears below a hinge or at the sill | Water entry, rot, jamb or substrate movement | Stop; examine the assembly and flashing with a qualified installer |
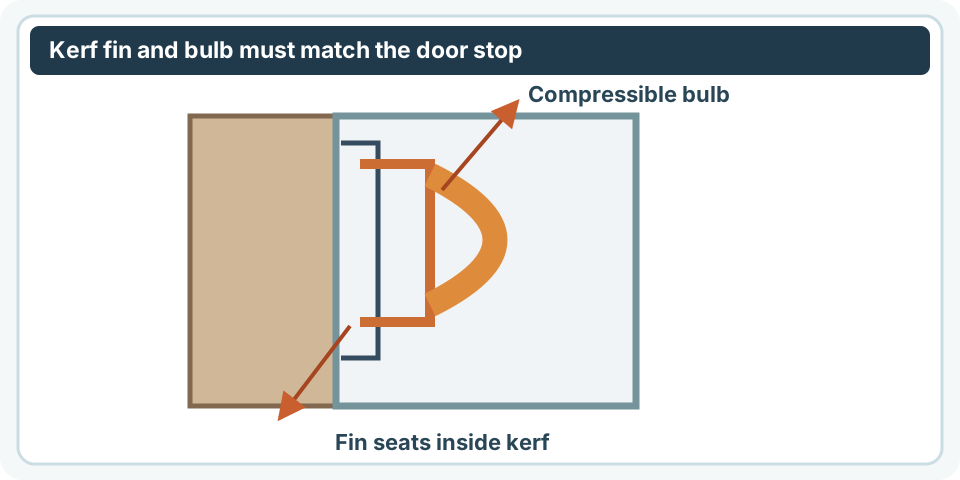
| Door closes easily yet air appears at a single jamb corner | Missing compatible kerf segment or approved corner pad | Match kerf weatherstrip or inspect corner pads |
A usable before/after worksheet
Record door handing and inswing/outswing, six reveal measurements (hinge top/middle/bottom and latch top/middle/bottom), whether the door rests latched normally, whether the hinge leaves move relative to the jamb, and the exact point where rubbing begins.
Hypothetical observation: before a documented and safe screw-tightening procedure, a latch-side reveal looks narrow near the top and wider near the bottom. Recheck all six reference points from the same resting door position after any permitted action. If the reveal changes but the latch now binds, the intervention did not pass. A photo of the full frame, its maker label and hinge arrangement is a better support request than a claim the door is “out by 1/8 inch.”
Stop condition: never support an unexpectedly dropping door by fingers near a hinge, remove all hinge screws from a heavy leaf, drill into unknown reinforcement, or use this article to modify fire/egress-rated hardware. The manufacturer installation and service manual, not a generic gap chart, controls repair.
Stop conditions and source references
- Therma-Tru: Troubleshooting a sticking, leaking or misaligned door.
- Therma-Tru: Routine door maintenance inspection.
- U.S. DOE: Air sealing vs weatherstripping.
This article is an inspection pathway, not a permit to alter an exterior structural or rated door. MendNook has not inspected your hinge attachment; obtain qualified assistance for uncertain framing.
After the project: did it work?
After completing only product-approved work, document what you actually observe instead of assuming a replacement part resolved the fault.
- Success looks like
- The door opens, closes and locks without lifting the handle, with reveals rechecked after any maker-approved hinge work.
- If it still fails
- If jamb anchoring is loose or door still binds, do not plane or file security hardware; ask a qualified installer.
- Keep for next time
- Six reveal locations; hinge condition; latch/deadbolt result; any approved correction
Keep your actual measurements and observed result in your private project notebook. This is a verification checklist, not a product certification.
My project record: progress and take-home checklist
Select a progress stage if helpful. This is a personal record only, not a claim that MendNook verified your repair.
Includes this guide's specific diagnosis, decision, safety, and outcome checks, plus any note entered above. Nothing is sent to MendNook; downloads and copy operations stay under your control.