An adjustable sill cap may fix uneven bottom gasket contact, but a fixed sill or sagging leaf must not be adjusted blindly.
Before you buy or repair
- Record first
- Sill product, hinge/center/latch clearance, door-bottom gasket and original adjuster position
- Make the decision
- Only adjust manufacturer-documented sill cap after eliminating sag and threshold damage
- Stop & verify if
- The door binds, the sill has water damage or the hardware is not confirmed adjustable
Jump to a section
- Diagram checkpoints
- Identify the type of sill you have
- Diagnose the leak before reaching for a screwdriver
- Measure three locations and define a stop condition
- Four checks that separate an air gap from a damaged sill
- Read Therma-Tru's actual adjustment sequence correctly
- Adjust only an identified, approved mechanism
- When adjustment is not the repair
- Worked example: why “raise the low side” can be wrong
- Final acceptance checklist
- Source references and limits
- After the project: did it work?
Open desktop diagram ↗ Open mobile diagram ↗
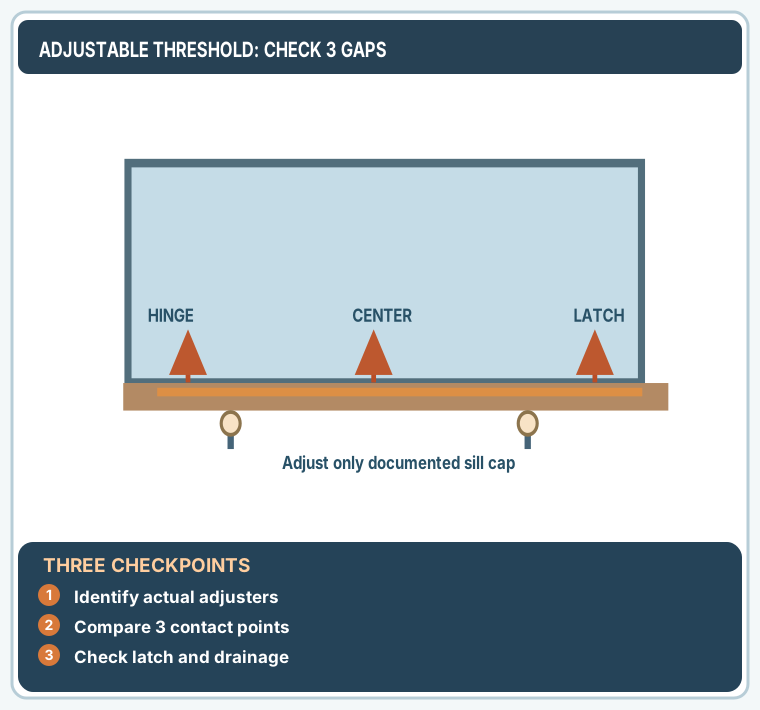
Read the diagram: three checkpoints
- Identify actual adjusters
- Compare 3 contact points
- Check latch and drainage
An exterior door that leaks air at the bottom does not necessarily need a new sweep. On some entry systems, the threshold cap is adjustable to meet the door-bottom gasket. On others the sill is fixed, designed with specific drainage or integrated weatherstripping, and must not be turned or drilled like an adjustable design. The safe sequence is: diagnose the gap, identify the threshold, adjust only per model instructions, and retest the complete door.
Identify the type of sill you have
With the door secured open, look for visible adjustment points on the threshold cap and check manufacturer labeling. An adjustable cap usually has a defined mechanism or screws shown in the door-system guide. A fixed aluminum saddle, ADA-compliant low-profile threshold, composite sill and some outswing assemblies can behave differently. Do not treat any exposed screw as a height adjuster: it may be an anchor into the substrate.
Therma-Tru's troubleshooting guide distinguishes damaged sill saddles, improper door-bottom contact, sagging frames and missing corner pads. Correctly identifying these avoids making the wrong component tighter.
Diagnose the leak before reaching for a screwdriver
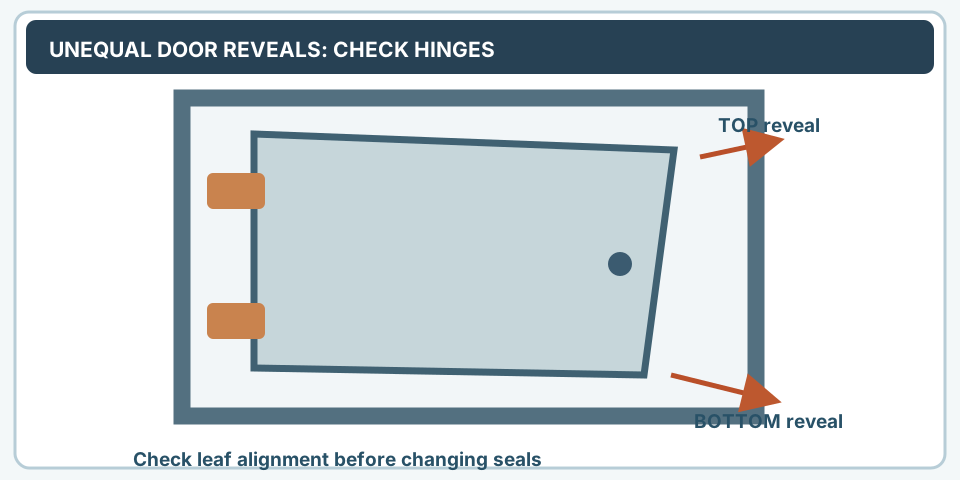
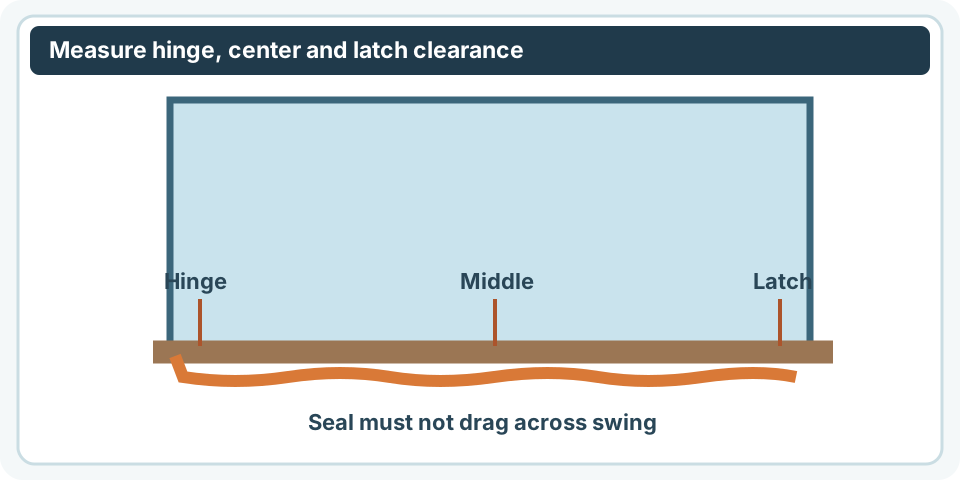
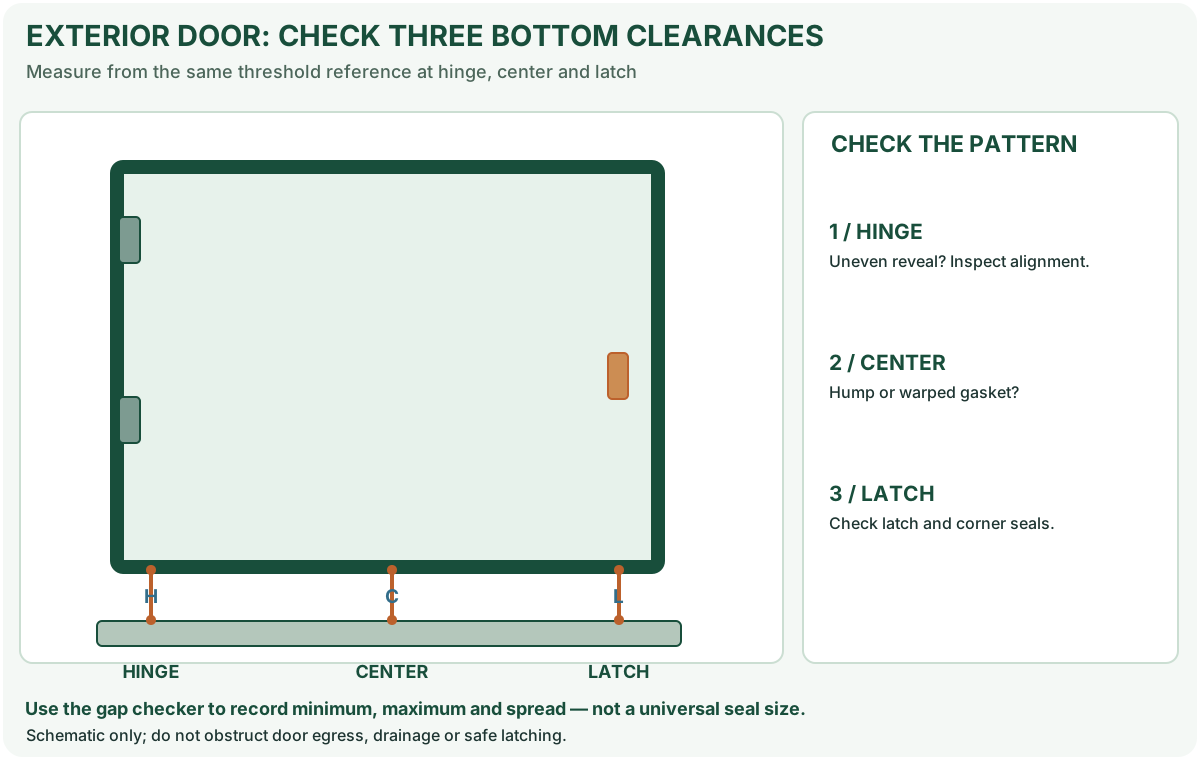
Close and latch the door gently, then inspect the bottom at hinge, center and latch positions. Record whether you can see daylight, feel air movement, observe water stains or find a crushed gasket. If the bottom gap differs substantially from one side to the other, check hinges and door squareness first; a raised threshold cap can mask a sagging leaf.
On a narrow screen, scroll this table sideways to see every column.
| Symptom | First likely check | Unsafe shortcut |
|---|---|---|
| Seal contacts center only | Threshold hump/slope or damaged gasket | Raise both ends until door jams |
| Daylight mainly at latch corner | Hinge sag, corner seal, door bottom | Max out a single adjuster |
| Door rubs threshold after new seal | Excess compression or misaligned door | Force latch shut |
| Water appears after rain | Drainage, sill-to-subfloor flashing, corner pads | Fill every sill opening with sealant |
| Loose threshold hardware | Anchor/sill stability | Guess which screw is an adjuster |
If the door is sagging or hinge screws are loose, begin with entry-door hinge-gap diagnosis before altering the sill height.
Measure three locations and define a stop condition
Use the door gap checker to record minimum, maximum and spread. Example: a door has 1/8 inch at the hinge side, 1/4 inch at the center and 5/16 inch at the latch. The spread is 3/16 inch. That is not an instruction to raise the sill by 3/16 inch; the leaf may be tilted. Record threshold type and whether the door bottom is straight before choosing any adjustment.
The correct final contact is model-specific. Some Therma-Tru installation instructions use a paper or dollar-bill resistance check at several locations; this is a qualitative check, not a calibrated pressure or air leakage measurement.
Four checks that separate an air gap from a damaged sill
Adjustable caps are not the first fix for every draft. Work through this sequence before interpreting a door-bottom gap:
On a narrow screen, scroll this table sideways to see every column.
| Inspection point | What to look for | Next decision |
|---|---|---|
| Hinges and jamb reveal | Gap widens from top to bottom; latch-side leaf is lower | Investigate door hinge alignment first |
| Door-bottom gasket | Material torn, flattened, displaced or missing | Match the original maker's door-bottom component, not a random add-on sweep |
| Threshold cap and sill | Clearly documented cap adjusters versus structural anchor screws | Only use adjustment directions published for the identified model |
| Rainwater path | Wet subfloor, staining from under the sill, or blocked designed outlets | Stop cosmetic sealing and investigate water entry separately |
What counts as useful evidence? Photograph the sill profile from inside with the door open, photograph any maker label, and record the closed, latched gaps at hinge/center/latch using the same reference. Note whether the door already rubs when opening or its deadbolt needs extra force.
Therma-Tru's full door installation guide states that a unit's sill may be adjustable, rather than asserting that all are. Its documented paper/dollar-bill check is an indicator of snug contact for the relevant unit, not proof of airtightness, proper drainage or passing an energy standard.
Read Therma-Tru's actual adjustment sequence correctly
The Therma-Tru full-door installation workflow places sill adjustment after jamb and hardware positioning, then places corner-seal pad inspection afterward for its applicable inswing door systems. This ordering is part of a specific door-installation process, not permission to turn any visible sill screw.
On a narrow screen, scroll this table sideways to see every column.
| Confirmed observation | What the maker's sequence means | What it does not prove |
|---|---|---|
| A matching Therma-Tru system with documented adjustable sill | Once the door is properly fitted, the manufacturer describes adjusting the sill and checking snug paper/dollar-bill resistance | That an older, damaged or unknown sill has the same adjustment mechanism |
| Gap at the bottom jamb corner remains after correct center-line contact | Inspect the applicable inswing corner seal pad and jamb/sill joint separately | That more sill height or an added full-width sweep fixes the corner |
| Paper test grips tightly, but the latch is difficult to close | Door operation and gasket compression may be wrong | That stronger paper resistance automatically means a better seal |
| New wet mark emerges under the sill after rain | Examine water-management and sill bedding/flashing | That surface paper resistance is a water-intrusion test |
Model-specific paper check: Therma-Tru describes a snug fit where a bill can barely be withdrawn without tearing. That is a qualitative installation check within that documented assembly, not a universal numeric force requirement or pass certificate. If the first sample tears, the door will not lock normally, or a seal folds, stop and review the fit rather than maximizing contact. Always check the exact updated manual and local rated-door requirements.
Adjust only an identified, approved mechanism
- Read the matching door unit's installation or service manual, including the distinction between inswing and outswing.
- Mark the original adjuster positions with a pencil and photograph the current sill.
- Inspect and clean debris from the contact line. Keep the manufacturer's drain features unobstructed.
- Turn only the documented adjustment point in the model-approved direction and small approved increments.
- Close the door gently; stop at once if latch operation becomes heavy or the bottom gasket folds.
- Test contact at hinge, center and latch, then check the full door swing, deadbolt engagement and weatherstrip corners.
- Record the final position. Recheck after temperature/humidity changes.
Do not loosen sill anchors, bend metal saddles, drill into the sill or conceal water intrusion as substitutes for approved adjustment.
When adjustment is not the repair
If the door-bottom gasket is torn, replace the correct seal. If the cap is cracked or the sill saddle is crushed, source the approved component. If the jamb is out of square, weatherstripping may only temporarily mask a carpentry problem. And if water enters under the sill, investigate flashing and subfloor integrity rather than adding caulk to the visible upper lip.
Compare door sweep installation only when the door system is designed for that type of supplemental seal. A commercial fire or exit door may have hardware and clearance requirements that override a DIY guideline.
Worked example: why “raise the low side” can be wrong
Consider a hypothetical exterior door with a measured bottom clearance of 1/8 in at the hinge side, 1/4 in at center and 5/16 in at the latch side. The measured spread is 5/16 − 1/8 = 3/16 in. But three readings alone cannot tell whether the threshold is tilted, the hinge is sagging or the bottom gasket is compressed.
Scenario A — hinge gap also becomes wider toward the latch: Start with hinge attachment and squareness; raising the cap at the latch corner could make the door bind.
Scenario B — door geometry looks level, but the sill's seal is visibly torn: Identify the replacement gasket; adding compression to a destroyed seal is not a verified repair.
Scenario C — model documentation confirms an adjustable sill cap: Follow the exact adjustment method, record each approved change, and retest both latch force and full opening sweep before accepting it.
A result is only acceptable when the door remains safe to open, the deadbolt works normally, intentional drainage remains open and the maker's documented contact condition is met. Do not equate a reduced visible gap with a verified flood or energy-performance rating.
Final acceptance checklist
The door must close and latch without unusual force, open fully without dragging, retain required drainage and ventilation, and show reasonably consistent gasket contact. A paper test may help compare one location with another but is not an energy-performance test. Record new draft observations under similar weather, not a claim of measured savings.
Source references and limits
- Therma-Tru: Door troubleshooting guide.
- Therma-Tru: Door maintenance inspection.
- Therma-Tru: Common door-part terms.
- Therma-Tru: Full exterior door installation, sill adjustment and paper test.
MendNook has not adjusted your door in person. The unit manufacturer's instructions, safety code and actual sill design control every adjustment.
After the project: did it work?
After completing only product-approved work, document what you actually observe instead of assuming a replacement part resolved the fault.
- Success looks like
- The model-approved sill contact is reasonably even without restricting swing, latch, drainage or door-bottom gasket.
- If it still fails
- If it binds or a fixed sill is damaged, return to the original position and seek matching door-system guidance.
- Keep for next time
- Door/sill model; three gaps; original and final adjustment; latch/weep check
Keep your actual measurements and observed result in your private project notebook. This is a verification checklist, not a product certification.
My project record: progress and take-home checklist
Select a progress stage if helpful. This is a personal record only, not a claim that MendNook verified your repair.
Includes this guide's specific diagnosis, decision, safety, and outcome checks, plus any note entered above. Nothing is sent to MendNook; downloads and copy operations stay under your control.