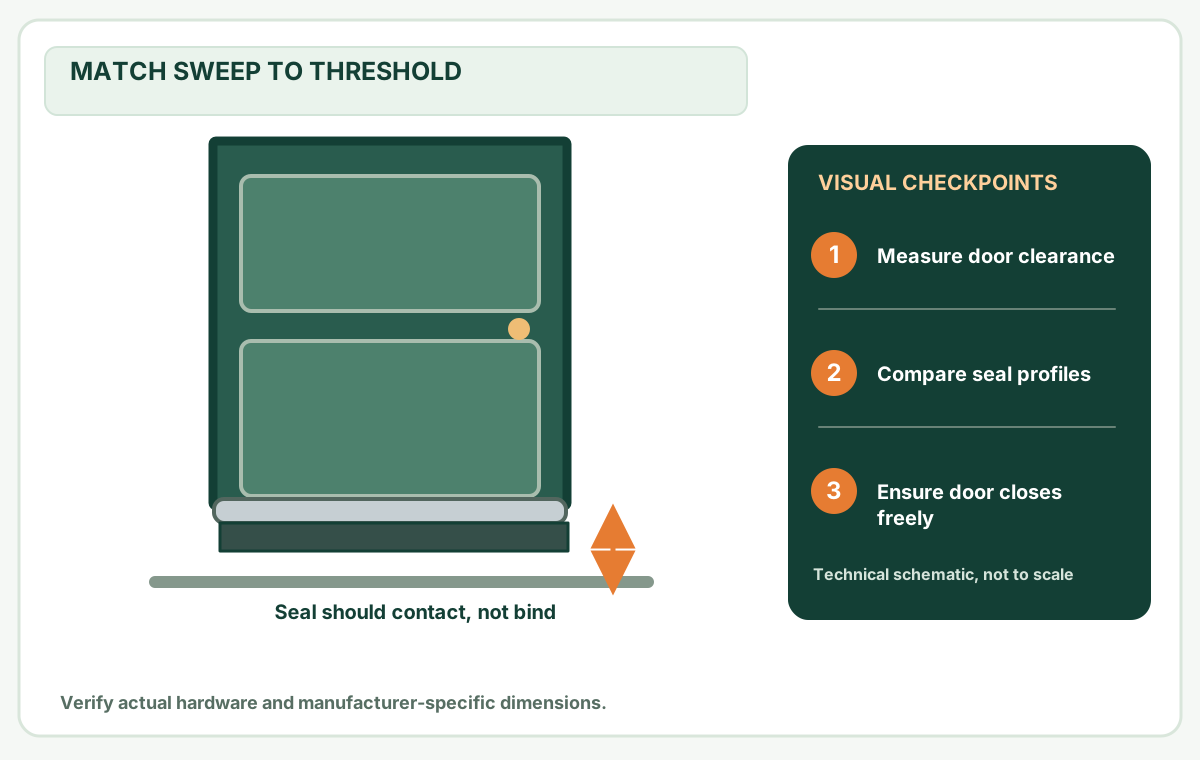
Check minimum and maximum threshold clearance plus full door swing before installing a sweep.
Before you buy or repair
- Record first
- Hinge, center and latch bottom clearances plus complete swing
- Make the decision
- Use sweep manufacturer working range and door materials
- Stop & verify if
- Door will not latch or drags heavily across floor
Jump to a section
- Diagram checkpoints
- 1. Diagnose the bottom before buying
- 2. Make a useful measurement record
- 3. Check the whole opening arc, not only the closed-door gap
- First decide the attachment family: installation is not always drilling
- 4. A safe dry-fit and installation sequence
- 5. Record a real pass/fail outcome
- References and limitations
- After the project: did it work?
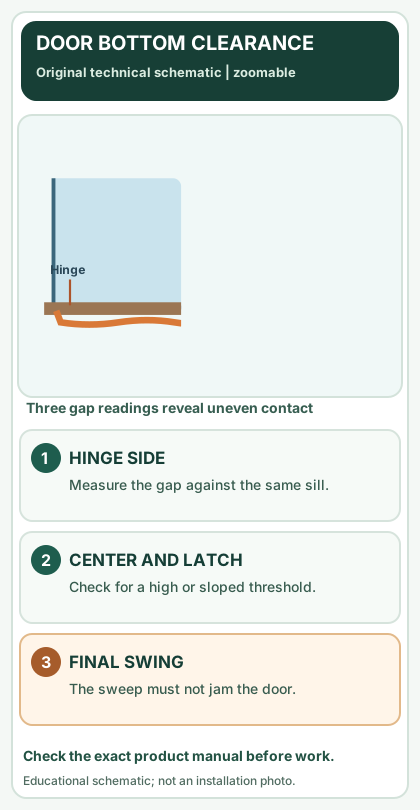
Open desktop diagram ↗ Open mobile diagram ↗
Read the diagram: three checkpoints
- Measure three gaps
- Match seal working range
- Check full door swing
Installing a new door-bottom sweep is a fit and door-operation job, not just cutting a strip to the door's nominal width. The correct part must match the door material, sill design, existing gasket/retainer and swing direction. A rigid strip may seal the widest gap and still scrape at the narrowest; a brush may reduce a draft yet fail to fix water leaking around a sill.
Stop before drilling if the assembly is fire-/smoke-rated, part of emergency egress, factory-specified for a proprietary bottom seal, or the fixing substrate and approved screw locations are unknown. Use the exact door and sweep manufacturer's instructions or qualified service.
1. Diagnose the bottom before buying
With the door latched normally and from a safe position, note whether air enters mainly at the bottom, a side jamb or a fixed casing joint. If you also see water staining, swelling or damaged flashing, diagnose the water path first. A weatherstrip does not replace a correctly drained sill.
Use the five-zone door-draft guide for a location check and the sweep selection guide to distinguish factory under-door kerf gaskets, surface blades, brushes, U-channel attachments and automatic drop seals. Those options are not interchangeable simply because the door is 36 inches wide.
2. Make a useful measurement record
Write down the actual door-bottom width, the door thickness, whether it swings in or out, whether the threshold is fixed or adjustable, and the type of existing bottom seal. Photograph the old seal from a safe accessible position, including its attachment profile and any identifying label.
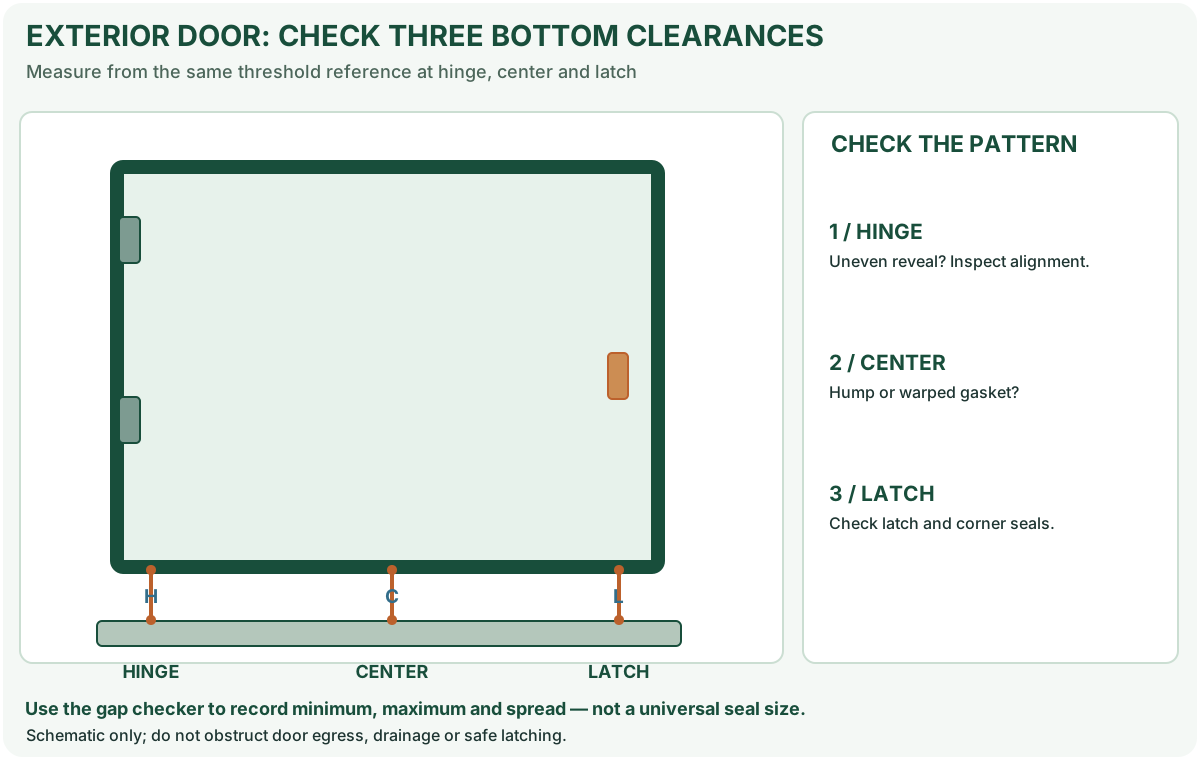
Record three clearances from the same identified threshold reference with the door closed and stable:
On a narrow screen, scroll this table sideways to see every column.
| Position | Hypothetical gap |
|---|---|
| Hinge side | 3/16 in |
| Centre | 1/4 in |
| Latch side | 5/16 in |
The difference is 1/8 in, and that variation can matter more than the centre reading. These numbers are an example only, not a published allowable clearance. A strip that contacts firmly at the 5/16-in side could jam at the 3/16-in side. Enter your measurements into the door-bottom gap checker and then compare both extremes with the named product's specified contact range.
If a factory gasket conceals the gap and you cannot read it safely, note "not measurable without dismantling" rather than pushing a sharp gauge under the door. Ask the supplier to identify the intended measurement surface.
3. Check the whole opening arc, not only the closed-door gap
A seal may clear a raised sill when the door is closed yet hit tile, carpet or a floor transition partway through its arc. Identify the highest potential contact point before fixing a rigid blade. Check whether the handle and lock work normally before the repair; if the door already rubs, sags or needs force to latch, correct the door alignment first rather than hiding it with a larger sweep.
On a narrow screen, scroll this table sideways to see every column.
| During dry fit, you notice… | What it means | Decision |
|---|---|---|
| Proposed blade/brush snags a floor transition | Mounting height or style may be wrong | Stop, check compatible design |
| No sound mounting surface exists | Screws or adhesive may fail/damage the door | Do not improvise holes |
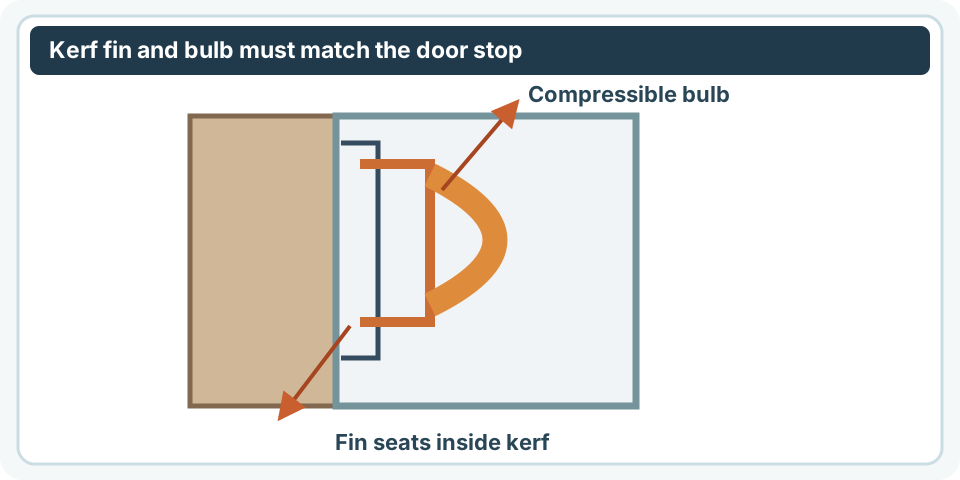
| Slide-on channel does not match door thickness or underside profile | Wrong part family | Exchange for exact compatible profile |
| Sill has open drainage channels that the proposed seal would block | Weather management at risk | Stop and check sill-maker instructions |
| Door is documented fire-, smoke- or accessibility-rated | Special assembly rules apply | Obtain approved components and qualified procedure |
Manufacturer-specific example: A Therma-Tru door-system FAQ describes different single- and dual-bulb door-bottom seals paired with different sill systems. A generic U-channel or surface blade must not be substituted simply because it seems more flexible.
First decide the attachment family: installation is not always drilling
Frost King's manufacturer installation overview distinguishes several families, and its catalog names actual products. Match the existing arrangement before taking out a drill or removing a heavy door.
On a narrow screen, scroll this table sideways to see every column.
| Family | Published manufacturer example | Safe decision |
|---|---|---|
| Slide-on U-channel | W79/36H, for a listed 1-3/4-in door thickness | Match underside and original gasket profile; do not force over a factory kerf or reinforcement |
| Snap-in bottom | UDS36 for specific Stanley doors | Only use the approved existing groove. Do not cut a new kerf in an unidentified slab |
| Screw-on vs nail/glue-on | Same page lists UDB36BR as screw on and UDX36 as nail or glue on | Check exact fixing surface and maker instructions. Do not combine the fastening instructions |
| Automatic lifting sweep | A56/36H, which lifts while open and lowers when closed | Verify an approved actuator, attachment plane and full arc; its 2 x 36-in catalog size is not a tested sealing range |
| Two-piece storm-door bottom | SDB36WH, adjusts from 1 to 1-3/4-in thickness | Confirm compatible storm-door design; do not transfer this installation to a fiberglass entry door |
Drill-bit trap: Frost King's general door-sweep FAQ mentions a 1/8-in drill bit. That is vendor context, not a universal requirement for every sweep or door: some replacement products slide or snap into an original profile. No drill size is safe evidence of where to bore into an insulated, steel-reinforced, glazed or rated slab.
Door-removal trap: The manufacturer overview notes that some staple-on wooden-door sweeps require door removal. That is not a recommendation to pull hinge pins from a heavy or rated entry door without appropriate lifting/support and the exact door manufacturer's service procedure.
4. A safe dry-fit and installation sequence
- Identify the actual product and read its current installation sheet, including mounting side, permitted trimming and fastener dimensions. Mark any allowed fixing points only after checking for existing hardware, door skin reinforcement and warranty conditions.
- Compare the part with your measurements: leaf width, thickness and the minimum and maximum bottom gaps, the sill and full swing clearance. If it does not meet the named product's requirements, do not modify the door to force fit.
- Position without permanent fixing: hold a manufacturer-approved test piece or the complete component against the intended surface, without fingers in the hinge/closing gap. An assistant may be needed to check the opening arc safely.
- Fit only by the maker's method. A screw-on blade, factory under-door gasket and slide-on channel need different steps. Use specified fasteners in specified locations; do not choose drill sizes from an unrelated website.
- Recheck the full swing slowly before normal use. Do not force the handle, bend the threshold or let the sweep fold under a sill ridge.
- Check the latching and seal, then retest when wind or temperature conditions change. In a door with a normal latch, it should engage without extra force. Do not rely on closing the door harder to compress an incompatible seal.
A dry fit is not a proof of durability: a part can appear to fit initially yet wear, peel or snag later. Keep the supplier's product/model information and the installation instructions.
5. Record a real pass/fail outcome
The U.S. Department of Energy's 2024 weatherstripping job aid (PDF) lists reduced air infiltration and maintained/improved door operation as joint intended outcomes, not competing goals. That guidance documents an installer procedure, not approval to drill into every door model.
On a narrow screen, scroll this table sideways to see every column.
| Check after fit | Pass condition | Stop/fail condition |
|---|---|---|
| Door closes and locks | Latch, deadbolt and required closers function normally | Requires new force, no longer locks, or binds |
| Sweep contacts the sill as designed | Intended contact without folding/tearing | Scrapes heavily, rolls under or leaves an obvious incompatible gap |
| Opening arc stays clear | No trip, catch or floor collision | Hits flooring/transition while swinging |
| Water and ventilation functions remain | Drainage paths and deliberate ventilation unobstructed | Seals or screws block either |
| Part remains seated through repeated normal use | No loosening or damaged fasteners | Retainer shifts, breaks or endangers users |
If a compatible sweep still leaves a corner leak, inspect the jamb-to-sill connection, corner seal pads, door sag and sill drainage; do not layer multiple sweeps. Continue with door corner-seal troubleshooting or threshold assessment as the evidence suggests.
References and limitations
- U.S. DOE / NREL: Exterior Door Weatherstripping Job Aid (June 2024, PDF) — measuring the doorway, secure installation, verifying air sealing and ensuring normal operation.
- Frost King: Door sweep installation mechanism differences.
- Frost King: Snap-in, screw-on, nail/glue-on and slide-on named examples.
- Frost King: General mounting and drilling FAQ — not a universal drilling permit.
- Therma-Tru: Door-system FAQ — distinct sweep/sill combinations on a named manufacturer's systems.
- The Home Depot: How to Weatherproof Your Front Door — overview of bottom-sweep types and attachment.
Evidence boundary: All example gaps and decisions here are instructional. MendNook has not installed, field-tested or independently measured a sweep for your door. Exact product instructions, local assembly rules and safe operation take precedence.
After the project: did it work?
After completing only product-approved work, document what you actually observe instead of assuming a replacement part resolved the fault.
- Success looks like
- The entire door swing and latch operate freely, with suitable bottom contact at hinge, middle and latch positions.
- If it still fails
- If the sweep rubs or water enters under the sill, diagnose threshold/door alignment and drainage instead of adding pressure.
- Keep for next time
- Three clearances; sweep model and working range; swing/latch result
Keep your actual measurements and observed result in your private project notebook. This is a verification checklist, not a product certification.
My project record: progress and take-home checklist
Select a progress stage if helpful. This is a personal record only, not a claim that MendNook verified your repair.
Includes this guide's specific diagnosis, decision, safety, and outcome checks, plus any note entered above. Nothing is sent to MendNook; downloads and copy operations stay under your control.