Leaks at the lower jamb can come from a missing corner pad; matching inswing sill hardware is more useful than adding random foam.
Before you buy or repair
- Record first
- Door system, pad orientation, threshold/wall interface and observed leak location
- Make the decision
- Replace the exact compatible corner pad only when perimeter geometry and flashing are sound
- Stop & verify if
- Water enters under the sill, the door is rated or damaged jamb material is present
Jump to a section
- Diagram checkpoints
- Find the exact leak path first
- Understand why inswing/outswing matters
- Worked decision example: two corner leaks
- Preparation before any sealant or pad work
- Validate the repair
- Annotated component check: do not mistake the pad for the sweep
- Corner seal, threshold or flashing? Three different scope decisions
- Sources and exclusions
- After the project: did it work?
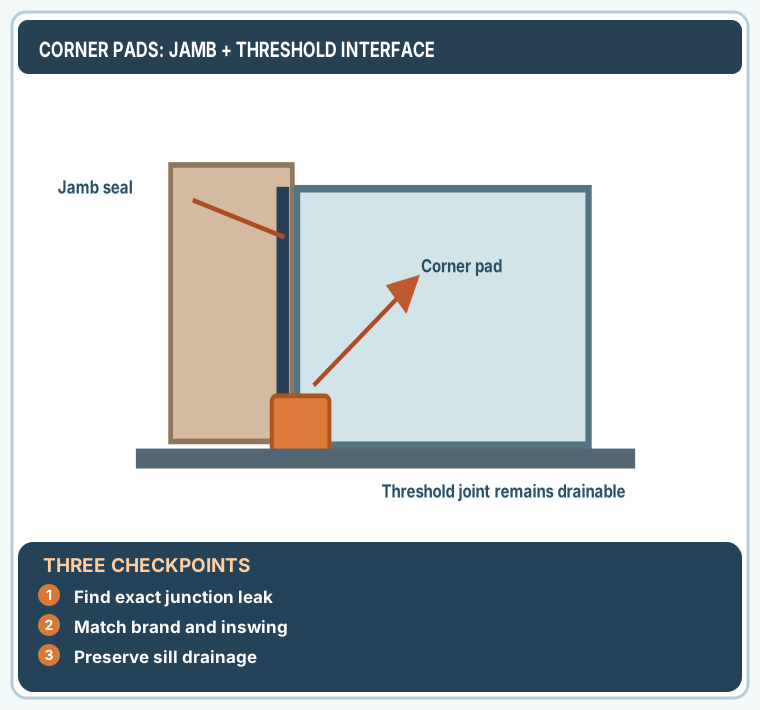
Open desktop diagram ↗ Open mobile diagram ↗
Read the diagram: three checkpoints
- Find exact junction leak
- Match brand and inswing
- Preserve sill drainage
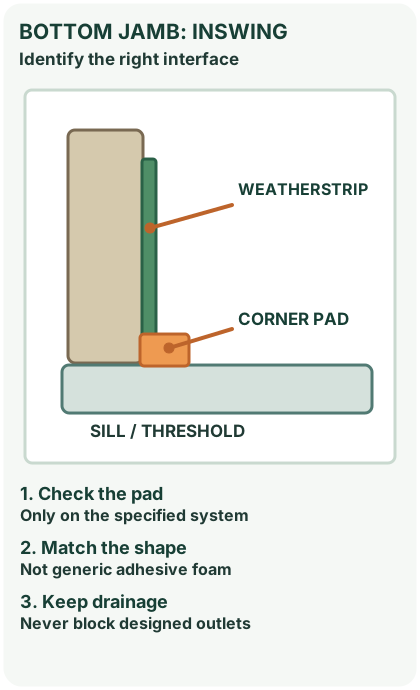
A draft or water mark at the bottom corner of an exterior door may come from a tiny missing part: the corner seal pad where the door jamb, vertical weatherstrip and threshold meet. The pad can keep water from following a gap around the end of the perimeter seal. But it is not a universal rubber square, and it does not fix improper flashing or a sagging door.
Find the exact leak path first
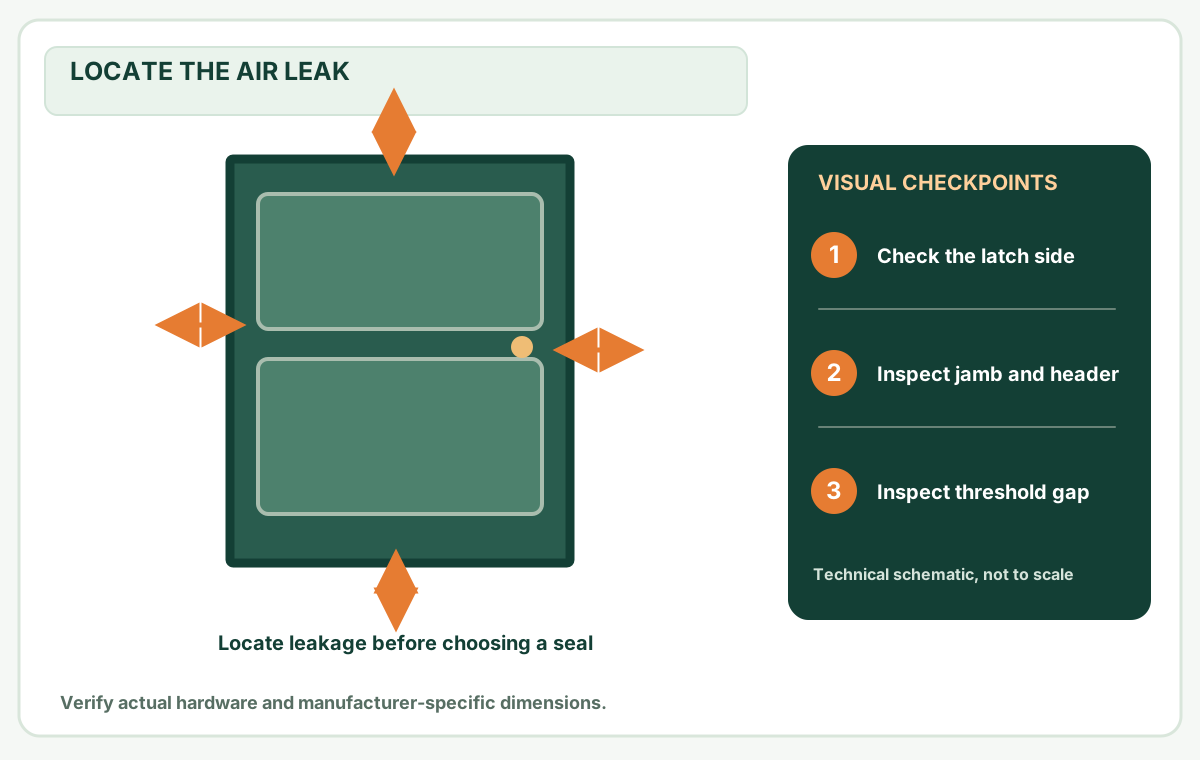
Inspect the lower hinge and latch corners after dry weather and again after rain (only when safe). Do you see daylight between the weatherstrip and threshold cap? Is the jamb face wet while the threshold surface remains dry? Is the gasket torn or the weatherstrip pulled away at the last inch? Photograph both sides and the closed position.
Therma-Tru's troubleshooting guide specifically lists missing corner seal pads among causes of draft/light leakage. It also identifies sill-to-subfloor seal failure and water tracking around the jamb as separate problems.
On a narrow screen, scroll this table sideways to see every column.
| Observation | What to investigate | What a new pad cannot do |
|---|---|---|
| Pad missing at weatherstrip/threshold junction | Exact compatible inswing pad kit | Repair a warped door or bent sill |
| Weatherstrip stops short of corner | Strip length and install order | Replace missing perimeter weatherstrip |
| Water stains extend below sill | Flashing/subfloor path | Fix concealed rot or failed sill seal |
| Door hits stop at top but not bottom | Jamb/hinge alignment | Correct twisted frame geometry |
| Draft only at bottom center | Door-bottom gasket/sill contact | Replace the central sweep or gasket |
Understand why inswing/outswing matters
A manufacturer's corner pad may be specified only for inswing units or a particular sill profile. Therma-Tru defines a corner seal pad as part of the interface between vertical weatherstrip and bottom gasket. It is not always interchangeable with foam tape from a roll.
Confirm door brand and sill series. Photograph the existing pad on the opposite corner if present, its orientation, and the height where the threshold cap meets the jamb. Do not buy a generic pad solely by thickness without checking the manufacturer drawing.
Worked decision example: two corner leaks
Case A: the jamb weatherstrip is intact, the door aligns and latches smoothly, but the lower hinge-side pad is missing. A compatible pad may address the local discontinuity after cleaning and preparation. Case B: the pad is intact but water stains appear under the threshold and into the floor. Replacing a pad alone is unlikely to fix failed flashing or the sill-to-subfloor joint. These examples are diagnostic comparisons, not physical MendNook tests.
Track the leak after both calm and wind-driven rain; wind pressure can change the path and a new pad should not be credited for fixing every weather event.
Preparation before any sealant or pad work
- Verify the door model and product-specific installation diagram.
- If the junction is wet, identify and stop the moisture source; allow it to dry. Do not encapsulate damp trim.
- Check whether a vertical weatherstrip end is too short or wrongly seated; resolve that first.
- Remove old pad residue gently without damaging finish or the jamb-to-sill joint.
- Check the sill has its intended drainage and any required weep openings.
- Dry-fit the correct pad with its top, bottom and narrow/tapered portions aligned as instructed.
- Apply any required manufacturer-specified sealant only to the identified joint, not across water paths.
- Reinstall the correct pad, then close and latch the door without scraping or excessive gasket compression.
Therma-Tru's product documents describe pad orientation and a particular jamb/threshold sealant sequence for relevant systems. That is not a license to copy the bead location on another manufacturer's door.
Validate the repair
Check both corner joints with the door closed, verify seal contact and full door function, and photograph the installed pad. After natural rain, inspect again for moisture, staining and swelling. For a controlled water test, follow a qualified professional's method rather than spraying water into hidden wall joints and assuming a pass.
If water persists, investigate under-sill flashing, jamb alignment and missing exterior sealant. Use door draft source diagnosis for perimeter checks and threshold adjustment guide for bottom contact only if your sill is adjustable.
Annotated component check: do not mistake the pad for the sweep
The Therma-Tru door installation procedure describes corner seal pads for applicable inswing systems as part of the vertical weatherstrip–sill junction, not the long strip under the door. The instruction includes sealing the specified jamb/sill interface and orienting the pad as the exact product diagram indicates. In that documented configuration the tab side faces up and the narrow portion is near the sill. Do not transfer those directions to an outswing, fire-rated or other proprietary door.
On a narrow screen, scroll this table sideways to see every column.
| Component visible on a real door | Job | Failure that component alone cannot fix |
|---|---|---|
| Jamb weatherstrip | Compress against the vertical door edge | Missing sill flashing or a crooked door |
| Short corner seal pad | Close a discontinuity at the bottom of the perimeter seal | Central door-bottom clearance |
| Door-bottom gasket or sweep | Seal against the threshold along the leaf | A missing pad at a side jamb |
| Sill and drainage features | Handle threshold contact and designed water paths | Rotted framing or a failed subfloor seal |
Practical inspection sequence: photograph the entire bottom corner so it is possible to see the jamb, vertical strip, pad and sill together. Check the installed pad on the opposite side for model-specific orientation, but do not assume both are unmodified. Compare the exact maker's installation diagram with the part being sold. Check the door closes and locks normally, and ensure designed drainage remains unobstructed. Only perform sealant steps specified in the applicable installation sheet.
The labeled door-corner schematic on this page is an orientation aid. Its simplified shape is deliberately not an ordering template or proof of water-tightness. A new pad cannot cure water entry under the sill; escalating moisture, swelling or soft floor material needs investigation by a qualified installer.
Corner seal, threshold or flashing? Three different scope decisions
Before buying a pad, make one photo with the door open showing the junction of vertical jamb weatherstrip, pad position and sill. Then make a second photo latched closed to observe contact. Do not assume dampness below this area originates at the pad.
On a narrow screen, scroll this table sideways to see every column.
| Where the symptom actually appears | Inspect next | The pad by itself cannot repair |
|---|---|---|
| Visible short gap exactly where the vertical jamb seal stops above the sill | Correct original pad missing, compressed, detached or installed upside-down | A central door-bottom sweep gap |
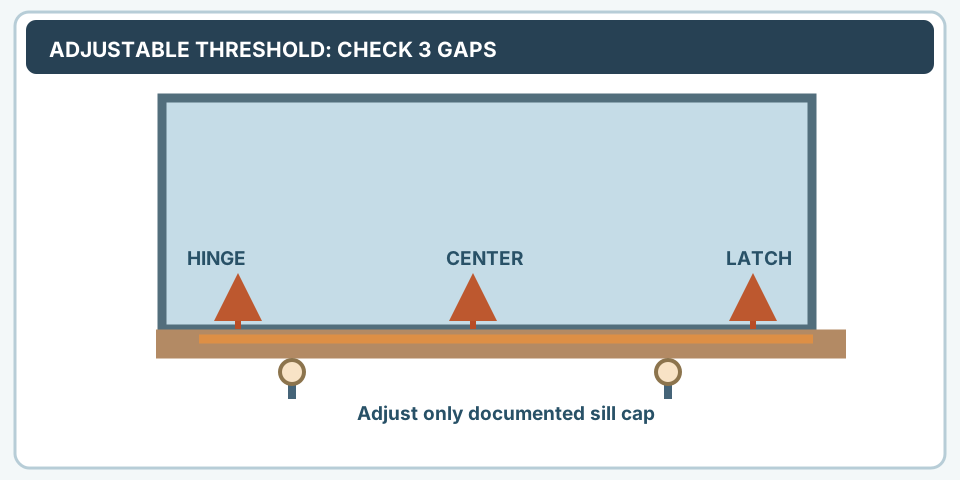
| Air felt across the full bottom width | Measure bottom clearances at hinge/center/latch and match sweep to sill | Entire door-bottom contact profile |
| Water mark emerges from below the threshold or behind trim after rainfall | Sill bedding/flashing/substrate; seek qualified building-envelope assessment | Failed under-sill water management |
| Door gap widens toward the latch or it needs lifting to lock | Diagnose hinge and reveal alignment | A dropped or distorted door slab |
| One side's pad is absent but the other survives | Identify exact maker, inswing/outswing configuration and original pad orientation | Compatibility with an unrelated door series |
Manufacturer installation detail, not universal advice: Therma-Tru's full-door installation documentation places corner-pad and sill-jamb sealing directions within a specific inswing installation process. Never infer that any similarly shaped pad, tape or silicone blob will substitute for the required component, or that sealing every visible slot prevents rainwater intrusion.
What constitutes a credible outcome check?
After an approved pad replacement, capture same-angle before/after images, check the vertical weatherstrip reaches the intended pad without a corner gap, open/close and latch the door normally, and observe the area after normal rain. Dry weather or a single quick spray cannot establish a watertight flashing assembly. If wet stains recur, stop cosmetic fixes and investigate the envelope rather than adding more sealant.
Sources and exclusions
- Therma-Tru: Door troubleshooting.
- Therma-Tru: Door component terminology.
- Therma-Tru: How to maintain the door.
Do not disturb a fire-rated or security exit assembly. Any recurring water entry, soft wood or structural movement needs qualified assessment, not merely a replacement pad.
After the project: did it work?
After completing only product-approved work, document what you actually observe instead of assuming a replacement part resolved the fault.
- Success looks like
- Manufacturer-compatible pad joins the vertical seal and threshold as intended; door latches and the corner stays dry on later inspection.
- If it still fails
- If water tracks under the sill or trim softens, investigate flashing and subfloor rather than layering pads.
- Keep for next time
- Door model; pad orientation/SKU; initial leak; rain follow-up
Keep your actual measurements and observed result in your private project notebook. This is a verification checklist, not a product certification.
My project record: progress and take-home checklist
Select a progress stage if helpful. This is a personal record only, not a claim that MendNook verified your repair.
Includes this guide's specific diagnosis, decision, safety, and outcome checks, plus any note entered above. Nothing is sent to MendNook; downloads and copy operations stay under your control.