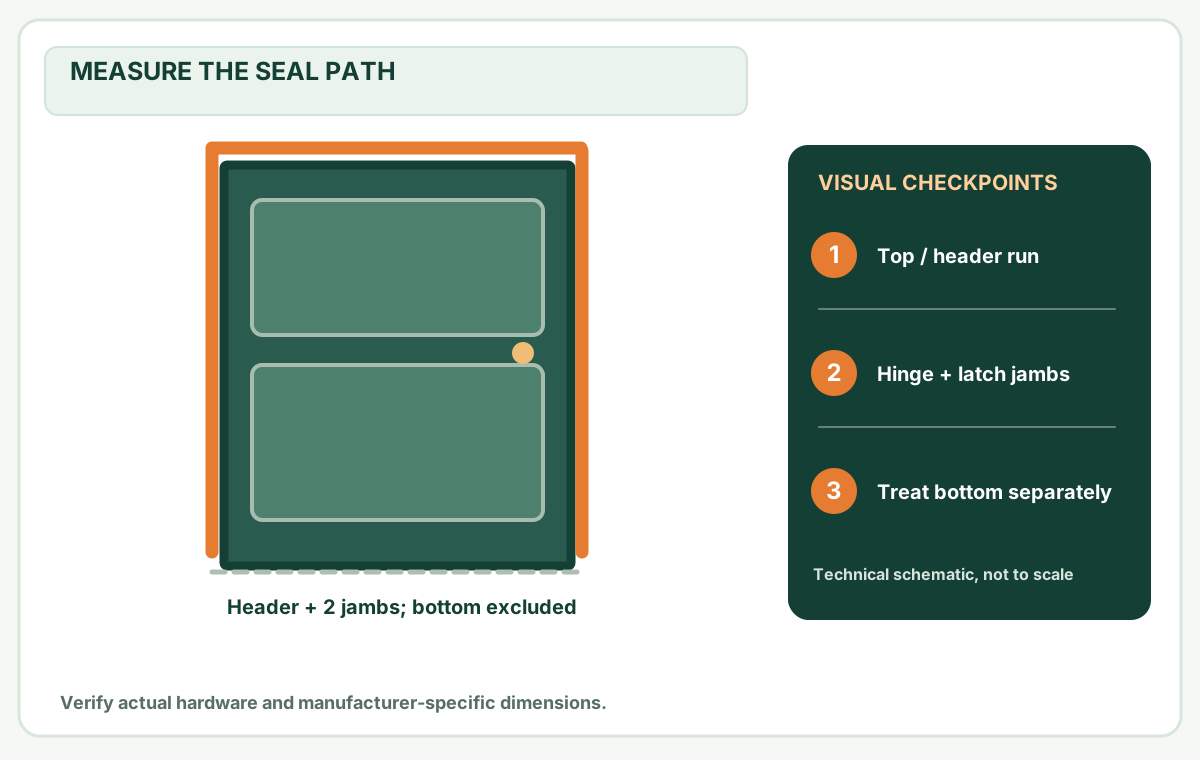
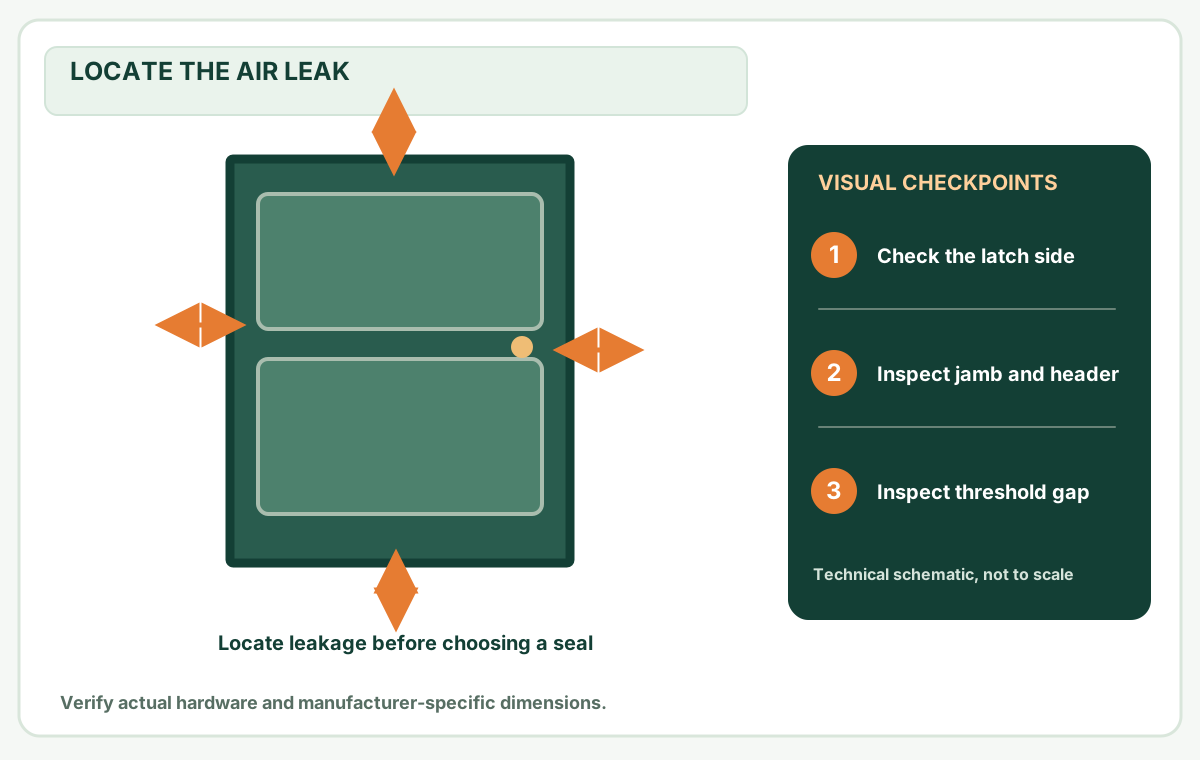
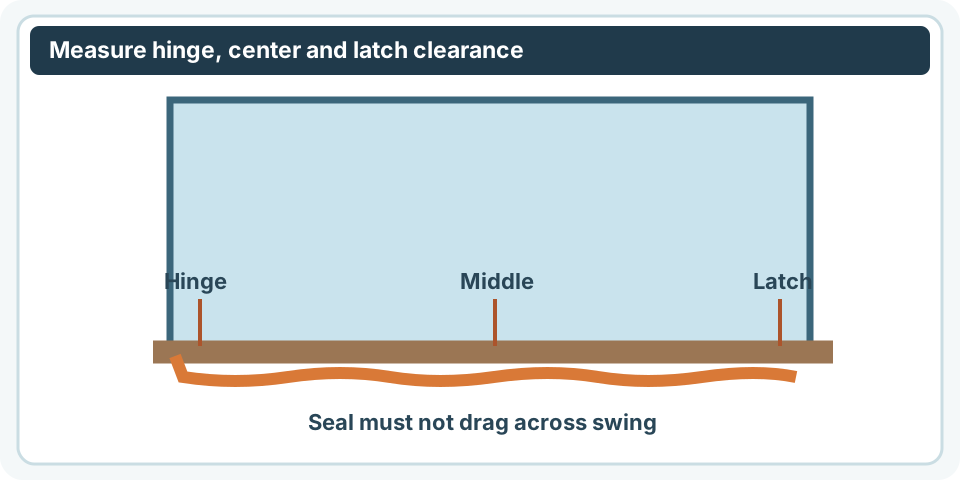
Choose the correct kerf fin and bulb profile, then test that the door latches without heavy resistance.
Before you buy or repair
- Record first
- Kerf shape, bulb cross-section and top/side cut lengths
- Make the decision
- Verify brand-specific fin fit and normal compression
- Stop & verify if
- Slot is broken, door is rated or latch binds
Jump to a section
- Diagram checkpoints
- Confirm you actually have a kerf seal
- Diagnose the actual failure before purchasing
- Record the compatible profile
- Worked quantity example with real measurement logic
- The two-match purchase check: retention versus working compression
- Two verified installation documents that must NOT be combined
- Remove the old strip without damaging the stop
- Install in the right sequence
- Test and document the result
- Match the right retail listing in the US, Canada and UK
- Sources and limitations
- After the project: did it work?
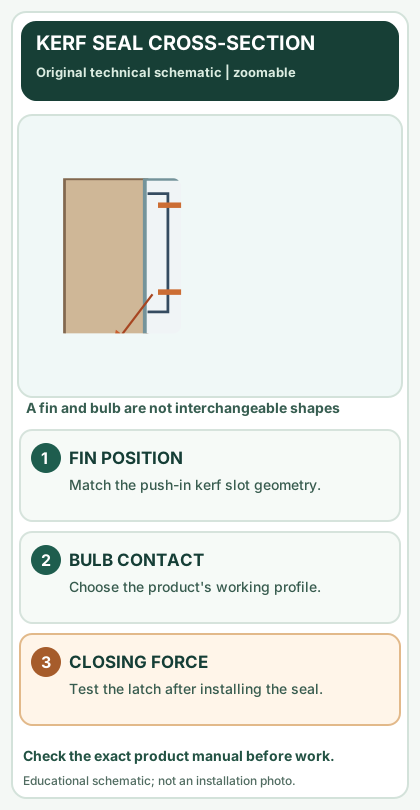
Open desktop diagram ↗ Open mobile diagram ↗
Read the diagram: three checkpoints
- Identify kerf slot
- Check fin and bulb profile
- Verify latch force
Kerf weatherstripping is a flexible seal whose narrow mounting fin presses into a slot cut into the door stop. If it has flattened, split or pulled free, a compatible replacement can reduce drafts without replacing the whole entry door. Kerf seals are not interchangeable just because they are both white or black. A wrong fin or bulb shape can make a latch difficult to close, leave a gap or fall out of its channel.
Confirm you actually have a kerf seal
Open the door and inspect the stop along the top and both side jambs. A push-in kerf seal has a ribbed or barbed fin disappearing into a narrow slot. Adhesive foam sticks onto a flat surface; screw-backed metal weatherstrip uses separate fasteners. These installation methods require different replacement materials.
The Home Depot guide to weatherproofing an exterior door explains that many newer doors use kerf-style weatherstripping and distinguishes it from adhesive and screw-fastened designs.
Diagnose the actual failure before purchasing
Run a gentle fingertip or thin paper check along the closed door while someone operates it; never trap fingers at the latch. Note whether air enters at the hinge, latch, head or bottom. A torn kerf seal may leak even with a straight door, but a door with uneven gaps or loose hinges may need alignment first.
On a narrow screen, scroll this table sideways to see every column.
| Symptom | Inspect | Better first decision |
|---|---|---|
| Bulb is flattened but fin holds | Seal profile and contact gap | Confirm replacement cross-section |
| Entire seal falls from slot | Kerf width, broken barb or damaged wood | Check slot condition before ordering |
| Door now needs force to latch | Excess seal compression or warped door | Stop; do not defeat latch |
| Only bottom edge leaks | Threshold/sweep, not jamb kerf | Use bottom gap checker |
| Water appears around sill | Drainage, threshold and flashing | Avoid sealing unseen drainage paths |
Record the compatible profile
Pull only a short already-loose section of the old seal to photograph its mounting fin, barb direction, bulb or leaf shape and compression face. Record the door maker if present. Compare the shape and dimensions with the exact manufacturer's profile drawing, not a generic online photograph. Kerf width alone does not establish how far the seal protrudes when the door closes.
Measure the actual top and both side lengths along the receiving slot; include corner/joint rules from the selected seal manual. For a first material estimate, use the weatherstrip length calculator, then check package lengths individually.
Worked quantity example with real measurement logic
Imagine a door stop that needs 35 1/2 inches across the head, 79 1/4 inches at the hinge side, and 79 inches at the latch side. Total straight-run material is 193 3/4 inches, or about 16.15 feet before any manufacturer-required corner allowance. A 17-foot kit might have enough total length but still be unsuitable if it contains only two short pre-cut jamb sections or a nonmatching bulb profile.
Write down each section rather than buying solely by combined footage. These measurements are illustrative and do not specify an actual kit.
The two-match purchase check: retention versus working compression
A strip can be secure in its kerf slot and still fail to touch the moving door, or it can compress firmly but fail to remain in the slot. These are different mismatches. Verify both against the original door maker's profile rather than treating “kerf weatherstrip” as a single size.
On a narrow screen, scroll this table sideways to see every column.
| Trial with the door in its normal state | What it reveals | Action |
|---|---|---|
| Short candidate fin will not seat without force, or splinters the wood stop | Barb/fin-to-channel compatibility is not established | Stop; do not widen an unknown kerf or drive the fin in with a hammer |
| Fin seats but falls out during gentle handling | Retention profile, channel damage or worn barb may be wrong | Photograph fin and receiving slot; ask for exact original retainer |
| Fin remains seated but bulb does not touch the closed, normally latched door | Projection / door alignment / contact position may differ | Compare original working profile; don't assume thicker is permitted |
| Candidate seals only if you pull the handle or slam the door | Excess compression, strike alignment or sag | Fail the trial; restore normal latching before buying or installing |
| Head and jamb pieces appear compatible but leave a corner opening | Manufacturer's preformed joint or corner pad may be required | Follow the original assembly's corner detail; don't fill drain or ventilation gaps |
Hypothetical supplier note: “This is an inswing door with existing push-in barbed fin. Original head and two jamb strips stay in the slot, but the lower latch side no longer touches when latched. Door operation remains normal. Here are the old fin cross-section, bulb projection, jamb stop photos and exact part/model label.” This is more useful than “need 17 feet of white kerf seal.” Exact dimensions and allowed replacements must come from the product manufacturer; the note is not a substitute for a fit drawing.
What a successful test proves: the original design can close and lock normally with a fully seated, manufacturer-approved seal, without damaging the slot. A paper-strip drag observation at one point cannot quantify the home's air leakage, identify sill flashing defects or guarantee every other jamb location seals. Use the door draft location guide for a separate zone check.
Two verified installation documents that must NOT be combined
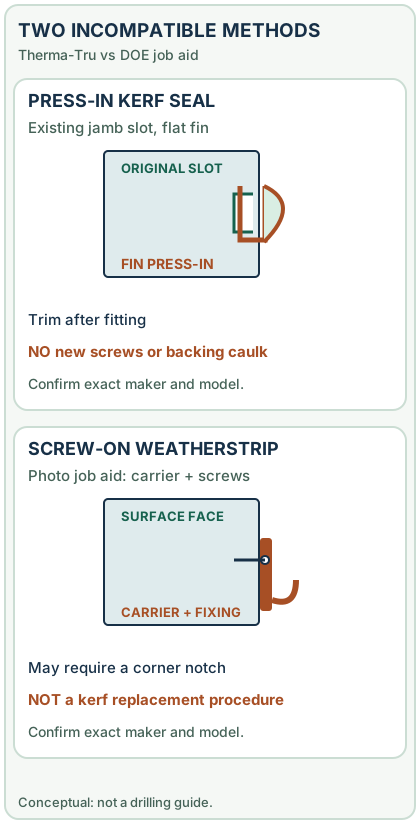
There is a very practical distinction between a manufacturer's push-in door-jamb weatherstrip and a screw-fixed weatherstrip assembly. These are different products, not two alternative ways to attach the same strip.
On a narrow screen, scroll this table sideways to see every column.
| Original instruction | Named product/system | What it actually tells an installer | What is NOT transferable |
|---|---|---|---|
| Therma-Tru — How to Replace Door Weather Stripping | Therma-Tru's illustrated press-in replacement for its applicable door jamb | Start at the top of the jamb, pull out the old weatherstrip; press the flat edge of replacement into the groove, then trim the excess using scissors and seat the remaining end. The listed tools are safety glasses, scissors and tape measure. | No new screw holes, thin backing caulk bead or metal retaining strip are described in this particular press-in replacement sequence |
| U.S. DOE Job Aid 11-1, June 2024 | Its photo example of screw-secured exterior-door weatherstripping in a weatherization installation | Measure each side, check door alignment, notch ends where required, apply a narrow bead in line with the back-side screw holes, then secure with manufacturer-provided short screws and verify smooth door operation. | Not permission to drill a Therma-Tru push-in kerf or to add caulk behind a replacement fin that is meant to be removable |
Worked wrong-repair case: Your existing seal has an intact narrow kerf channel, the original seal can be eased out by hand, and the corresponding Therma-Tru replacement profile is documented as press-in. Copying DOE's photo sequence literally—drilling through the stop, adding a backing sealant bead and screw-fastening an aftermarket carrier—would be a different alteration, not the manufacturer's press-in replacement. Identify the exact part and use the Therma-Tru sequence only if the door is the specified compatible system.
Conversely: If your existing weatherstripping is screw-fastened with a visible carrier rather than a flexible barbed fin, the push-in sequence won't hold it. Use the actual carrier/fastener instructions and verify backing and door rating; do not cut a new kerf merely to switch systems.
A short buyer/installer decision that prevents wasted material
- Photograph the old seal cross-section in the end of its channel while it is seated, then the already-loose end of the part if accessible without damage.
- Record whether there are visible fasteners, an original kerf groove, or an adhesive layer. These are different attachment methods.
- Compare the original door-maker replacement profile; ask for the correct head-jamb and side-jamb component lengths/quantity.
- Follow the exact maker instructions for corner trimming. A notched joint shown in DOE's screw-fixed example does not establish the corner fit for an original press-in profile.
- Stop if the door requires extra force to latch, the gasket pulls out, a rated/security/egress assembly must be modified, or the strike cannot reach its receiver.
Remove the old strip without damaging the stop
With the door secured open, release the old fin gently from one end while watching for splintering or peeling paint. Avoid scraping or gouging the kerf. Check for wet or rotten wood, torn slot edges or damaged vinyl. Clean debris and allow the slot to dry. If the fin breaks off inside, use the manufacturer-approved method rather than driving a new seal over the old fragment.
Do not pry close to glass, security hardware, or electrical door systems. Historic painted trim may require lead-safe precautions; if paint is likely lead-containing, use qualified lead-safe work procedures.
Install in the right sequence
- Dry-fit a short sample section into the kerf without stretching it.
- Close the door gently and confirm normal latch engagement with the sample in place.
- Follow the manufacturer’s top-and-side installation order; ensure the fin is fully seated, not twisted.
- Trim and join corners to the seal instructions, avoiding openings at transitions.
- Remove any stretched or buckled segment and re-seat it; a stretched seal can retract later.
- Test with the door fully closed at several locations. No heavy rubbing or excessive closing force should be necessary.
Never fill or block weep holes, drainage channels, door safety releases or approved ventilation paths.
Test and document the result
Check for a consistent seal contact line using a paper-strip test where the design allows, noting that paper drag is only a rough contact check, not a certified air-leak test. Verify that the latch catches normally and that hinges and strike plate are not overloaded. Reinspect after seasonal expansion. If a draft persists at the threshold, compare sweep vs weatherstripping instead of adding more jamb seal.
Match the right retail listing in the US, Canada and UK
The word kerf describes a mounting-slot method; it is not a universal replacement size. Search terms vary by market: US and Canadian listings commonly say kerf-in weatherstripping, door jamb seal or compression bulb, while a UK supplier may say groove-fit door seal, door frame gasket or rebated door seal. Check whether the exact product is for timber, uPVC, composite, aluminium or a proprietary door set. The supplier's cross-sectional drawing and compatibility list matter more than a regional keyword.
On a narrow screen, scroll this table sideways to see every column.
| Before paying | Check in the listing | If missing |
|---|---|---|
| Kerf mounting fin | Barb width, direction and required groove geometry | Compare surviving OEM strip or ask the door maker |
| Working seal | Bulb/leaf projection and compression range | Do not assume thicker stops more draught |
| Material | Temperature, UV and exposure suitability | Ask for the actual product datasheet |
| Pack format | Continuous roll versus precut head and jamb pieces | Compare each cut length separately |
NRCan's weatherstripping guide recommends choosing a product that springs back and does not prevent door or window operation. The Energy Saving Trust similarly warns that an overly thick strip can stop a window or door from closing. These support checking compression, not a universal material choice.
Worked shopping quantity: mm and inches, no fake tolerance
Suppose your actual measured runs are 900 mm (head), 1,980 mm (hinge) and 1,975 mm (latch). The base length is 4,855 mm (4.855 m). With 10% planning waste, it is 5.3405 m. A single 5 m continuous roll is short for that planned allowance; two 3 m rolls total 6 m but can still leave an unusable cut if the product forbids joining pieces. Package quantity never proves part compatibility. The material estimator now lets you work in millimetres or inches and evaluate roll counts without mixing units.
After installation, test the full swing and locking action. Never let a shopping calculation override fire-door ratings, emergency egress, ventilation or a manufacturer's seal profile.
Sources and limitations
- Therma-Tru: Press-in jamb weatherstrip replacement (official procedure) — original groove, flat fin and scissors, not screw-on retrofit.
- U.S. DOE: June 2024 Job Aid 11-1, screw-on weatherstripping example — notching, backing caulk and manufacturer short screws are system-specific.
- Home Depot: Weatherproof your front door.
- Home Depot: Weatherstripping material and fit guide.
- U.S. Department of Energy: Caulking vs weatherstripping.
No “universal kerf seal” dimensions are asserted here. Match the door-system manufacturer before ordering; this page is researched, not field-tested.
After the project: did it work?
After completing only product-approved work, document what you actually observe instead of assuming a replacement part resolved the fault.
- Success looks like
- Kerf fin is seated along the intended slot, corners are continuous, and the exterior door shuts and locks normally.
- If it still fails
- If the bulb causes heavy closing force or falls out, stop; compare exact fin and compression profile to maker specifications.
- Keep for next time
- Door brand; original/new seal cross-section; cut lengths; latch and draft recheck
Keep your actual measurements and observed result in your private project notebook. This is a verification checklist, not a product certification.
My project record: progress and take-home checklist
Select a progress stage if helpful. This is a personal record only, not a claim that MendNook verified your repair.
Includes this guide's specific diagnosis, decision, safety, and outcome checks, plus any note entered above. Nothing is sent to MendNook; downloads and copy operations stay under your control.