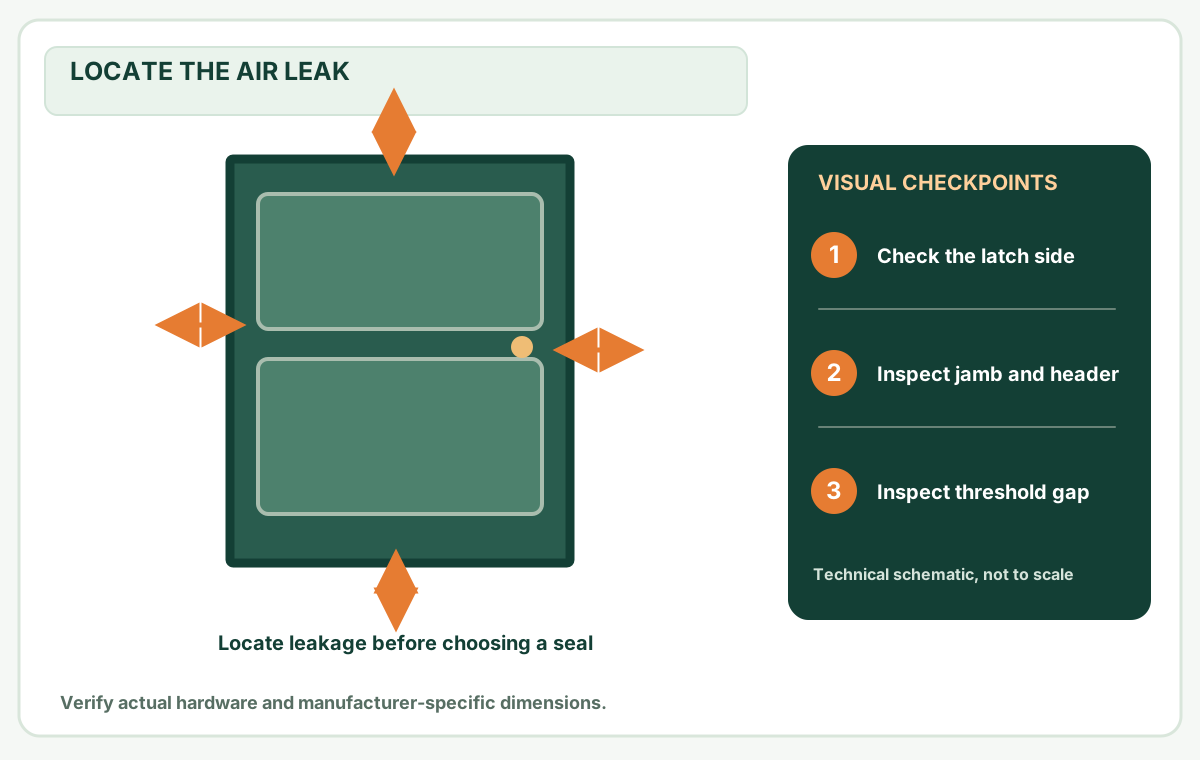
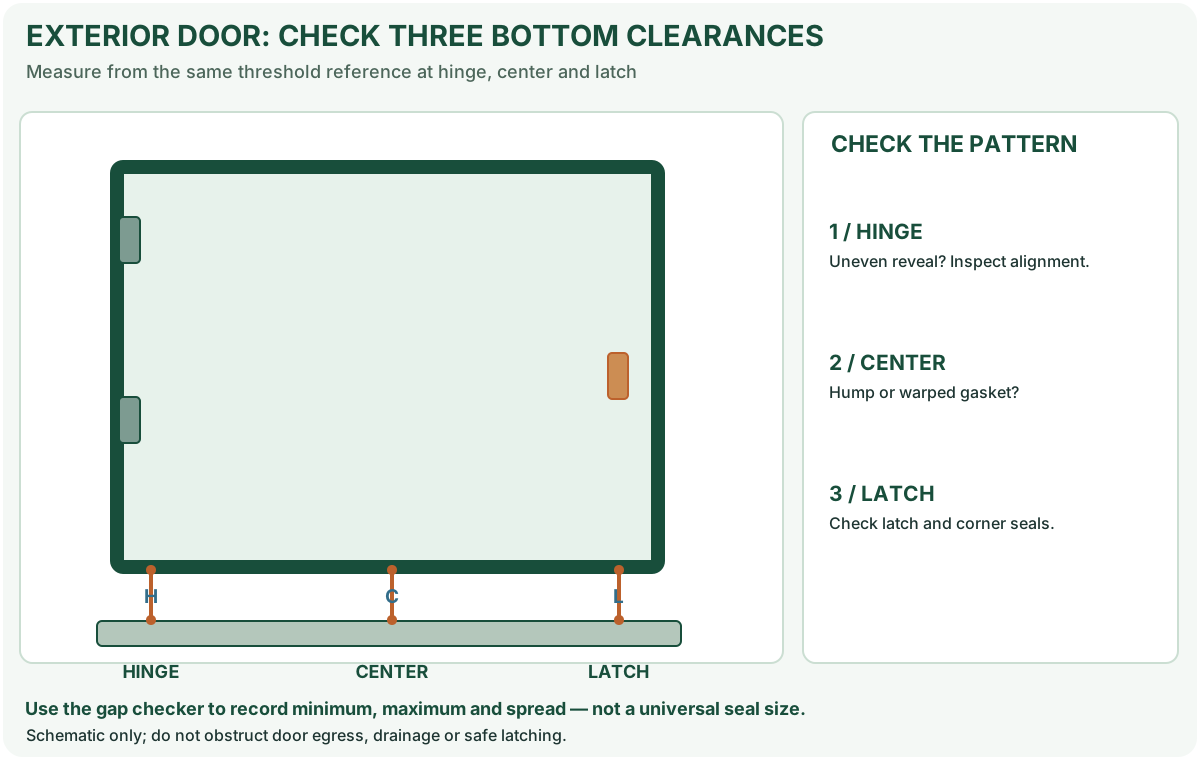
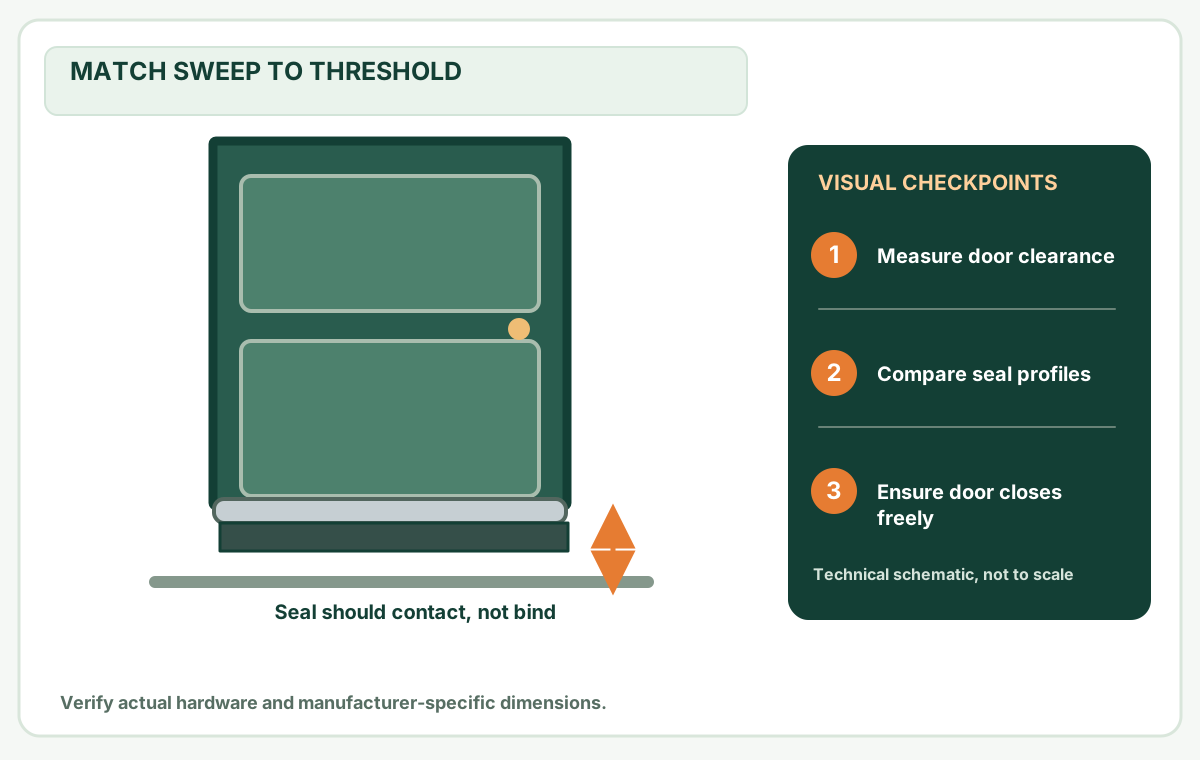
Measure the actual top and side runs rather than multiplying a nominal door size; exclude the bottom if it uses a separate sweep.
Before you buy or repair
- Record first
- Top and each side separately, excluding any separately treated threshold
- Make the decision
- Actual compression profile, cut plan, corner joints and reasonable scrap allowance
- Stop & verify if
- A seal would interfere with latching or conceal water/structural damage
Jump to a section
- Diagram checkpoints
- Step 1 — identify the seal path and material
- Step 2 — calculate a planning allowance, not a product specification
- Step 3 — check if the pieces actually fit the stock
- A second cut-list example: the cheapest total length can be unusable
- DOE's notch is not a universal kerf-cut instruction
- Step 4 — make the fit decision separately from the stock decision
- Step 5 — verify the result before declaring the repair done
- Primary references and limits
- After the project: did it work?
Open desktop diagram ↗ Open mobile diagram ↗
Read the diagram: three checkpoints
- Top / header run
- Hinge + latch jambs
- Treat bottom separately
A door labelled “36 × 80 inches” does not prove you need a 36-inch head strip and two 80-inch jamb strips. The actual gasket contact path, corner joint and mounting groove can differ. Measure the three sections you intend to replace and identify the original seal profile before calculating stock quantity.
This guide covers a common head plus hinge and latch jamb sealing plan. Door-bottom sweeps and threshold gaskets are separate product systems; do not silently add them to the same roll.
Step 1 — identify the seal path and material
Look for a push-in kerf fin, compression bulb, adhesive strip, V-strip or screw-on carrier. Photograph an undamaged cross-section next to a ruler. If the frame includes a proprietary seal, the manufacturer parts diagram takes priority over a generic roll calculator.
Measure the actual contact runs, not the nominal door leaf:
On a narrow screen, scroll this table sideways to see every column.
| Cut | What to record | What not to assume |
|---|---|---|
| Head (T) | Continuous top seal path between its intended joins | That the glass or door slab width equals the head strip |
| Hinge jamb (H) | Seal path from the specified top join to its bottom endpoint | That the nominal door height is the exact cut |
| Latch jamb (L) | Independently measured path, including any original profile changes | That H and L must be identical |
If different profiles are used along different edges, do not sum them into one purchase; create separate material lists. A bottom-of-door sweep is likewise measured and purchased against its compatible sill and door thickness. The five-zone door draft check helps establish which components actually need replacement.
Step 2 — calculate a planning allowance, not a product specification
For an illustrative 36-inch head and two 80-inch jambs:
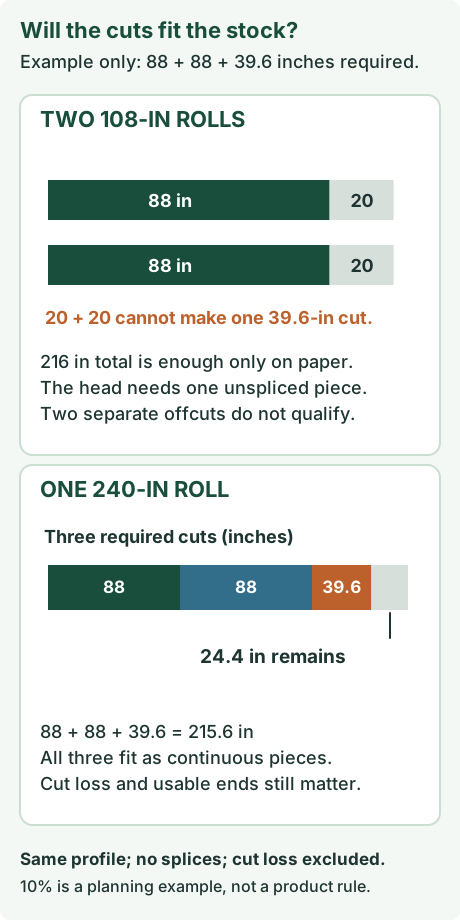
Head + hinge jamb + latch jamb = 36 + 80 + 80 = 196 inches.
This is 16 ft 4 in before cutting allowances. A chosen 10% planning margin makes the sum 215.6 inches, or about 17.97 feet. That 10% is MendNook's adjustable example, not a Department of Energy or manufacturer rule.
Write the planned individual lengths on your cut list: 39.6 + 88 + 88 inches. Rounding the total to 216 inches is fine for rough inventory discussion, but do not round each separate required cut down without the product instructions.
Step 3 — check if the pieces actually fit the stock
Total stock length is only a lower bound. Even if the stock adds up, three unspliced sections might not fit in two retail rolls.
On a narrow screen, scroll this table sideways to see every column.
| Hypothetical continuous stock | Length-only answer | Can the three cuts 39.6 + 88 + 88 in fit without splicing? |
|---|---|---|
| 1 × 240-inch roll | Enough total material | Yes, geometrically, if one matching seal profile works on all runs |
| 2 × 108-inch rolls | 216 in exceeds the 215.6-in sum | No. Neither 108-in roll can hold 88 + 39.6 in together |
| 3 × 108-inch rolls | Enough material | Yes, geometrically, with one cut on each roll |
| 1 × 5-metre roll | 196.85 in stock | No for the 10%-allowance cuts (215.6 in); barely exceeds the base 196-in length without waste |
A product can require special corner notches, overlap, factory joints, a cut-to-fit insert or finished lengths. That information cannot be inferred from the table. Verify whether your retailer sells continuous stock or individual precut lengths.
The weatherstripping length and roll planner now checks the three selected lengths against an entered continuous stock length, allocating the chosen allowance to each cut. It reports whether an unspliced arrangement is possible within its simplified model. It does not certify the material fit, cut loss, product-specified joins or the usability of every inch of stock.
A second cut-list example: the cheapest total length can be unusable
For the earlier illustrative 39.6 + 88 + 88 in cuts, consider supplier packages that have the same profile:
On a narrow screen, scroll this table sideways to see every column.
| Available package lengths | Total purchased | Can it provide three unspliced cuts? |
|---|---|---|
| One 240 in continuous roll | 240 in | Yes: all three pieces total 215.6 in; unallocated 24.4 in |
| Two 108 in rolls | 216 in | No: each 88-in jamb leaves only 20 in, not enough for the 39.6-in head |
| Two 96 in and one 48 in precut strips | 240 in | Yes geometrically: 88 from each 96 and 39.6 from the 48 |
| Three 84 in strips | 252 in | No: neither 88-in jamb cut fits a single 84-in strip |
A cut must fit one uninterrupted stock piece, not just the total summed length. This is a simple one-dimensional cutting-stock problem; the weatherstripping roll planner is useful to explore it. Packaging may have damaged ends, preformed fittings or required corner cuts, so leave the manufacturer's actual allowance intact rather than treating every theoretical inch as usable.
Record one real part match, not only the price per foot
Before comparing these packages, record seal profile (kerf fin or carrier), compression contact surface, temperature/use rating, corner-joint instructions and door latch behavior. A cheaper 240-in roll can be worse than three precut pieces when its cross-section is wrong, it cannot make a maker-approved corner, or it impedes the door. DOE's exterior-door job aid specifically combines reducing air infiltration with proper door operation.
DOE's notch is not a universal kerf-cut instruction
The U.S. DOE weatherization Job Aid 11-1 (June 2024) measures each side and the door head/bottom, then shows a screw-on weatherstrip with a notched end where a tight head-to-side junction requires it. Its photos also show a backing caulk bead and manufacturer-provided screws. That does not establish that an original door-maker's press-in kerf bulb should be cut, backed with caulk or screwed in the same way.
The Therma-Tru press-in jamb replacement guide instead shows pulling the old product from its original groove, pressing in the new flat fin, and trimming the excess after fitting. It identifies scissors and tape measure for that model family. This creates a real distinction between length planning and corner-assembly design.
On a narrow screen, scroll this table sideways to see every column.
| Purchased material | Continuous cut-list logic | Installation detail to obtain |
|---|---|---|
| Therma-Tru original-compatible press-in weatherstrip | Record head and each jamb's original groove/run lengths separately; inspect actual purchased kit's precut segments | The manufacturer determines whether the head is preformed, how corners terminate, and whether the new strip is fitted and then trimmed; do not transfer DOE's screw-on notch |
| DOE's pictured screw-on carrier weatherstrip | Measure three separate door sides and the door-bottom if the correct system includes it | Its photo shows notching where not preprovided, a backing bead and short supplied screws; this is not a replacement fin for a kerf slot |
| An adhesive-backed strip in a smooth stop | Count each continuous run, confirm usable packaged length and whether corner overlaps are allowed | Use adhesive/surface preparation and compatible gap compression from its own instructions, not either of the other mounting methods |
Illustrative buying rejection: With a 35 1/2-in head and 79 1/4 + 79-in jambs, you need a base of 193 3/4 in of the correct profile if all three paths use compatible material. A 17-ft roll equals 204 in, leaving only 10 1/4 in for all trimming, end notches and waste. That's not evidence a retail kit is usable: three contiguous runs and the product's specific corner treatment still determine whether the stock actually works. Three differently formed kit pieces may also be preferable to a longer but wrong profile.
Prevent irreparable mistakes: Mark the three actual installed paths, retain photos of the original corners, and compare the manufacturer's drawing before cutting. A generic 10% stock cushion is an estimator setting, not a permission to shorten a factory-shaped head/corner seal or to splice two ends where the system requires a continuous gasket.
Step 4 — make the fit decision separately from the stock decision
A 20-foot roll of the wrong gasket can be completely unusable. Before buying, confirm:
- Matching profile: photograph a good section of the old seal; check material, kerf fin, bulb/strip width and whether it is a compressed or sliding seal.
- Compatible frame: verify the maker's specified stop surface, adhesive or mounting groove. Do not drill or file unknown or rated assemblies to fit a generic seal.
- Corner detail: get the product-specific rule for joining the head to the jambs. Do not splice leftovers through a continuous run unless the manufacturer permits that construction.
- Door operation: the door should latch without extra force before and after the repair. If it currently rubs or is misaligned, check its hinges and reveal first.
- Water and ventilation: do not block purposeful sill drainage or designed airflow to combustion appliances or ventilation systems.
Worked decision: Two precut 84-inch strips may cover both 80-inch jambs at their base lengths, but cannot also yield an unspliced 36-inch head. A third strip is still needed unless the specific seal maker has an approved different jointing method. Adding package lengths together does not answer the real cut question.
Step 5 — verify the result before declaring the repair done
Fit only the product permitted for your door system. After installation, open and close the door gently several times: inspect all three seal runs and corner joins, confirm proper compression and normal latch/lock operation, and watch for new scraping or shifting. A door that leaks less but cannot latch is not a successful repair.
If a correct seal still leaks at one edge, investigate latch alignment, hinge wear, damaged frame or an adjacent fixed-wall joint; do not simply add a thicker layer. Use the door draft diagnosis and kerf replacement compatibility guide.
Primary references and limits
- Therma-Tru: Press-in replacement from the original jamb groove — trim after fitting, no screw-fixed carrier in that sequence.
- DOE June 2024 Job Aid 11-1, photo sequence for screwed weatherstrip — distinct mounting family, not a universal kerf notch.
- U.S. Department of Energy: Install Weatherstripping on an Exterior Door, 2024 — measure each side, inspect alignment and maintain proper door operation.
- Natural Resources Canada: weatherstripping materials and selection — choose the seal by gap, durability, original profile and compatibility.
- Natural Resources Canada: exterior doors — distinguishes jamb/head seals from door-bottom and threshold products.
Evidence limit: All cut lengths above are teaching examples. The 10% allowance is an adjustable shopping assumption and not a published universal tolerance. This article does not record a completed physical installation, manufacturer-specific assembly approval, or a safety inspection.
After the project: did it work?
After completing only product-approved work, document what you actually observe instead of assuming a replacement part resolved the fault.
- Success looks like
- Each head/jamb run and manufacturer-required cut is listed separately, and the chosen kit has sufficient usable pieces.
- If it still fails
- If total footage fits but an individual piece is too short, choose an approved longer section rather than unverified joins.
- Keep for next time
- Top/hinge/latch lengths; seal type; package cut lengths; waste allowance
Keep your actual measurements and observed result in your private project notebook. This is a verification checklist, not a product certification.
My project record: progress and take-home checklist
Select a progress stage if helpful. This is a personal record only, not a claim that MendNook verified your repair.
Includes this guide's specific diagnosis, decision, safety, and outcome checks, plus any note entered above. Nothing is sent to MendNook; downloads and copy operations stay under your control.