Seal only stationary window-trim joints using compatible sealant; preserve drainage and operable sash movement.
Before you buy or repair
- Record first
- Stationary joint, drainage openings, substrate and moisture condition
- Make the decision
- Use correctly rated sealant without blocking sash or weeps
- Stop & verify if
- Active leaks, rot or flashing/drainage design is unclear
Jump to a section
- Diagram checkpoints
- Find where the air is entering
- Confirm the window drainage design
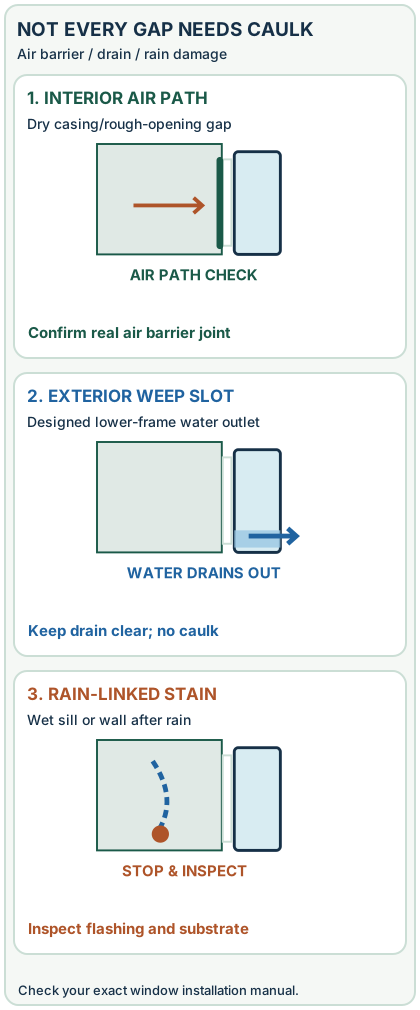
- Three different paths: interior air leak, intended exterior drain or flashing leak
- Select a sealant compatible with both materials
- Measure the joint and plan materials
- Prepare the surface without damaging the frame
- Apply a controlled bead and tool it
- Inspect the work and stop if the draft continues
- The Canada/UK exception: don't confuse air sealing with blocking drains
- The correct next step if caulking is NOT the repair
- Sources and limitations
- After the project: did it work?
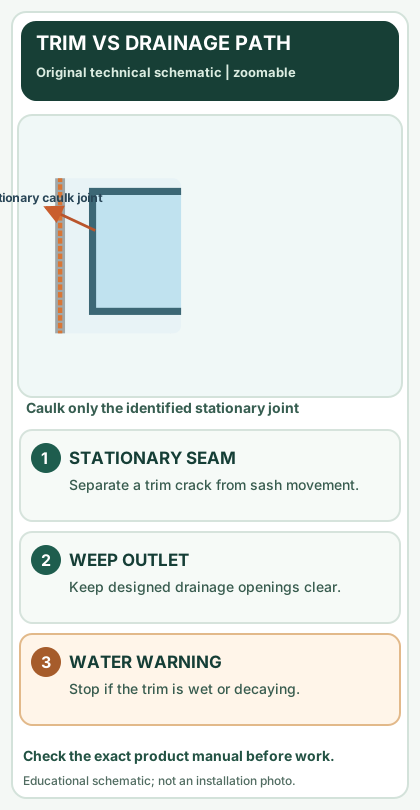
Open desktop diagram ↗ Open mobile diagram ↗
Read the diagram: three checkpoints
- Identify stationary joint
- Avoid weep openings
- Select substrate-safe sealant
Caulk can reduce drafts around stationary joints such as a window frame where it meets interior trim or exterior cladding. But a draft through an opening sash, a leaking glazing system or hidden water-damaged wall needs a different repair. The most important first step is choosing the right joint, not simply covering every visible line with sealant.
Find where the air is entering
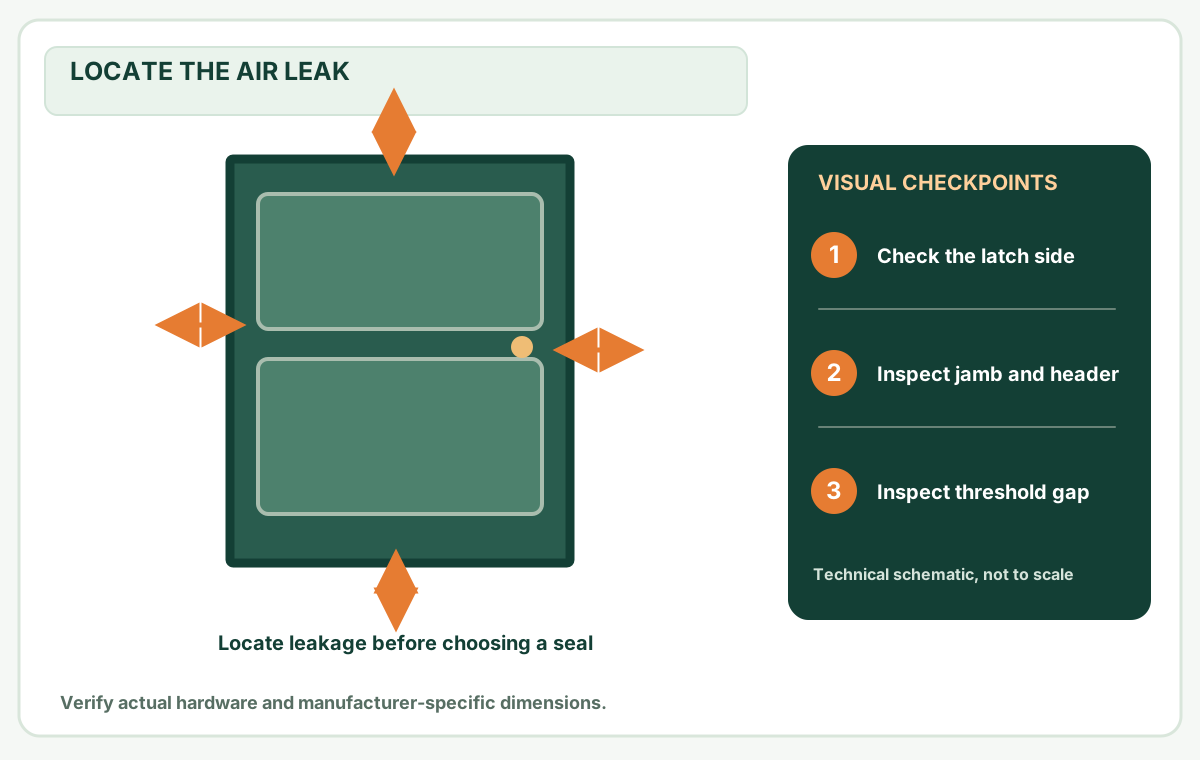
With the sash closed, inspect the perimeter where trim meets wall, where window frame meets trim and where movable sash meets its stop. A tissue or approved smoke pencil can help locate movement in safe, still conditions, but drafts can shift with wind and mechanical ventilation. Do not use a flame near curtains or combustible materials.
The U.S. Department of Energy explains that caulking seals stationary cracks, while weatherstripping seals parts that move. Review DOE's air-sealing guidance before selecting the product.
On a narrow screen, scroll this table sideways to see every column.
| Location | Typical first approach | Do not do |
|---|---|---|
| Fixed interior trim/wall joint | Compatible paintable caulk | Bridge a moving sash track |
| Operable window sash | Manufacturer-approved weatherstrip | Caulk the sash shut |
| Exterior frame to siding joint | Exterior-rated compatible sealant per installation detail | Seal weep/drainage outlets |
| Gap behind removable trim | Investigate air barrier and insulation detail | Fill blindly with uncontrolled expanding foam |
| Soft trim or moisture stains | Diagnose water intrusion first | Hide rot with new sealant |
Confirm the window drainage design
Some windows drain rainwater through manufactured weep slots or channels. These paths may be low on the exterior frame and can resemble a gap. Never caulk a slot until the manufacturer confirms its purpose. Building Science Education highlights the importance of correctly locating the air seal relative to the window frame so rainwater can drain. See DOE Building Science: air-sealing window openings.
If you find active leaks, wet insulation, widespread rot or a failed flashing detail, stop treating the problem as cosmetic caulking.
Three different paths: interior air leak, intended exterior drain or flashing leak
Two primary references make this distinction actionable: the U.S. DOE Building Science rough-opening air-sealing guide describes sealing the window-to-framing rough-opening joint with a compatible air-impermeable method and window/door low-expansion foam, whereas Milgard's window care guidance describes manufactured exterior-bottom weep slots that drain water from its frame and must remain clear. A caulk bead across a weep is not the same as repairing an interior trim air path.
On a narrow screen, scroll this table sideways to see every column.
| What you actually observe | System it may belong to | Best action before purchasing or applying sealant |
|---|---|---|
| Dry indoor casing-to-wall gap with detectable air movement | Exposed interior finish joint or rough-opening air barrier behind the casing | Identify which joint actually leaks; the superficial bead may not seal the hidden gap. DOE identifies caulk, suitable backer rod and low-expansion window/door foam as possible rough-opening materials, subject to assembly and product instructions |
| Small slots in an exterior lower frame with a sill/track that sometimes holds rainwater | Manufacturer's intended weep/drainage channel | Do not caulk or fill the slots. Milgard instructs occupants to keep these exterior outlets clear and use a soft brush to clear debris; check your exact model's outlet locations |
| Wet or stained trim after wind-driven rain, especially below the sill | Possible failed flashing, drain plane, window assembly or wall material | Stop cosmetic air-sealing; follow DOE window-flashing principles and obtain a qualified inspection when substrates are wet |
| Air felt along the opening sash rather than fixed frame/trim | Moving weatherstrip or failed sash contact | Identify model-specific weatherstrip, not stationary caulk; check operation and intentional trickle ventilation |
| Visible exterior frame-to-cladding joint with uncertain drainage detail | May be a legitimate manufacturer-specified weather-seal or drainage exit | Ask the installer/window maker for the correct wall assembly and product installation section before adding a continuous bead |
Original decision example (hypothetical): A homeowner feels air at the dry interior right casing while a small lower exterior vented slot also exists. It would be incorrect to put a continuous bead across the slot because it appears to connect inside and outside. Instead, first identify the actual interior casing/rough-opening air path, keep the manufacturer's lower drain unchanged, and follow the approved air-barrier detail for that frame. An air-leak impression is not proof that the wall cavity is dry, and a clean weep is not proof the flashing is sound.
Do not reverse the lesson: Some specific window installation systems call for sealant at parts of the sill or exterior flange. That does not conflict with protecting their designed drainage outlets. Never copy a generic drawing to choose an unlisted no-caulk zone or a fastener point. Your actual maker's current wall/window detail, sill-pan and WRB drainage layout control the work. Where that documentation is absent, leave the exterior joint unmodified and request professional assessment rather than inventing a continuous bead.
Select a sealant compatible with both materials
Record the two surfaces you are joining: painted wood and drywall, vinyl and masonry, metal and painted trim, etc. Read the sealant label for adhesion, indoor/outdoor rating, movement allowance, paintability, curing temperature and service life. Silicone is not generally paintable; some acrylic/latex products are better suited to paintable trim, but exact performance varies.
For a wider or deeper stationary joint, the solution may involve a suitable backer rod and sealant geometry, not a thick mass of unsupported caulk. Follow the sealant maker’s joint-width and depth chart. Never invent a fill depth from the window opening alone.
Measure the joint and plan materials
Inspect the full perimeter to determine exactly which segments need resealing. For example, a window with a 36-inch head and 48-inch sides might have 132 inches of stationary interior trim joint around those three sides. That is 11 linear feet of bead before allowance; it is not proof that a standard tube will cover the work because bead size and nozzle cut diameter affect yield.
If one side has intact flexible caulk and the other is loose, treat each segment based on actual condition rather than automatically stripping sound material.
Prepare the surface without damaging the frame
- Protect adjacent finish and glass with suitable masking materials.
- Remove loose or cracked old sealant using a scraper approved for the substrate; protect delicate vinyl and painted trim.
- Follow the sealant maker’s directions to remove incompatible silicone residue.
- Clean dust, oils and loose paint; rinse and allow complete drying before resealing.
- Apply painter’s tape when a neat narrow line is needed and the product allows it.
- Test adhesion on a small inconspicuous area if recommended by the maker.
Before disturbing old painted trim, consider lead-safe requirements for older buildings. Do not sand or heat suspect lead-containing paint without appropriate controls.
Apply a controlled bead and tool it
Cut the nozzle to suit the manufacturer-approved joint width; a smaller opening is easier to control. Apply a continuous bead at a steady rate, keeping the nozzle against the joint to avoid voids. Smooth with a suitable tool without pushing the material completely out of the gap. Remove masking tape at the manufacturer-recommended time. Avoid touching until the sealant has sufficiently skinned/cured.
The Home Depot caulking guide distinguishes surface preparation, application, tooling and curing. Read the actual cartridge instructions; drying and full curing are different.
Inspect the work and stop if the draft continues
After curing, look for voids, missed corners, peeling edges and accidental sealant on moving sash components. Confirm windows still open, close and lock freely and that drainage remains unobstructed. If air persists from behind the trim, the leakage path may be within the wall/window rough opening rather than the cosmetic surface joint.
Save a note with the joint location, products used, date and whether air movement changed. That gives future occupants a useful maintenance record.
The Canada/UK exception: don't confuse air sealing with blocking drains
Natural Resources Canada's air-leakage guide distinguishes sealing air paths around interior window casings from allowing exterior wall details to shed moisture. A decorative exterior joint is not automatically the right air barrier. In UK homes, Energy Saving Trust distinguishes fixed window joints (appropriate compatible sealants) from opening sashes (weatherstripping or brush seals). Do not apply silicone over a moving track or cover trickle ventilation openings.
Three checks before starting: (1) identify whether the joint moves, (2) confirm you are not covering weeps/ventilation, (3) establish whether the surrounding wall or trim is already wet. Stop for persistent water intrusion, rot or unfamiliar flashing details. In North America the material may be sold as caulk; in the UK look for the substrate-compatible frame sealant. These names do not establish product chemistry, adhesion or required curing conditions.
If your repair is genuinely a stationary dry joint, save a record of both substrates, product name, bead length, application temperature and curing instructions. That record is more useful for future maintenance than a guessed energy-saving percentage.
The correct next step if caulking is NOT the repair
Follow the observed failure instead of repeating more caulk along every visible seam:
On a narrow screen, scroll this table sideways to see every column.
| What you observe after cleaning or testing | Better path | What not to infer |
|---|---|---|
| The draft comes through a movable sash or its sliding track | Find the exact window maker's weatherstrip service for that operable model | A stationary caulk bead will stop a moving-component leak |
| Glass fog cannot be wiped off either accessible face | Identify window condensation location | Surface caulk can restore an insulated-glass unit seal |
| Air seems to enter behind dry interior casing instead of at the exposed trim joint | Review the DOE Building Science rough-opening seal detail; obtain qualified help if the casing must be removed | A decorative bead alone proves the rough opening is airtight |
| Water appears below the sill after rain or trim is soft | Stop and investigate flashing, drainage, substrate and moisture | Caulking the visible gap automatically repairs rainwater entry |
| Joint is stationary, dry and compatible with chosen cartridge | Proceed with the controlled surface preparation and cure checks above | A successful-looking bead is proof of a measured energy saving |
Separate evidence types. A tissue or smoke-pencil observation can suggest an air path, but it does not identify the exact hidden wall joint or quantify leakage. DOE's stationary-versus-moving component explanation gives a practical first choice; its cost-savings discussion is not a guarantee for any one window.
Retest and record. After the sealant has cured, photograph the named joint, check the sash opens and locks, visually check any weep/vent openings remain unchanged, and compare draft behavior under similar weather. If the underlying wall or frame is wet, do not install additional sealant over that moisture.
Sources and limitations
- U.S. DOE: Air sealing and the distinction between caulk and weatherstrip.
- Milgard — Weep drainage maintenance and exterior bottom slots — manufacturer example, not proof every window uses the same outlet geometry.
- DOE Building Science — Window flashing and drainage plane — why surface sealant cannot fix concealed rainwater intrusion.
- Building Science Education: rough-opening air sealing and drainage.
- Home Depot: How to caulk.
This is a researched DIY guide, not a moisture-damage assessment. Where water is present or the flashing is uncertain, consult the window maker or a qualified installer.
After the project: did it work?
After completing only product-approved work, document what you actually observe instead of assuming a replacement part resolved the fault.
- Success looks like
- A stationary joint is continuously sealed after the product's required cure, while the sash, locks, drains and vents remain free.
- If it still fails
- If moisture persists or air leaks behind trim, investigate rough-opening air/water management rather than adding surface caulk.
- Keep for next time
- Substrates; sealant and cure instructions; treated joint; any remaining moisture
Keep your actual measurements and observed result in your private project notebook. This is a verification checklist, not a product certification.
My project record: progress and take-home checklist
Select a progress stage if helpful. This is a personal record only, not a claim that MendNook verified your repair.
Includes this guide's specific diagnosis, decision, safety, and outcome checks, plus any note entered above. Nothing is sent to MendNook; downloads and copy operations stay under your control.