Do not cut rails from the desired outside dimension until the chosen kit's corner-key geometry and the window's retainer method are known.
Before you buy or repair
- Record first
- Receiving window profile, frame outside target dimensions, corner-key insertion geometry and available retainer hardware
- Make the decision
- Kit-specific rail cut convention, compatible spline/mesh and frame diagonals before final trim
- Stop & verify if
- Unsafe height exposure, unknown retaining track, bent extrusion, broken connector or force-fit screen
Jump to a section
- Is a frame kit the right repair?
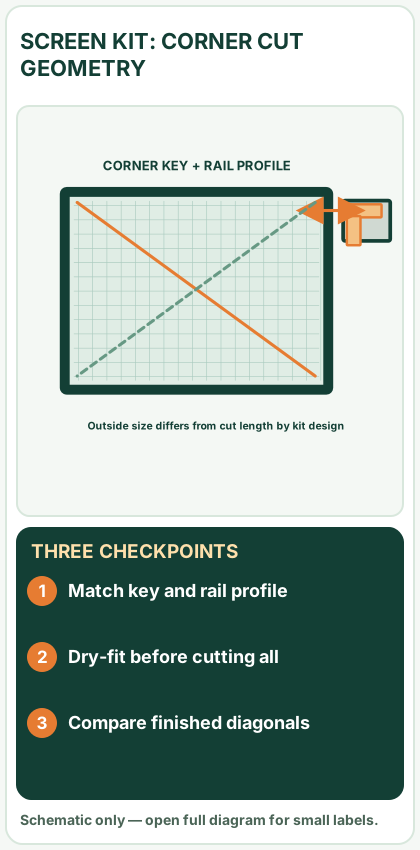
- Read the diagram: three checkpoints
- Before buying: document the window and retainer system
- What belongs in a frame kit?
- Calculate cut lengths from your actual corner keys
- Cut and dry-assemble the rails
- Install screening after the frame is stable
- Fit and retention check: the step many tutorials omit
- Common reasons a new screen frame does not fit
- Keep a frame-building record you can verify
- Frequently asked questions
- Sources and scope
- Questions before you buy or repair
- After the project: did it work?
Quick answer: Building a new insect-screen frame is possible with a suitable frame kit, corner connectors, compatible mesh, spline, a clean work surface and the correct retainer hardware. The costly mistake is cutting four rails to the screen's intended outside width and height without allowing for how far the chosen corner keys add to the finished frame. Match the kit and the window's retention method, record outside dimensions, calculate cuts using that kit's connector geometry, dry-assemble, check diagonals, then install mesh without racking the frame.
Is a frame kit the right repair?
On a narrow screen, scroll this table sideways to see every column.
| What you see | Best next step | Why |
|---|---|---|
| Mesh torn but frame straight and retainer hardware works | Rescreen the existing frame | You do not need a frame kit |
| Old frame bowed, crushed or corners split | Evaluate the damaged frame | A new rail assembly may be more dependable |
| Entire insect screen missing, opening has recognized screen tracks/retainers | Identify window maker and screen system, then measure the correct replacement reference | Missing screen means no original outside measurement to copy |
| Proprietary integrated screen, retractable screen or unusual clip system | Contact manufacturer with unit ID and photos | Commodity frame kits may not fit |
| Damaged glass, sash, safety glazing, window framing or structural fall protection | Professional repair assessment | A thin insect-screen frame is not a safety barrier |
A screen keeps insects out when the right mesh and mounting fit, but must not be treated as fall protection for a child, adult or pet. Never lean on an installed insect screen. If access requires an unsafe ladder position or exposure to an exterior drop, use a professional.
Open desktop diagram ↗ Open mobile diagram ↗
Read the diagram: three checkpoints
- Match key and rail profile
- Dry-fit before cutting all
- Compare finished diagonals
Before buying: document the window and retainer system
- Window maker / model. Record labels or model identifiers if available; photographs of the upper and lower tracks and both vertical corners help a specialist identify the design.
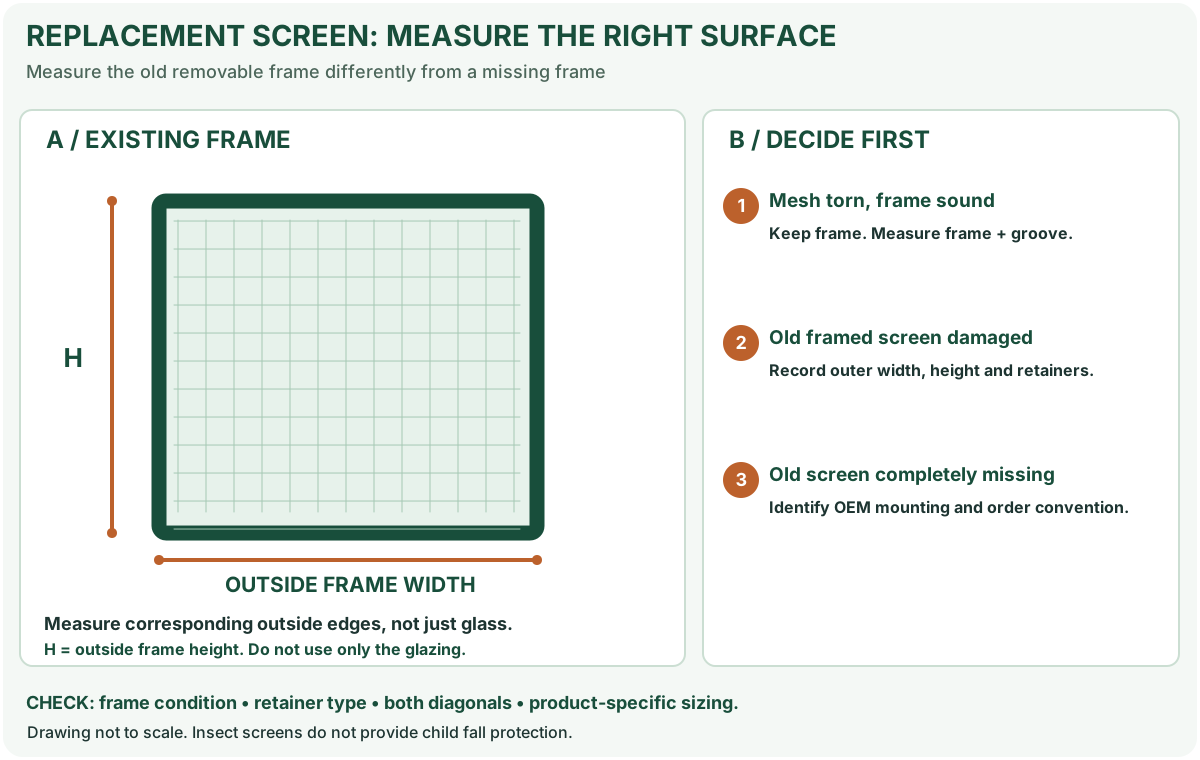
- Target screen outside dimensions. If a sound original frame exists, measure its outer width and height at multiple points. If missing, do not automatically use glass size or inside jamb size as the finished-frame order size: screen springs, lips, channels and receiving features matter.
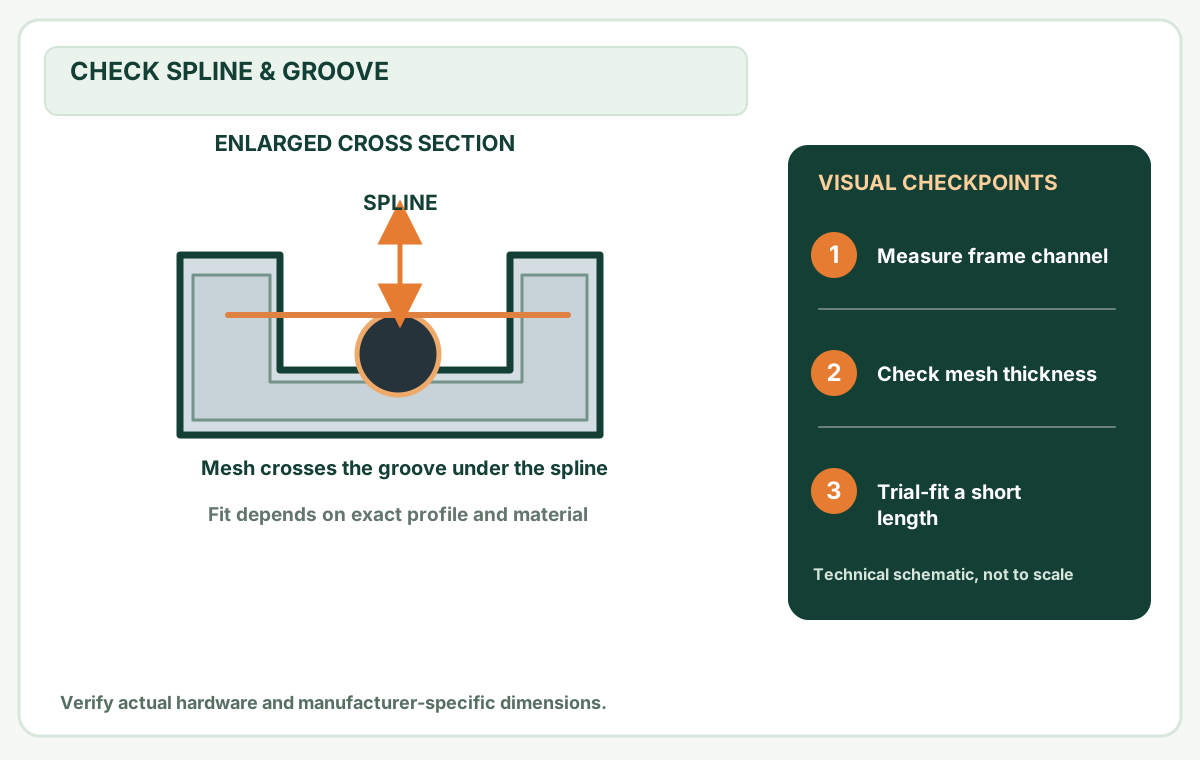
- Rail profile. Record face width, thickness, spline groove location, frame color and corner style. A "5/16 in" listing may describe one profile dimension; it does not prove fit in every opening.
- Corner geometry. Save a photo or supplier drawing of the corner key, including how far it is inserted and whether it adds an exposed length to the finished assembly.
- Attachment method. Identify spring clips, plunger pins, turn buttons, pull tabs or another manufacturer-specific retainer. A screen that physically fits the opening but cannot be retained safely is not ready for use.
Use MendNook's screen measurement decision path when unsure whether you are measuring an old frame or the receiving opening. Use the screen-frame squareness guide before copying dimensions from a distorted frame.
What belongs in a frame kit?
Some kits include four aluminum rails, four corners and spline; others include clips or pull tabs, and some omit screening mesh. For example, the Screen Tight 5/16-in frame kit listing identifies pre-cut frame fasteners, spline and four corners. A different 5/16-in knock-down kit listing notes pre-cut rails, corners, hardware and spline, but screening is not included. Package content changes; read the actual item and SKU rather than assuming all kits are complete.
Make a before-shopping record:
On a narrow screen, scroll this table sideways to see every column.
| Item | Required check |
|---|---|
| Aluminum frame rails | Compatible profile, correct color and sufficient uncut length |
| Corner keys | Exact fit in rail profile; chosen 90-degree assembly method |
| Mesh | Fiberglass, aluminum or specialty fabric compatible with spline groove |
| Spline | Manufacturer-published combination for groove and chosen mesh |
| Screening roller | Compatible wheel edge for pressing spline, not for deforming channel |
| Retainer clips/pins/pull tabs | Match original retention method, not simply "universal" marketing |
| Cutting equipment | Approved fine-tooth metal saw or cutter, secure work support, deburring tool, eye/hand protection |
Do not buy a heavier pet-resistant fabric before verifying its thickness and spline compatibility. A thick mesh can change the retainer fit.
Calculate cut lengths from your actual corner keys
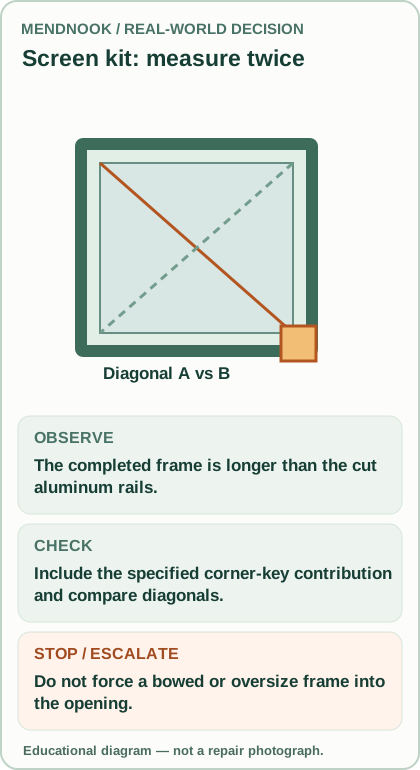
The key distinction is finished outside dimension versus length of an individual straight rail. A frame assembled with exposed external-corner shoulders differs from one whose corner keys are entirely inserted within the extrusion. No universal subtraction value is reliable across those systems.
Use this worksheet for the specific kit:
- Desired outside finished width, measured from the correct frame reference:
W. - Desired outside finished height:
H. - Width added by the fully assembled left and right corner geometry, according to the manufacturer's drawing,
Cw,leftandCw,right. - Height added at the top and bottom corners,
Ch,topandCh,bottom. - If those are truly external added lengths for this connector design, straight horizontal rail length is
W - Cw,left - Cw,rightand vertical rail length isH - Ch,top - Ch,bottom. If the connector is flush or sits fully inside the cut profile, the formula is different.
Worked example, hypothetical only: a particular connector is documented to add exactly 1/4 in externally at each end of a horizontal rail. To make an outside width of 30 in, that specific hypothetical rail would be cut to 30 - 1/4 - 1/4 = 29 1/2 in. The numbers are illustrative; do not use 1/4 in as a Screen Tight, RITESCREEN or other brand's actual corner specification. Confirm the supplier's assembly convention first.
When the diagram isn't available, ask the kit manufacturer or do a supported mock assembly with scrap pieces and a careful overall measurement rather than cutting all rails based on a guess. Make a one-piece fit check before committing to four cuts.
Cut and dry-assemble the rails
- Lay the rails on a clean, stable bench with the spline grooves facing the orientation stated by the kit. Photograph the untouched kit and corners.
- Mark each rail from the exact supplier-defined cut reference. Label top, bottom, left and right before making a cut. Support the thin extrusion to avoid twist or crushing.
- Use the maker-approved cutting tool with suitable eye and hand protection. Never attempt cuts while balancing the rail across your knee or a ladder.
- Deburr carefully, keeping the corner-key socket and spline groove clear of protruding metal chips; check the ends are square when the kit calls for square cuts.
- Dry-insert corners without distorting the profile. An oversize corner, split metal sidewall or forced joint is a mismatch — not a reason to hit the assembly harder.
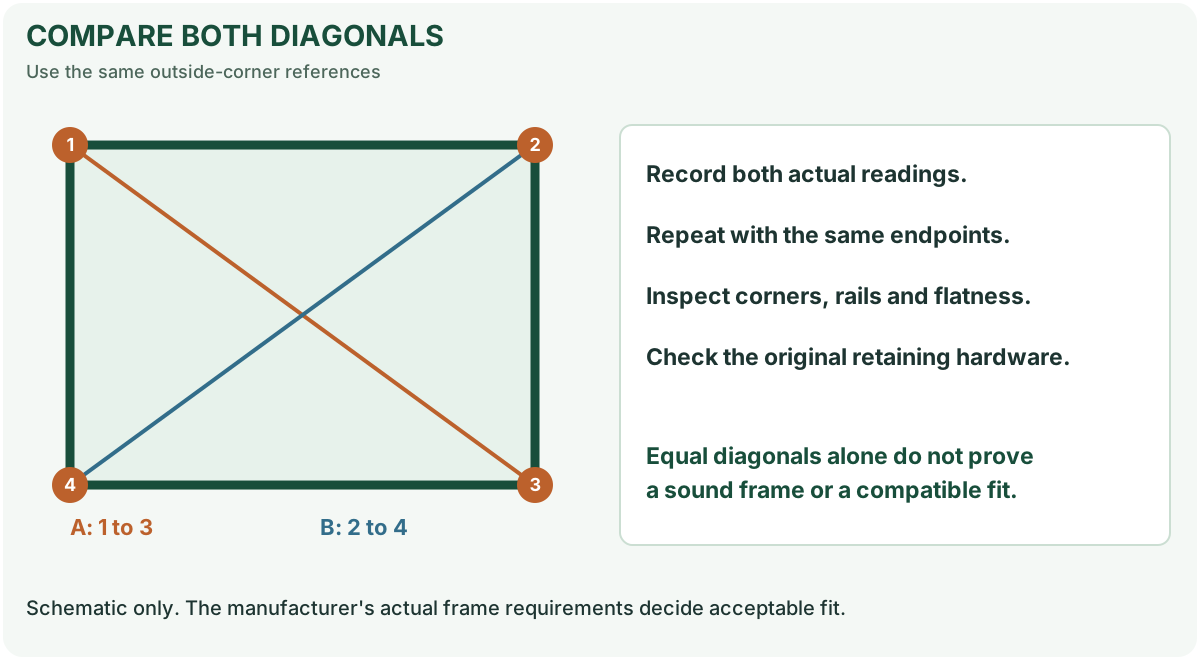
- Lay the rectangle on a flat table and measure both outside diagonals using the same reference corners. Compare the two, inspect rail straightness and confirm the intended finished width/height.
- If the two diagonals differ, reseat joints and recheck rather than using the screen mesh to pull the frame square. Check the maker's acceptable tolerance; do not claim that a mathematically equal diagonal alone guarantees fit in a warped opening.
Use the frame diagonal calculator to compare the theoretical geometric diagonal to observations, remembering that it does not establish a factory installation tolerance.
Install screening after the frame is stable
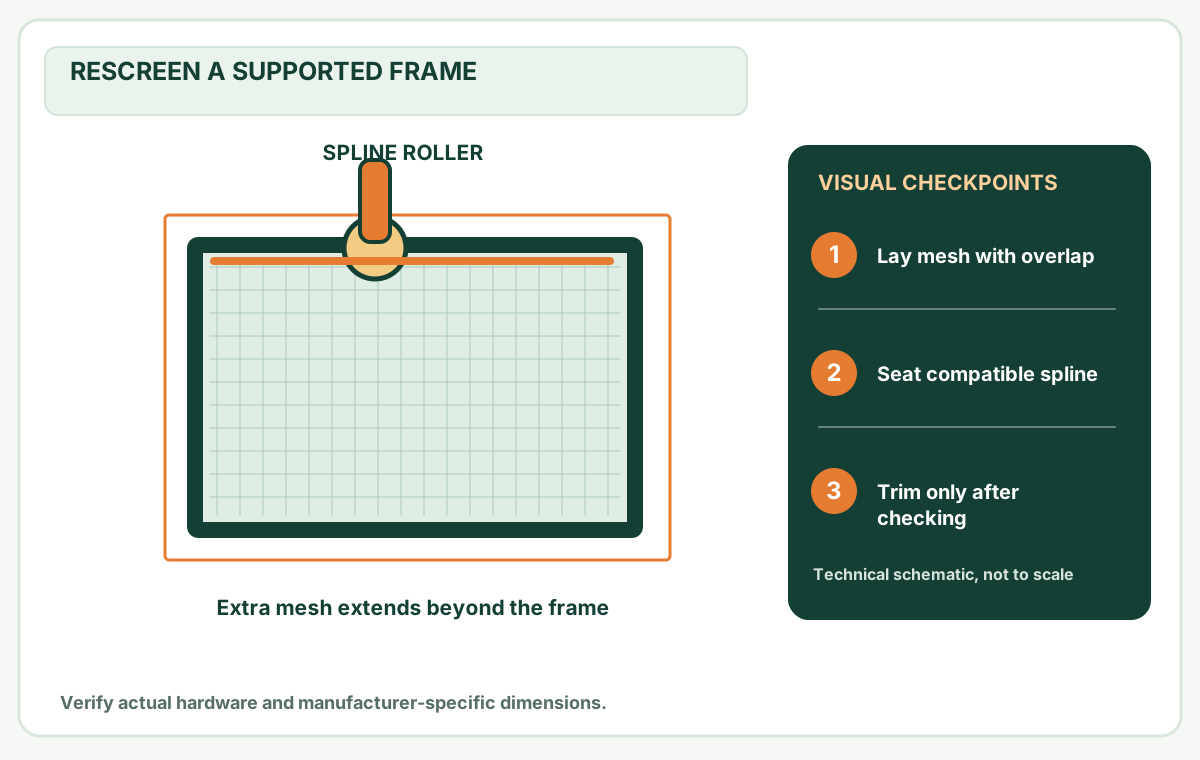
The Phifer DIY screen-installation guide describes working on a flat surface, keeping fabric square and using spline within the groove without trimming until secure. The length of initial material overhang differs among Phifer's published workflows, so follow the relevant method for your frame and mesh rather than one universal allowance.
For a typical compatible spline-retained fiberglass system:
- Keep the assembled frame fully supported on a clean, flat table. Tape or clamp only in a way that protects the extrusion and keeps the spline groove accessible.
- Spread sufficient uncreased mesh beyond all four grooves so you can hold it aligned while rolling. Use the supplier's mesh-overhang directions.
- Trial-fit a short spline section with the actual mesh. If the frame bows or the spline refuses to seat, stop and check the groove and spline combination.
- Start at the maker-recommended location and roll the retainer in gently. Keep the weave reasonably square rather than pulling one side extremely taut.
- Inspect all corners and both diagonals again before final trim; no rail should visibly bow and no corner should be opening.
- Trim from the outer edge of the spline channel with controlled cuts that protect the newly installed screen and the user's hands.
If your mesh has unusual thickness, directional orientation or manufacturer requirements, that product's directions override generic fiberglass procedures. See spline selection and the mesh material comparison.
Fit and retention check: the step many tutorials omit
Before calling the repair complete, fit the entire screen system — not just a rectangle:
- Verify the designed spring or clip side is oriented correctly and that all intended retainers engage.
- The screen should seat without being bent into the opening or wedged against sash hardware.
- Check for corner daylight or gaps, loose frame movement and trapped pull tabs.
- Open and close the operable window normally. Check that the screen cannot block sash operation or any escape opening.
- If a safety-critical window or high-elevation opening is involved, stop and obtain manufacturer or professional help.
Never use the screen as a barrier to stop a child or pet falling. Insect screens are not safety guards. A frame may look tight while a spring retainer is absent.
Common reasons a new screen frame does not fit
On a narrow screen, scroll this table sideways to see every column.
| What happened | Likely measurement/assembly question | Correct next step |
|---|---|---|
| Outside width is too large | Did corner shoulders add length? Was the glass width mistaken for frame width? | Recheck finished outside reference and kit-specific corner convention |
| Frame is diamond-shaped | Do diagonal readings differ? Are corners fully seated? | Check square joints and rail straightness before meshing |
| Mesh is wrinkled | Is spline seated and fabric aligned? | Inspect support and mesh tension; don't simply over-pull |
| Frame bows after mesh installation | Is spline or mesh too thick? | Verify material compatibility and replace mismatched retainer |
| Screen fits but rattles | Are spring clips or retaining lips missing or wrong? | Identify the original retainer style; see screen retainer clips |
| New screen leaves a gap | Was the correct reference used at the track? | Follow screen gap diagnosis |
Keep a frame-building record you can verify
Take four reference photographs before cutting: the actual window's receiving channel, a close-up of the retaining clip or spring, the new frame kit's label, and the corner-key profile beside a ruler. After you establish the exact supplier's cut convention, photograph one marked rail and one dry-fitted corner before sawing the remaining pieces. These pictures help distinguish a mistaken overall dimension from an incompatible component.
Lay the dry-assembled frame flat and record the two outside diagonals in the same photograph series. After the compatible mesh and spline are seated, compare those diagonals again, then photograph both corner joints and the location of any frame bow. Finally, photograph the frame in its receiving track with its retaining hardware actually engaged — not simply held in the hole.
Accept: fit is secure, screen moves only as designed, mesh and spline remain seated, window can still operate, and no unsafe exterior access is required. If not: send measurements, kit SKU, connector detail and failure photographs to the maker before ordering more material.
Frequently asked questions
Can I make a screen if the old screen is missing? Sometimes, but identifying the window's screen channel and retention system comes first. A tape measurement across the glass alone is insufficient.
Do I cut each rail to the finished width or height? Not until the corner geometry is known. Some connectors add to the outer dimension and others fit within the rail.
Can I reuse old spline? It depends on condition, diameter, profile and the new mesh. For an unknown frame, follow the current manufacturer chart and test a short section.
Will a stronger screen prevent someone falling? No. A typical removable insect screen is not fall protection, even if the frame and mesh feel tight.
Sources and scope
- Phifer — How to Replace or Repair a Window or Door Screen: supported frame, mesh alignment and spline workflow.
- Screen Tight 5/16-in frame kit retail specification: example components, not a universal dimension.
- Aluminum window screen knock-down kit retail specification: example of a kit sold without screening.
- RITESCREEN screen frame kit questions: product-specific measurement guidance; do not generalize its allowances.
Evidence limits: This article describes researched decisions, not a frame assembled and tested by MendNook. Exact kit instructions and fall-safety requirements control the work.
Questions before you buy or repair
Do rail cuts equal finished frame width?
Not necessarily. Connector shoulders can change the outside dimension, so use the kit's documented corner geometry before cutting.
Can I build a frame if the old one is missing?
Only after identifying the receiving track, clip or spring system; a glass measurement is not an adequate screen order dimension.
Will a finished insect screen prevent falls?
No. Insect-screen mesh and its removable frame are not safety guards, regardless of how securely they feel fitted.
These answers summarize the guide's documented evidence. Check the cited sources and exact model instructions above before ordering parts.
After the project: did it work?
After completing only product-approved work, document what you actually observe instead of assuming a replacement part resolved the fault.
- Success looks like
- Completed rectangular frame remains square, spline and mesh stay seated, retention hardware engages and sash operates.
- If it still fails
- Check corner cut convention and both diagonals; stop if rails bow or frame must be forced into the opening.
- Keep for next time
- Kit SKU, corner key, rail cut convention, finished outside dimensions, diagonals, mesh and retention results
Keep your actual measurements and observed result in your private project notebook. This is a verification checklist, not a product certification.
My project record: progress and take-home checklist
Select a progress stage if helpful. This is a personal record only, not a claim that MendNook verified your repair.
Includes this guide's specific diagnosis, decision, safety, and outcome checks, plus any note entered above. Nothing is sent to MendNook; downloads and copy operations stay under your control.