First identify the exact pressure, clip or adhesive mounting system. A no-drill label does not guarantee compatibility with every window profile or a damage-free installation.
Before you buy or repair
- Record first
- Exact SKU, flat contact surfaces, recess width/depth and handle projection
- Make the decision
- Whether the chosen no-drill mounting system has confirmed substrate fit and product-specific adjustment/engagement instructions
- Stop & verify if
- Unknown mechanism, fragile recess, unsafe egress, missing child-safety device or loose pressure mount
Jump to a section
- Choose the mechanism, not just the fabric
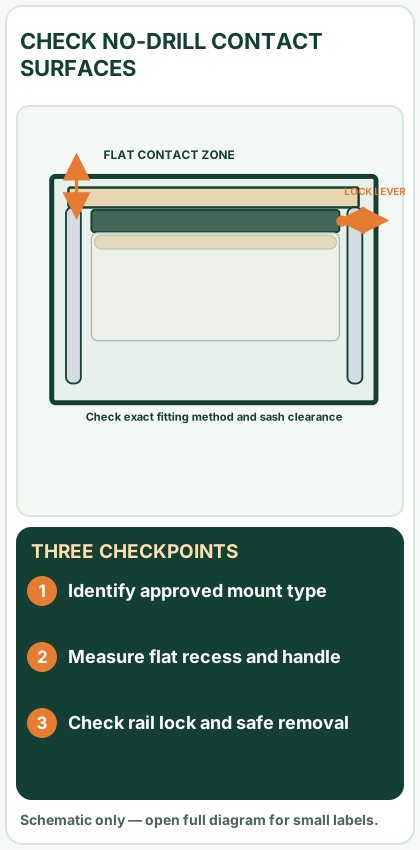
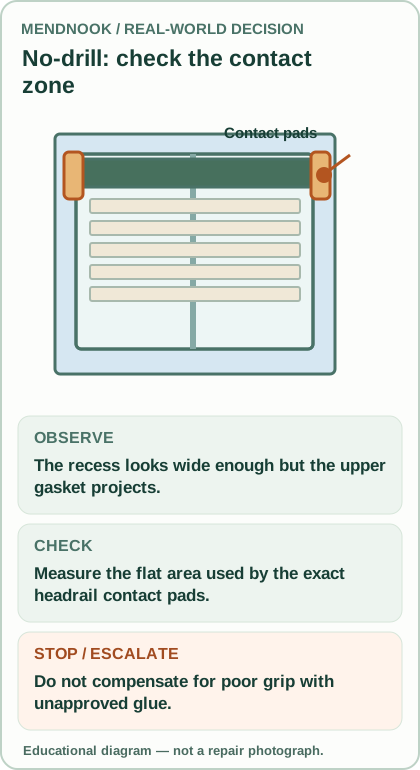
- Read the diagram: three checkpoints
- First five checks: is the window suitable?
- Measure the opening and preserve the raw readings
- Installation sequence for an identified LEVOLOR no-drill headrail
- Removal without sudden release
- Troubleshooting: identify the fault before changing pressure
- Worked buying decision: rental with painted aluminum frame
- Keep a useful fitting record for returns or support
- Questions readers ask
- Sources and verification limits
- Questions before you buy or repair
- After the project: did it work?
Quick answer: There is no single "no-drill blind" mechanism. A headrail that locks by pressure inside a recess, a blind that uses specially designed clip brackets, and an adhesive-mounted treatment have different mounting surfaces, size limits and removal procedures. Identify the exact product and its fitting instructions before measuring for an order. "No drilling" is not a promise that every surface will be damage-free or that every product will support a heavy shade.
Choose the mechanism, not just the fabric
On a narrow screen, scroll this table sideways to see every column.
| What the packaging or manual says | What actually retains the blind | What you must confirm |
|---|---|---|
| Adjustable, no-drill or tension headrail | Model-specific end caps and locking mechanism contact the recess | Usable flat contact surfaces, leveling, range of adjustment and whether an extra adhesive pad is required |
| No-drill Roman shade with push pad | A built-in tightening system bearing against the sides of the recess | Whether its supplied key operates an internal lock, the prescribed direction and correct contact location |
| Clip-on blind for a compatible frame | Brackets clip to an eligible frame profile | Frame type, gasket clearance, handle clearance, maximum size and manufacturer's clip specification |
| Adhesive-supported treatment | Adhesive transfers load to a specified clean substrate | Surface material, allowable product weight, curing instructions, temperature, finish compatibility and removal warning |
| Conventional screw-mounted blind | Fasteners and substrate carry the load | This is not a no-drill installation even if the blind style looks similar |
For one real example, LEVOLOR's 2026 No-Drill Headrail mounting instructions cover cellular, banded and roller shades. The manual describes an adjustable end cap and a lever that locks the rail. On smooth substrates such as painted aluminum or tile, that particular manual instructs use of the included double-sided adhesive on both end caps. Those details do not authorize applying tape to a different brand's mechanism.
Blinds.com's no-drill product category shows that cellular, roller, Roman and other shade styles can use no-drill configurations. The label describes an installation category rather than a universal bracket standard.
Open desktop diagram ↗ Open mobile diagram ↗
Read the diagram: three checkpoints
- Identify approved mount type
- Measure flat recess and handle
- Check rail lock and safe removal
First five checks: is the window suitable?
- Identify the exact product. Save the SKU, order page, current installation PDF and any maximum width or height limitations. A shade that is sold with optional no-drill hardware can have different mounting requirements from its screw-fixed version.
- Locate a genuinely flat, sound surface. Check both upper side jambs or the specified attachment locations. Flaking paint, crumbling plaster, loose timber trim, rough masonry, brittle vinyl and flexible seals are reasons to pause, not surfaces to force a pressure mount onto.
- Check usable recess depth. Measure from the planned contact plane to the nearest sash handle, crank, tilt mechanism or projecting trim. Do not assume that nominal frame depth is unobstructed depth.
- Check the complete operating path. Will the headrail interfere with window handles, emergency-egress opening, ventilation, screens, shutters or a security device? The installed covering must not prevent an emergency exit.
- Check who uses the room. Prefer cordless or inaccessible-cord products where children are present. Never remove or improvise a chain-tension device because the mount is advertised as "no drill."
Stop before ordering if you cannot determine the product's mounting method or if the manufacturer says the recess or surface is unsuitable. A returned blind is less serious than a falling headrail, damaged frame or blocked exit.
Measure the opening and preserve the raw readings
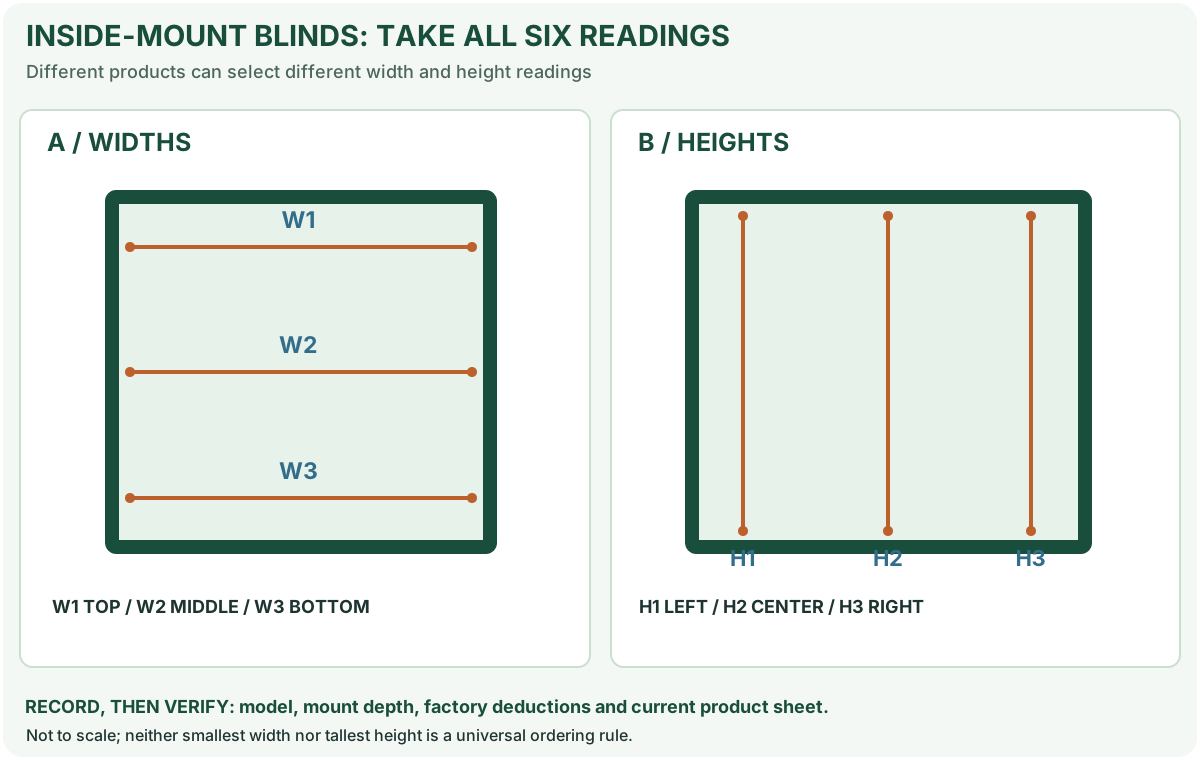
Record the top, middle and bottom widths, left, center and right heights and usable depth at the location where this specific system bears against the frame. Use a rigid steel tape, keep fractions or millimeters exactly as read, and photograph the reference points. Check whether the sides are parallel and whether the top contact line is level.
Here is a hypothetical observation record, not an approved order:
On a narrow screen, scroll this table sideways to see every column.
| Reading | Example |
|---|---|
| Top width | 34 7/8 in |
| Middle width | 34 13/16 in |
| Bottom width | 34 3/4 in |
| Left / center / right height | 59 1/2 / 59 3/8 / 59 1/2 in |
| Usable recess depth | 2 1/8 in |
| Handle projection | Must be measured |
| Exact make and SKU | Unknown — do not order yet |
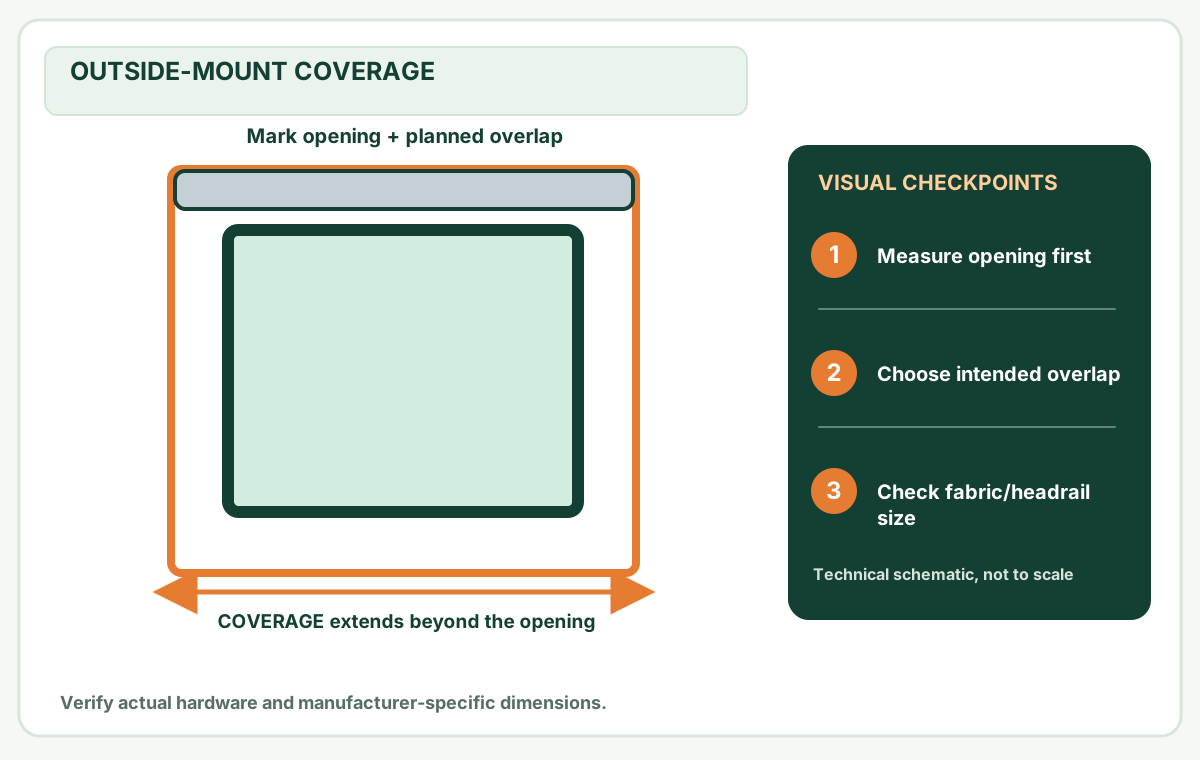
The narrowest measured width in this illustrative opening is 34 3/4 in; that is not automatically the order width. The manufacturer may specify a particular measurement location, a factory deduction, a minimum flat contact area or a specific adjustment range. Use our inside-mount blind measuring guide for a full opening record; then apply only the selected product's current rule. Do not subtract an extra allowance unless its instructions say the buyer must do so.
In the UK or Australia, record in millimeters when that is how the supplier requests dimensions. In North America, keep the original inch fraction if the ordering form requires it. Do not convert and round repeatedly.
Installation sequence for an identified LEVOLOR no-drill headrail
This is a model-scoped reading of the above LEVOLOR installation document, not generic installation advice:
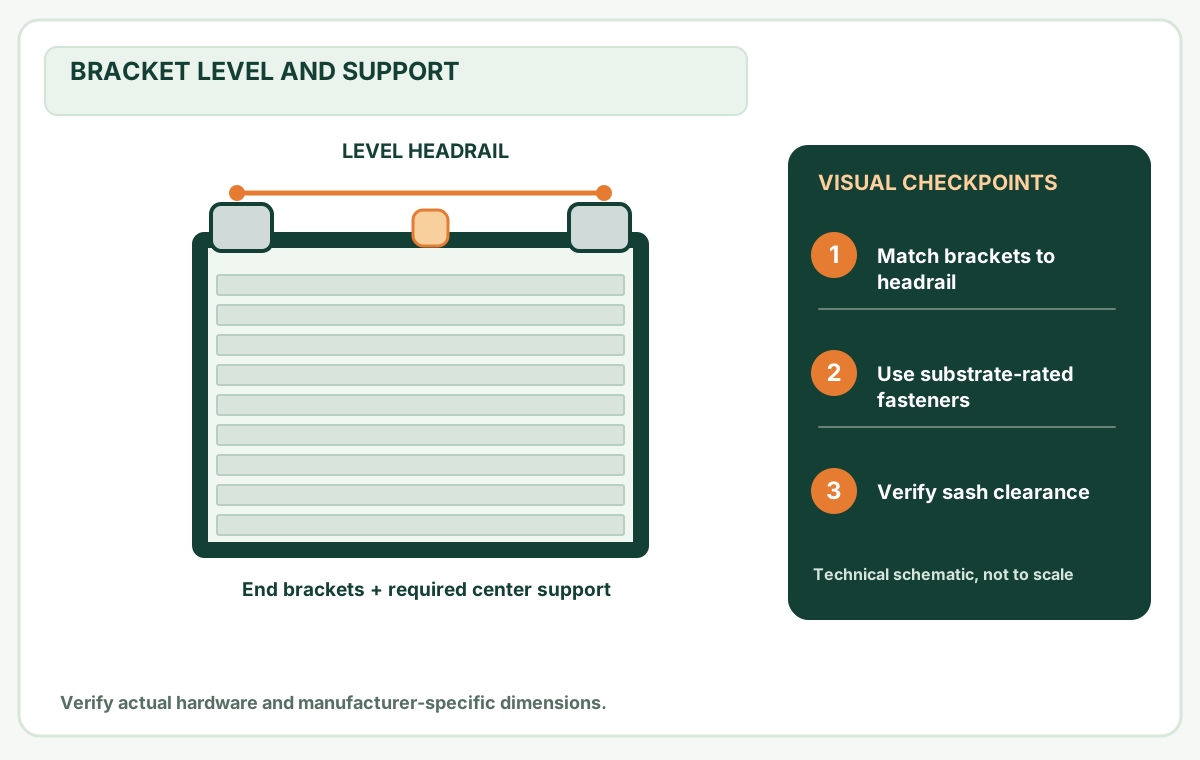
- Unpack the mounting assembly, confirm the specified brackets are preattached, identify the lever and check that both end caps are present. Read the entire model document including removal and child safety.
- Hold the unladen headrail at the manufacturer's stated position in the opening. Check level. The published sequence begins with its lever end tight to the frame.
- Use the adjustable end cap only within the mechanism's published range. The manual shows a maximum 1/2-in end-cap adjustment on the illustrated version; it is not a universal allowance for other rails.
- If this exact installation involves the smooth surfaces named in the manual, follow its supplied adhesive-pad step; do not generalize that to all painted surfaces or other systems.
- Engage the locking lever as directed, while keeping hands clear of pinch points. The rail must remain level and stable before attaching the shade.
- Attach the specific shade's headrail or cassette using the method for that shade variant: the LEVOLOR document distinguishes cellular from roller and banded engagement. Confirm the prescribed latch or click at each bracket.
- Operate the shade through its intended travel without pulling on the bracket assembly. Look for headrail movement, end-cap lift, fabric rubbing, obstruction or a sash that can no longer open normally.
Do not use this sequence for an adhesive-only or clip-on product. Do not test the rail by yanking it or hang extra weight from it; follow the maker's ordinary-use checks. If contact fails, stop using the product and obtain the approved fit/removal instructions rather than packing wedges behind the end caps.
Removal without sudden release
Removing a pressure-fit headrail is not the reverse of hanging a conventional blind. LEVOLOR tells users to remove the shade first according to its shade instructions, support the mounting system, then use a flat screwdriver to release the lever. The document explicitly warns that the lever releases abruptly. Keep your hand clear of its travel. That screwdriver use applies only to removal of the identified assembly, not an invitation to pry a different brand's lock.
Protect painted or finished surfaces and plan the support position before beginning. A claim of "damage-free removal" from marketing copy cannot replace checking the current paint condition or adhesive instructions.
Troubleshooting: identify the fault before changing pressure
On a narrow screen, scroll this table sideways to see every column.
| Symptom | Inspect first | Avoid |
|---|---|---|
| Rail tilts to one side | Level and contact plane; any mis-set adjustable end cap | Forcing the lever on a slanted rail |
| Rail slips after an installation | Correct SKU, mounting material, permitted adjustment and any required supplied pads | Adding random foam or glue |
| Fabric catches a handle | Usable depth and projection at the headrail and travel path | Pulling harder or bypassing the handle |
| Rail fits but window cannot open | Egress, sash clearance and position | Leaving a blocked escape window |
| Cord loop or tension device is loose | Current product safety/installation requirements | Omitting the tension device to keep a "no-drill" setup |
The LEVOLOR document also says an accidentally overextended movable end cap has its own release-tab procedure; don't force the cap inward using generic pliers. Contact support if the system isn't responding as documented.
Worked buying decision: rental with painted aluminum frame
Scenario: A renter has a window with a painted aluminum interior recess and a projecting handle. The existing paint is sound, but no product SKU has been chosen.
- First measure the recess and handle projection; record top, middle and bottom width.
- Compare each shortlisted shade's real no-drill mechanism, its approved contact surface and its projected cassette depth. Ignore the claim that every no-drill shade "fits most windows."
- If considering the named LEVOLOR system, inspect the model-specific supplied adhesive/end-cap guidance for smooth painted aluminum; do not purchase third-party tape on the assumption it is equivalent.
- Verify lease conditions, opening clearance and any emergency-egress function before checkout.
- If the chosen product lacks clear compatibility or removal instructions, choose a different system instead of improvising installation.
A successful outcome is a correctly supported headrail that remains level in ordinary use, a shade that travels without binding, an undamaged and fully usable window, and preserved child-safety hardware. This is an observable user check, not a certified load or durability test.
Keep a useful fitting record for returns or support
Before ordering, save a clear picture of the product label or SKU next to your actual window's recess and handle. Photograph the width reading at the manufacturer's specified contact height, and make a second picture showing the free recess depth, not just nominal jamb thickness. Keep a photo of each contact surface; paint damage or a projecting gasket can explain why a pressure system slides.
During a permitted installation, note the exact end cap and lever positions on the named model, then take a level-headed picture of the mounted rail before adding the shade. After fitting, record whether the window fully opens, the shade moves through its ordinary range, and the rail stays seated. A small caption such as "left contact pad, manufacturer-installed, no visible gap" is more useful to support than an unlabelled beauty shot. Do not simulate these checks with AI-generated repair photos.
If the fit fails: preserve the product instructions, measurements, photographs and order number. Ask the retailer for an approved alternative rather than wedges or extra glue.
Questions readers ask
Can I put no-drill blinds on a uPVC window? Only if the exact product is approved for that profile and its seals, clips and hardware. A product marketed for a flat timber recess is not automatically suitable for a flexible or profiled uPVC frame.
Are no-drill blinds always renter-safe? No. The attachment may load fragile paint or require adhesive, and a window covering may still violate tenancy rules. Confirm both the lease and the mounting instructions.
Do I always need to subtract half an inch? No. A depicted adjustment limit is not an ordering deduction. Follow the SKU's measuring specification.
Is a cordless blind safer than one with a loop? Cordless or inaccessible-cord configurations can reduce accessible cord hazards, but always follow the product's child-safety warnings, placement and operating instructions.
Sources and verification limits
- LEVOLOR — How to Install No-Drill Headrail Mounting System, 2026 PDF. Exact-document mechanism and child-safety limitations.
- Blinds.com — No-Drill Blinds and Shades category. Category breadth, not an endorsement of every product or universal fit.
- Blinds.com — Installing Blinds and Shades. Different mounting systems and product-specific instructions.
Evidence limits: This is research-based guidance, not a report of a MendNook installation. Check the exact manufacturer's current manual and applicable safety requirements.
Questions before you buy or repair
Can I use no-drill blinds on uPVC?
Only when that exact product approves the frame profile and contact surfaces; check gaskets, clearance and model fitting instructions.
Is an adjustable end-cap travel a sizing deduction?
No. Adjustment travel and factory order deductions are different; do not subtract a generic amount from your recess.
Does no-drill guarantee no paint damage?
No. Pressure and required adhesive can affect finishes; test suitability and read removal directions before ordering.
These answers summarize the guide's documented evidence. Check the cited sources and exact model instructions above before ordering parts.
After the project: did it work?
After completing only product-approved work, document what you actually observe instead of assuming a replacement part resolved the fault.
- Success looks like
- Identified headrail remains level and retained during ordinary use; shade travels correctly and window opens safely.
- If it still fails
- Stop if a cap slips, lever loosens or sash cannot open; verify SKU and correct contact substrate before reinstalling.
- Keep for next time
- Manufacturer, headrail SKU, mounting depth, contact surfaces, adjustment observations and final window-operation notes
Keep your actual measurements and observed result in your private project notebook. This is a verification checklist, not a product certification.
My project record: progress and take-home checklist
Select a progress stage if helpful. This is a personal record only, not a claim that MendNook verified your repair.
Includes this guide's specific diagnosis, decision, safety, and outcome checks, plus any note entered above. Nothing is sent to MendNook; downloads and copy operations stay under your control.