Check hinge and jamb geometry before filing or moving a strike plate. A latch that clicks only under force does not certify the door is secure.
Before you buy or repair
- Record first
- Latch operation with door open, strike contact mark, top/hinge/latch reveals and weatherstrip compression
- Make the decision
- Whether manufacturer identifies adjustable strike or the issue requires correcting geometry first
- Stop & verify if
- Fire-rated/security door, damaged frame, broken lock, unsafe egress or severe sag
Jump to a section
- Pinpoint exactly which contact fails
- Read the diagram: three checkpoints
- Find the interference with a safe, non-destructive test
- Identify the strike plate and latch arrangement
- Seven-step decision workflow
- Why weatherstripping may cause the symptom
- Faults that are not sensible DIY strike work
- Record the latch problem before adjusting hardware
- Common questions
- Source and limitations
- Questions before you buy or repair
- After the project: did it work?
Quick answer: A door that reaches its stop without the latch engaging needs a different check from one that scrapes the head jamb and cannot close. Do not start by filing the strike plate. First inspect door margins, hinge fixings, latch travel, weatherstrip pressure and the receiver opening. Therma-Tru's official troubleshooting guide lists both adjustable strike misalignment and sagging/out-of-square door geometry as possible causes, and distinguishes hinge/frame alignment from hardware problems.
Pinpoint exactly which contact fails
On a narrow screen, scroll this table sideways to see every column.
| Observation | First diagnostic clue | Avoid |
|---|---|---|
| Latch tongue misses above strike hole | Door dropped or receiver too high/low | Filing strike without gap comparison |
| Latch tongue touches front strike lip | Horizontal alignment or too-tight gasket | Slamming door |
| Deadbolt works only when door is lifted | Uneven jamb reveals or hinge support issue | Repeatedly forcing key |
| Door closes with latch retracted but not extended | Latch/strike fit | Grinding off latch tongue |
| Door binds on threshold before meeting strike | Sag, swelling or sill/contact problem | Shimming strike to conceal rub |
| Door closes but blows open | Latch not securing correctly | Treating it as secure |
Security note: A door that does not latch is not secure; arrange safe temporary protection and qualified repair promptly. Do not leave an unsafe external entry as if fully repaired.
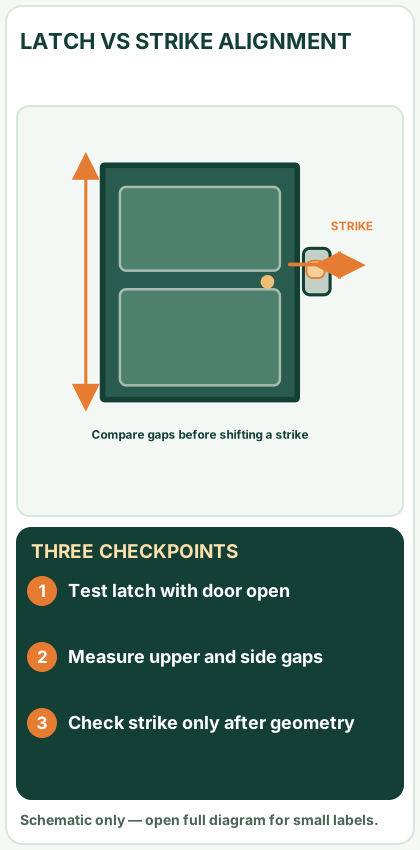
Open desktop diagram ↗ Open mobile diagram ↗
Read the diagram: three checkpoints
- Test latch with door open
- Measure upper and side gaps
- Check strike only after geometry
Find the interference with a safe, non-destructive test
With the door held in a safe position, check the latch tongue while the door is open. It should extend/retract smoothly using the existing handle — do not disassemble a spring mechanism blindly. Record whether the problem appears only when the door contacts the frame. Close gently until it meets resistance and photograph the apparent contact position; never use your hand in the narrowing hinge-side pinch zone.
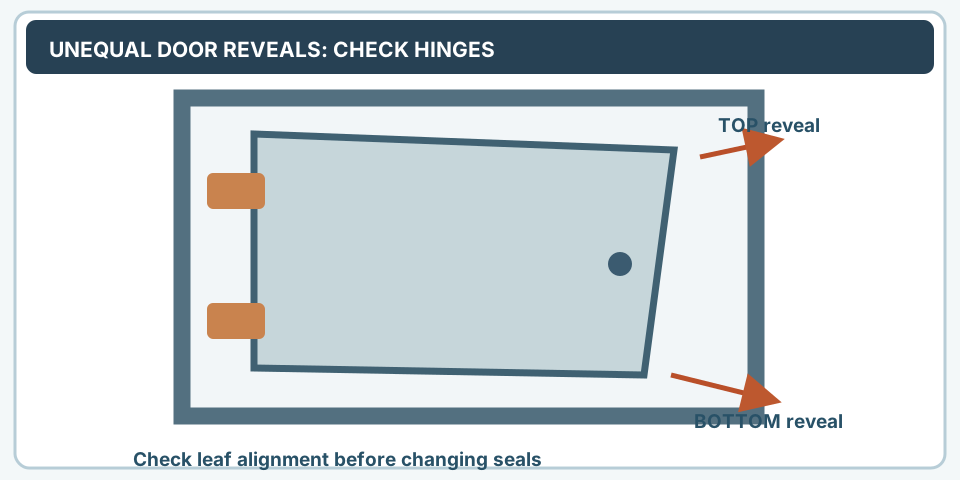
Compare the top gap, hinge-side gap and lock-side margin at top, center and bottom. A widening reveal on the latch edge or a tilted head margin can indicate hinge sag or frame distortion. Therma-Tru calls out long top-hinge screws in its own specified systems, but that is not an instruction to drive random long screws into every door, especially where hidden wiring, weak framing or glass sidelight systems may be present.
Our existing entry door sagging diagnosis explains the evidence to gather before hardware adjustment. Do that first if the margins are visibly uneven.
Identify the strike plate and latch arrangement
Some strike plates are adjustable; others are fixed, mortised into a jamb or part of a multipoint system. A spring latch, deadbolt, roller catch and multipoint hook are not interchangeable. Record photos of the whole door edge, latch tongue, strike opening, strike fasteners and maker labels if present. If the door has a multipoint uPVC/composite mechanism, ask the manufacturer/installer for the relevant setting procedure rather than following a conventional wooden door's strike adjustments.
The Therma-Tru troubleshooting guide explicitly mentions realignment of an adjustable strike plate for a misaligned receiver. A non-adjustable plate may be fixed in place for a reason; do not loosen it until fit and door geometry have been diagnosed.
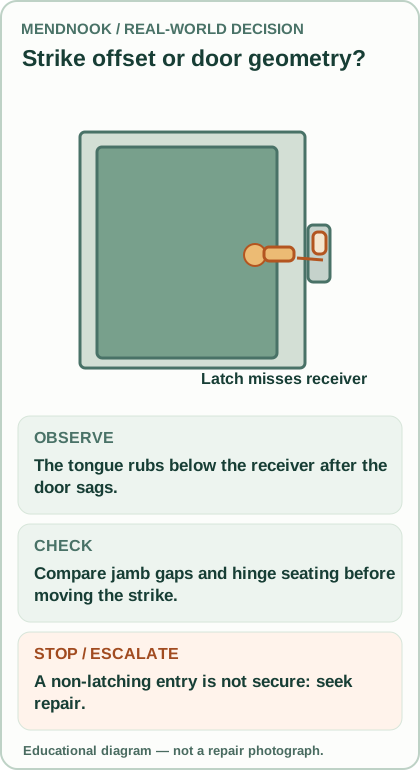
Seven-step decision workflow
- Check for a new obstruction: loose doormat, displaced sweep, swollen frame finish, a sagging hinge or built-up paint at the strike.
- Operate latch and deadbolt with the door fully open. If either catches internally even without a frame, investigate the correct lock service documentation instead of a strike alignment.
- Check reveal gaps and threshold rubbing with the door gently closed; note top, middle and bottom rather than one location.
- Inspect hinge leaves and screws visually for gaps, movement, stripped screws or a split jamb. A hinge failing to support a heavy glazed door is a professional issue.
- With no forcing, observe where the latch contacts the strike lip. A safe removable paper witness mark may help if permitted and it does not interfere with the lock.
- If the maker positively identifies an adjustable strike and the door is otherwise square, follow that maker's specific adjustment procedure. Photograph the original position before changing anything.
- Verify ordinary closing, latch engagement, deadbolt movement, full safe exit/opening and consistent gasket contact. Stop if the handle must be lifted excessively or the door suddenly binds.
Worked scenario, illustrative: The latch side at the top has a 1/4-in reveal but at the bottom has 1/8 in, while the latch marks the lower edge of the strike. This is suggestive of geometry mismatch, not proof that you must move the strike downward by 1/8 in. Measure the hinge-side and head gap as well, check frame squareness, then follow the manufacturer's geometry correction or obtain service.
Why weatherstripping may cause the symptom
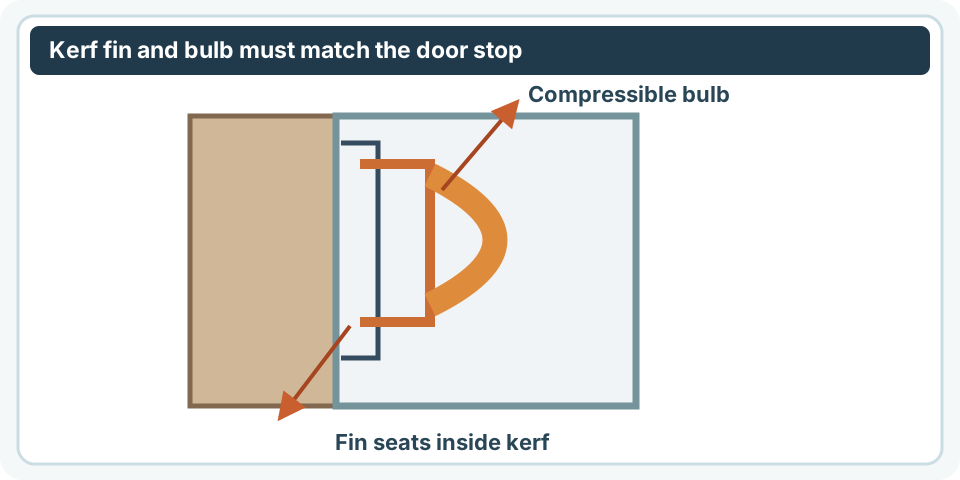
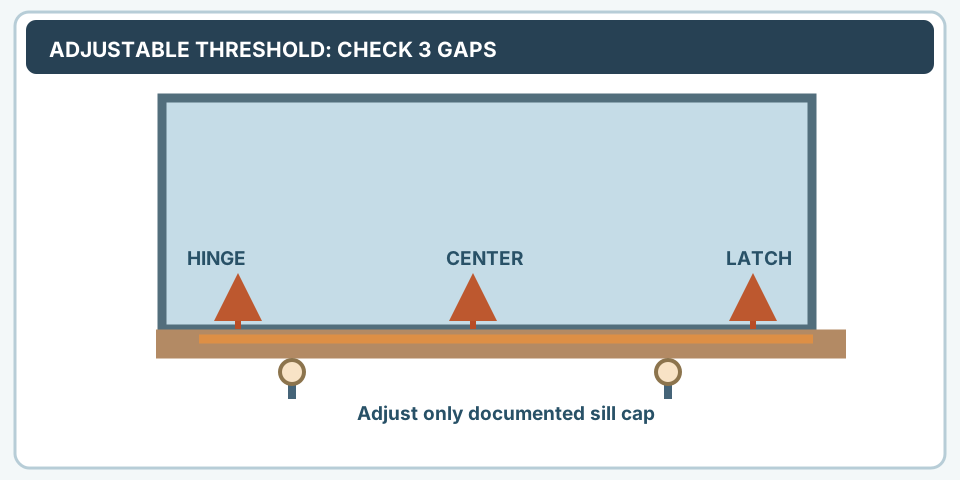
New thick perimeter seals or a raised adjustable threshold can push a door away from its strike or make a latch feel overly tight. If the latch engaged before a seal replacement, inspect whether the new seal matches the old profile and whether the door can compress it as specified. See kerf weatherstripping replacement and threshold adjustment guidance. Do not remove fire-rated or security-required seals simply to achieve an easy close.
Faults that are not sensible DIY strike work
A visibly broken latch spring, damaged gearbox, metal door with integral access-control hardware, fire door, frame detached from masonry, serious jamb rot, cracked glazing or emergency exit obstruction needs appropriate technical support. If a door's security is compromised, contact a locksmith or installer rather than repeatedly slamming it until it appears latched.
If an exterior door leaks wind and doesn't latch, the gap is not always a weatherstripping problem. The position of the latch, compression and hinge geometry must all work together.
Record the latch problem before adjusting hardware
Start with the full door in its frame and a close-up of the latch tongue operating while the door is open. Photograph the strike receiver and its fasteners. Take top, hinge-side and lock-side reveal pictures with a small ruler, keeping fingers out of the hinge pinch area. A clear image of where the latch touches the strike lip can distinguish vertical sag from excessive gasket pressure.
If the door model permits an adjustable strike, photograph its original setting before following that maker's procedure. After an authorized adjustment, record a gentle close and ordinary latch/deadbolt operation, plus the door opening normally. An external door that still does not catch is not secure.
Accept: ordinary closure, safe opening, smooth latch and lock movement, no new gasket dragging. If not: document the specific failed contact and consult the door manufacturer or qualified locksmith, rather than grinding metal by guesswork.
Common questions
Should I file the strike opening bigger? Not as a default. It can conceal sag or compromise a rated assembly.
Why does the latch click if I pull the door toward me? Gasket compression or latch alignment may be involved; assess reveal and strike position.
Can longer screws fix any sagging door? No. Frame construction, hinge style and hidden services determine safe anchoring.
Is this advice appropriate for fire doors? No universal strike modifications are safe on fire-rated or egress hardware; follow its specific approval requirements.
Source and limitations
- Therma-Tru — Door Troubleshooting Guide.
- Therma-Tru — Full Door Installation, alignment and hardware.
- Therma-Tru — Door Maintenance.
Evidence limits: The examples are source-based diagnostics; MendNook has not inspected this reader's door or certified its security.
Questions before you buy or repair
Should I file down my strike plate?
Not before checking door geometry. Enlarging a strike can conceal sag and weaken a rated or security-critical assembly.
Why must I lift a door to engage the lock?
Uneven hinges or frame alignment can shift the latch/strike relationship; record gaps before adjustments.
Can an oversized door seal stop the latch?
Yes, excessive compression can affect closing. Match the correct seal profile without removing required safety seals.
These answers summarize the guide's documented evidence. Check the cited sources and exact model instructions above before ordering parts.
After the project: did it work?
After completing only product-approved work, document what you actually observe instead of assuming a replacement part resolved the fault.
- Success looks like
- Door gently latches and locks without lifting or slamming, opens normally and retains intended weatherseal compression.
- If it still fails
- Stop if strike still misses or security, egress or hinge integrity is compromised; use approved service.
- Keep for next time
- Door and latch type, reveal readings, original strike position, intervention and final lock/exit test
Keep your actual measurements and observed result in your private project notebook. This is a verification checklist, not a product certification.
My project record: progress and take-home checklist
Select a progress stage if helpful. This is a personal record only, not a claim that MendNook verified your repair.
Includes this guide's specific diagnosis, decision, safety, and outcome checks, plus any note entered above. Nothing is sent to MendNook; downloads and copy operations stay under your control.