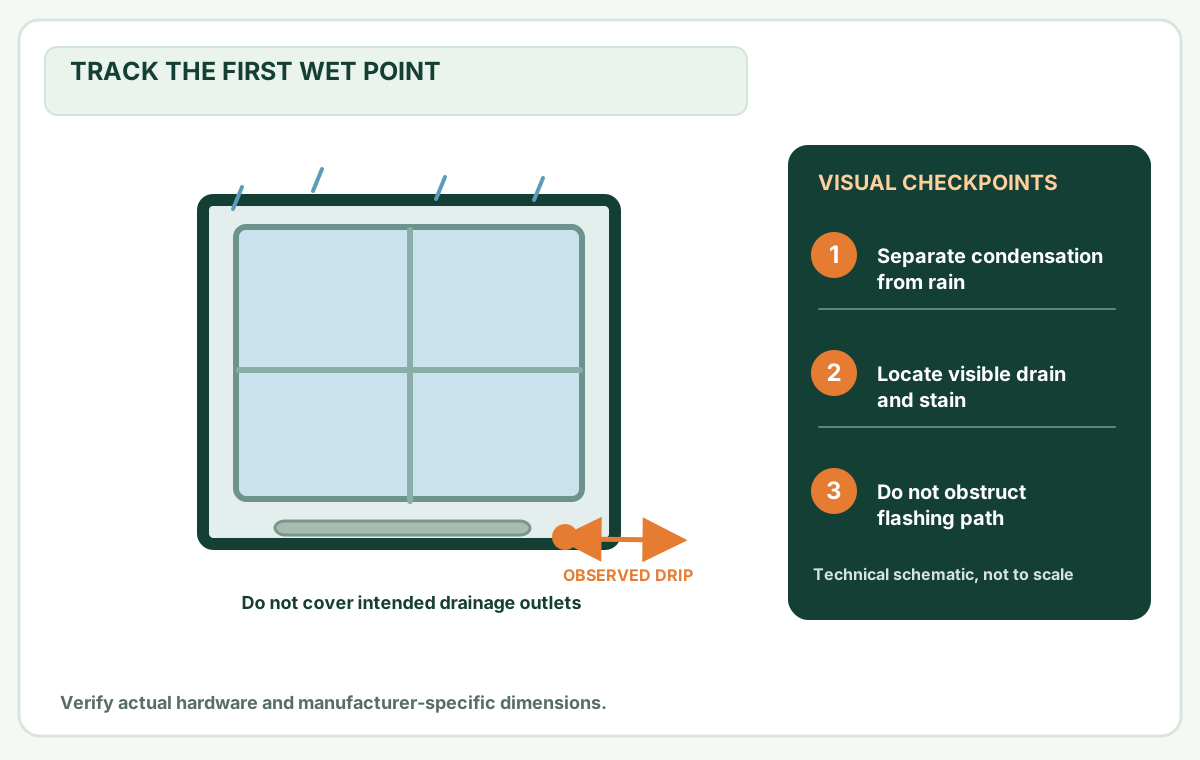
A dirty track and a blocked drain are separate issues. Clear only identified accessible weep openings using the exact manufacturer's approved gentle method.
Before you buy or repair
- Record first
- Window series, accessible track debris, confirmed manufacturer weep location and initial wet condition
- Make the decision
- Whether cleaning only the identified channel/outlet is approved and sash operation remains safe
- Stop & verify if
- Unidentified drain, wet electrical wiring, rotted sill, hidden wall moisture or exterior high access
Jump to a section
- Decide what is dirty: a track, drainage path or leak?
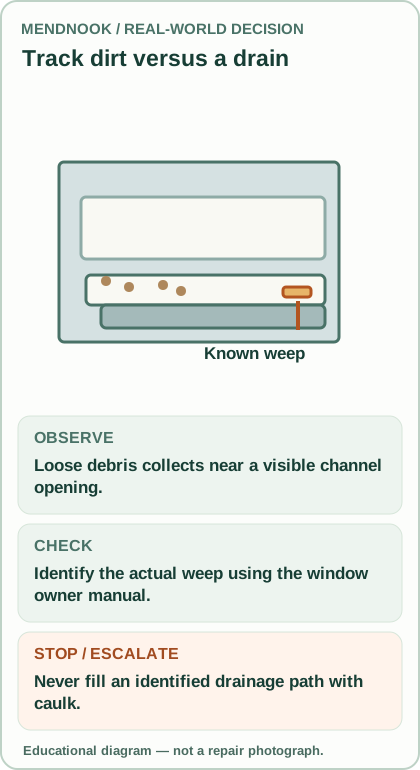
- Read the diagram: three checkpoints
- Tools: choose gentle before aggressive
- Identify your window and find the correct openings
- Clean the sill and track in a supported sequence
- Why a blocked weep matters — and why caulk is not the fix
- Illustrated scenario: gritty horizontal slider after renovation
- When to stop DIY cleaning
- Record what changed without claiming a drainage test
- Accept/reject checklist for the homeowner
- Frequently asked questions
- Sources and limitations
- Questions before you buy or repair
- After the project: did it work?
Quick answer: First identify whether the opening is a track, a manufacturer-designed drainage/weep outlet, a seal joint or an intentional ventilation feature. Take a "before" photo. Vacuum loose debris from reachable tracks with a soft brush, use mild soapy water only where the manufacturer allows it, and clean known weep openings gently with a small soft brush. Never fill, caulk, drill or block a weep outlet. If water is entering the wall, a sill is soft, or the window will not safely operate, stop cleaning and investigate the failure.
Pella's owner manual distinguishes cleaning the sill from cleaning the weep system: its covered window families have designed outlets, and it directs users to check those holes for dirt, sand and building debris and to use a small, soft brush. This is not permission to push metal wire into every small hole you can see.
Decide what is dirty: a track, drainage path or leak?
A sill track is an accessible channel where parts of a sliding window or movable sash operate. A weep hole is part of a designed water-management pathway intended to drain incidental moisture toward the exterior. Depending on the product, openings may appear on the interior or exterior lower frame, and other outlets may be behind purpose-made covers. These functions are not interchangeable.
On a narrow screen, scroll this table sideways to see every column.
| Observation | Likely first action | Do not assume |
|---|---|---|
| Dry grit in an accessible sliding track | Vacuum and gently brush visible dirt | That a rough or bent track can be repaired by stronger cleaners |
| Standing water in sill after wind-driven rain | Identify the maker's water-management design and approved cleaning method | That every drop of water in the drainage channel means a failed window |
| Outlet visibly packed with dirt | Confirm it is a weep and clean the visible mouth with a soft brush | That a metal pick or drill bit is safe |
| Water stain below trim or within drywall | Document moisture and assess flashing/seal failure | That a surface track cleaning will repair the wall |
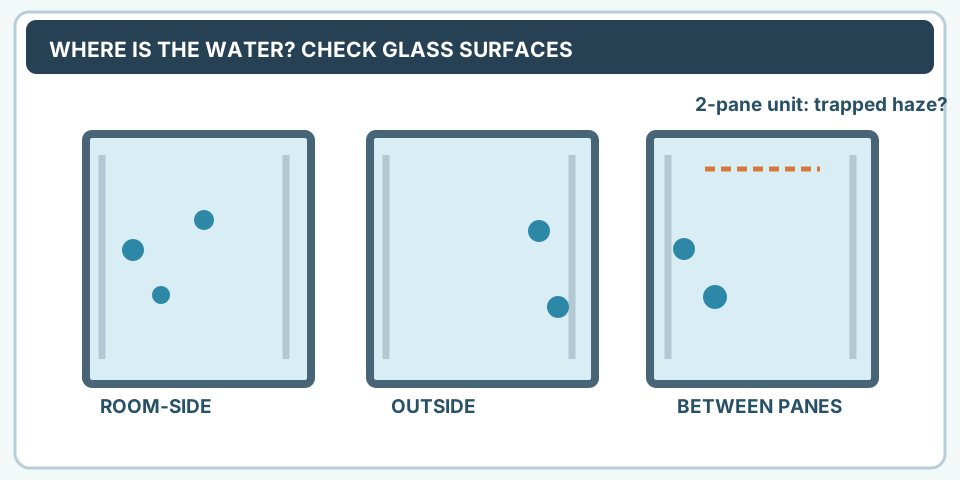
| Water trapped between sealed glass panes | Check insulated glass unit diagnosis | That the frame's weep system drains between the glass panes |
Use condensation diagnosis to distinguish roomside moisture from water trapped between glazing panes. Use drafty window trim diagnosis when the issue is air movement at a stationary trim joint rather than standing water.
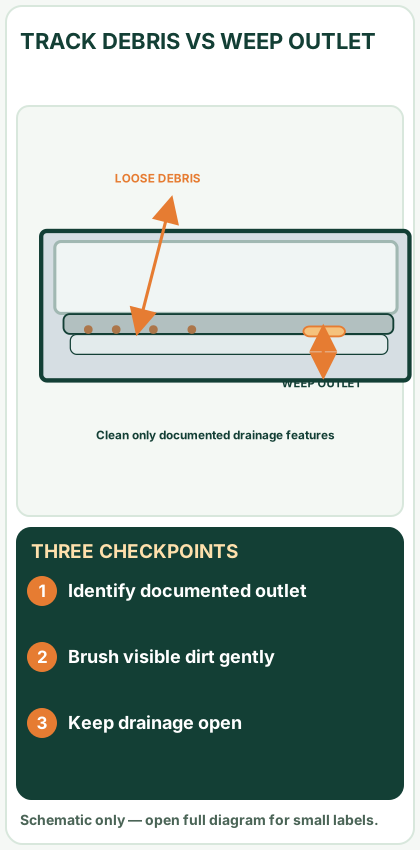
Open desktop diagram ↗ Open mobile diagram ↗
Read the diagram: three checkpoints
- Identify documented outlet
- Brush visible dirt gently
- Keep drainage open
Tools: choose gentle before aggressive
For ordinary accessible maintenance, assemble a vacuum with soft brush attachment, small soft nylon/detail brush, lint-free cloth, warm water, mild dish soap if approved for your finish, a flashlight and a phone for before/after photos. A small bowl or absorbent cloth may help prevent wash water from overflowing onto an interior sill.
Do not start with a pressure washer, strong bleach, abrasive pad, metal screwdriver, steel wire, hot steam, drain chemical or a drill. These can scratch coatings, drive water behind the frame, dislodge seals or change drainage geometry. Do not remove mystery covers or screws from the window to reach a hidden outlet. Some covers are part of an engineered drainage or insect-control system.
Safety first: Secure the sash in the position required by the manufacturer. Keep fingers away from moving rollers and pinch points. Do not stand on a chair, lean through an upper-story window or disable window stops/child-safety devices to reach an exterior weep outlet. Stop if the glass is cracked, the track is corroded and unstable, or the opening requires exterior access at height.
Identify your window and find the correct openings
- Photograph the entire inside frame while closed, then the accessible sill track with the sash positioned safely.
- Record whether the window is sliding, single-hung/double-hung, casement/awning or a different style. Cleaning access and designed drainage differ.
- Check for the product model or unit ID. Look up the current owner manual rather than a generic diagram.
- Locate the bottom track and any exterior outlet documented in the manual. Do not classify every notch as a weep; some are screw slots, air paths or pressure-equalization features.
- Mark which openings are known and which remain unidentified in your photo log. Leave the unknown ones alone.
The Pella manual describes weep holes in different locations in the lower frame and advises keeping them free of construction debris. Andersen's combination-unit maintenance directions independently describe vacuuming or wiping debris from the covered combination-unit sill; those directions do not authorize removing an unrelated window sash or cleaning hidden components in other products.
Clean the sill and track in a supported sequence
Step 1 — dry clean first. Start by removing loose leaves, dust, sand and grit that a vacuum/brush can reach. On a window with moving rollers, avoid trapping large particles in the travel channel. Pella's covered owner manual recommends vacuuming dirt from the sill/track area, including a soft brush attachment.
Step 2 — inspect what remains. Check for cracked plastic, loose weatherstrip, bent metal, missing end caps or a deformed drainage cover. Photograph damage. If a roller has gouged the track or the sash is dragging, cleaning may reduce grit but cannot repair metal or hardware geometry.
Step 3 — wipe approved surfaces. Use a damp soft cloth and mild soap solution only on finishes for which the maker approves it. Avoid flooding the sill or pushing rinse water toward interior trim, and do not wet unfinished wood unless the manual allows it. Dry accessible surfaces afterward.
Step 4 — clean only identified weep openings. For a known outlet in a covered Pella window, use a small, soft brush to clear the mouth of dirt and sand as the manual specifies. Keep protective covers intact. Do not push debris deeper with metal tools or enlarge an opening.
Step 5 — inspect without pretending to performance-test. Photograph the opening after cleaning and check that no new debris or sealant is covering it. If you want to verify drainage using water, do so only if the exact maker supplies an appropriate, low-risk method for the relevant product and interior water condition. Do not pour a large jug into an unknown assembly, hose the window from outside or claim a passing laboratory watertightness test.
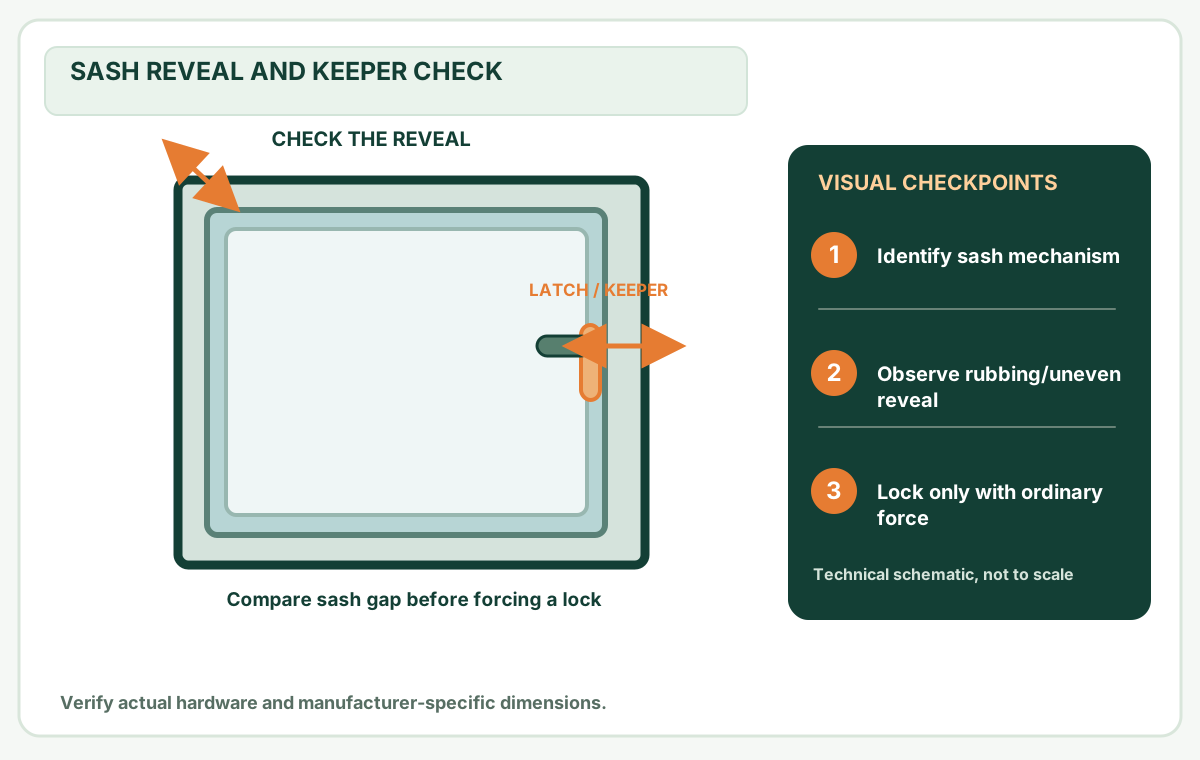
Step 6 — check normal window operation. Close and operate the sash through its intended travel with ordinary force. Any new sticking, latch misalignment, rubbing or water appearing behind trim is a stop signal.
Why a blocked weep matters — and why caulk is not the fix
Rainwater can enter a window assembly's intended exterior-facing drainage channels without necessarily indicating a failure. The purpose of designed outlets is to let that incidental water escape. Caulking an open drain can trap water. On the other hand, a wet drywall joint, repeated interior puddling or rot below a frame can indicate failure beyond a dirty channel.
On a narrow screen, scroll this table sideways to see every column.
| Outcome you observe | What it supports | What it does not prove |
|---|---|---|
| Loose dirt removed from a track | Accessible surface cleaned | Rollers or seals are sound |
| A visible outlet mouth is unobstructed | Debris no longer covers that mouth | Every concealed drainage chamber is clear |
| Window glides better after dry cleaning | Loose debris may have contributed | Track alignment or roller service is unnecessary |
| No puddle during one dry-day check | Surface is currently dry | Long-term watertightness under storm conditions |
| Water continues entering wall trim | Escalation is needed | Additional caulk on the visible sill will solve it |
If leakage occurs only during storms, record date, wind direction, affected sash, visible interior water path and whether drainage outlets were blocked. That record is useful to a qualified installer and reduces repeated speculative sealing.
Illustrated scenario: gritty horizontal slider after renovation
Hypothetical case: A ground-floor vinyl slider is gritty, with plaster dust in the lower channel and an exterior-facing slot of unknown function.
- The homeowner documents the model and takes overall and close-up photos.
- They vacuum the accessible grit with a brush attachment, keeping the sash safely supported.
- They consult the manufacturer's current manual and confirm whether the slot is a designed weep rather than a fastening feature.
- If confirmed as an accessible weep, they gently clear visible dust with a soft brush. They do not drill, soak or seal the outlet.
- They re-check ordinary sash motion and latch operation, and record whether the previously observed puddle recurs after comparable weather.
- If water reappears behind the interior trim rather than in the drainage channel, they stop and seek an envelope/window installation assessment.
This is a teaching scenario, not a MendNook-tested repair or proof of restored water resistance.
When to stop DIY cleaning
Stop when you find standing water in the wall cavity, persistent mold growth, rot/soft wood, failing flashing, cracked glass, a broken sash balance, high-elevation exterior access, damaged weatherproofing membranes, or an unknown part that requires disassembly. If you encounter suspected lead-paint dust in an older building, asbestos-containing material or significant mold contamination, follow the relevant local safety requirements and seek qualified help.
Do not remove an exterior glazing stop or pry a welded vinyl frame because a dark line looks like dirt. Drainage design, glazing retention and weatherseals are not ordinary wipe-clean surfaces.
Record what changed without claiming a drainage test
Begin with an overview photograph identifying the actual window style. Then photograph the accessible dirty sill and mark any outlet that your unit manual specifically identifies as a weep. If you are uncertain whether an opening is a drain or a fastener slot, label it unidentified rather than using a wire or tool to explore it.
After permitted soft-brush or vacuum cleaning, take a second photograph from the same angle. Include the removed debris and the visibly unobstructed mouth of the identified outlet; do not photograph a wet sill and claim that you verified hidden drainage. Slowly operate the sash and record whether it glides, closes and locks normally.
During a later natural rain event, write down whether water returns to an accessible track or appears behind the interior trim. That difference matters: a dry track immediately after cleaning is not proof that flashing or concealed channels are sound. Send the before/after observations and window series to a service professional if interior wall moisture persists.
Accept/reject checklist for the homeowner
Accept: accessible sill/track is free of debris, known drainage openings remain unobstructed, the sash operates and latches normally, and there is no new visible damage. Do not interpret this as proof of waterproofing.
Investigate further: repeated wet drywall, blocked hidden channels, apparent leakage under the frame, unsafe sash operation or a drain outlet you cannot positively identify. Record: window manufacturer and series if known, date, dirt location, before/after photos, products used, sash-operation results and weather observations.
Frequently asked questions
Should I pour water down my window track to find the weep holes? Not as a general test. A manufacturer may allow a specific check for a specific design; an uncontrolled pour can create interior damage and is not a water-performance test.
Can I unblock a weep hole with a wire hanger? The Pella manual cited here specifies a small soft brush. Metal wire can damage unknown parts. Follow the exact maker's method.
Should I caulk the opening once it is clean? No — not if it is a designed water outlet. Sealing drainage can make water management worse.
Are wet tracks always a sign of a bad window? Not necessarily. Some systems direct incidental water through drainage channels, but repeated interior leakage, rot or water behind trim requires separate investigation.
Will cleaning a track fix a sash that refuses to lock? Possibly grit contributes to movement, but failed rollers, sash distortion or latch hardware can need a different diagnosis. Never force a latch.
Sources and limitations
- Pella Windows and Patio Doors Owner's Manual, cleaning the weep system and sill (p. 31). Product-specific soft-brush, vacuum and drainage advice.
- Andersen — Clean and Maintain Andersen Combination Units. Named system-specific sill cleaning, not a general instruction to disassemble windows.
- Andersen — Clean and Maintain Retractable Screens on Gliding Patio Doors. Separate example of gentle track cleaning for a retractable screen, not a window drainage test.
Evidence limits: This guide is based on manufacturer cleaning documentation. It does not represent a witnessed MendNook maintenance job or a water-performance certification.
Questions before you buy or repair
Should I unblock a weep hole with wire?
Not unless your exact product guide authorizes it; the cited Pella owner manual describes using a small, soft brush.
Can I caulk a drainage opening?
No. An identified weep or designed outlet must remain open; sealing it can trap water in the window assembly.
Does a clean track prove a window is waterproof?
No. Cleaning visible debris is not a certified water-resistance test and hidden flashing failures may remain.
These answers summarize the guide's documented evidence. Check the cited sources and exact model instructions above before ordering parts.
After the project: did it work?
After completing only product-approved work, document what you actually observe instead of assuming a replacement part resolved the fault.
- Success looks like
- Accessible track is clean, known weep mouths remain open and sash travel and latch work without unusual force.
- If it still fails
- Stop if concealed water, rot or persistent wall leakage appears; obtain window and envelope assessment.
- Keep for next time
- Window series, before/after debris photographs, outlet identification, tools used and follow-up moisture observation
Keep your actual measurements and observed result in your private project notebook. This is a verification checklist, not a product certification.
My project record: progress and take-home checklist
Select a progress stage if helpful. This is a personal record only, not a claim that MendNook verified your repair.
Includes this guide's specific diagnosis, decision, safety, and outcome checks, plus any note entered above. Nothing is sent to MendNook; downloads and copy operations stay under your control.