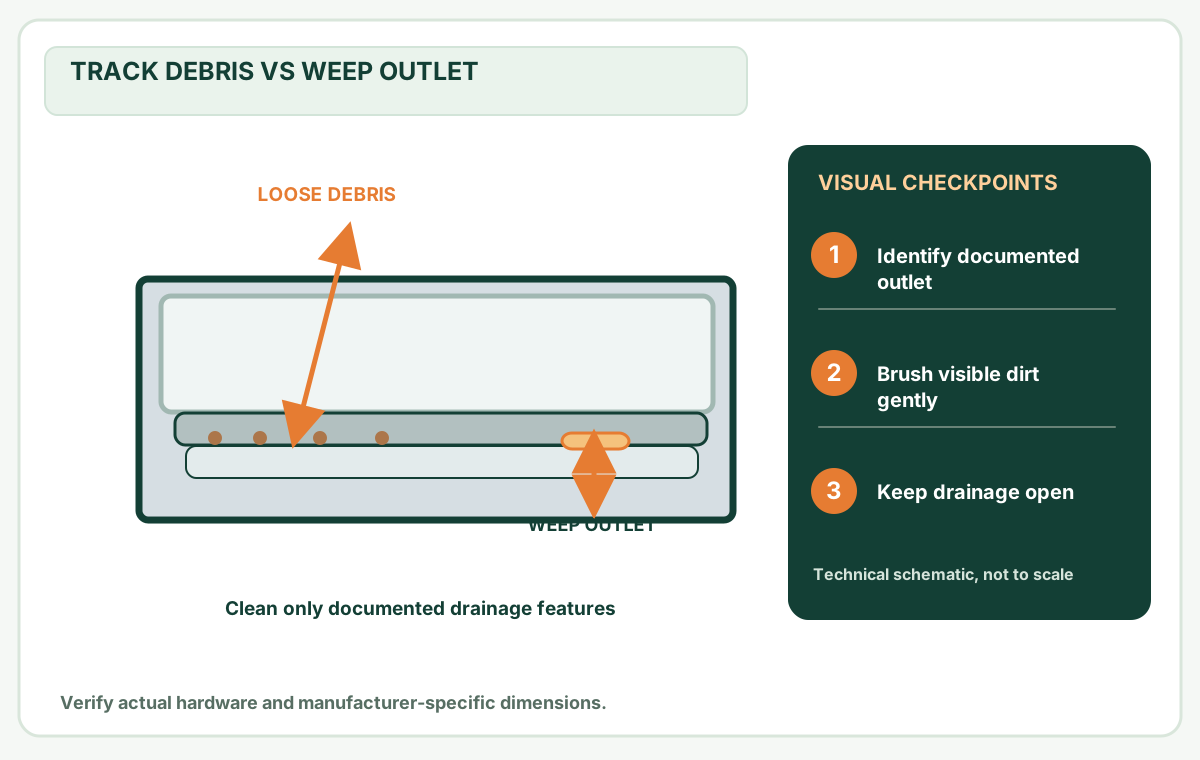
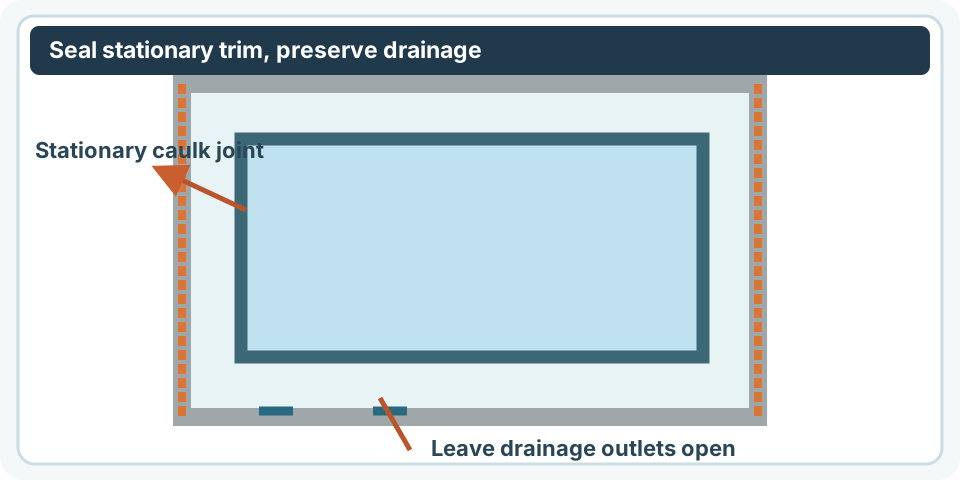
Record the first wet point and real storm conditions before sealing anything. Window weeps and concealed wall flashing may need to keep draining outward.
Before you buy or repair
- Record first
- First wet location, actual rain/wind observation, sash/trim/weep positions and any visible wall stain
- Make the decision
- Whether moisture is condensation, drain water or a concealed flashing/wall path
- Stop & verify if
- Wet electrical, soft structure, mold, high exterior access or repeated water in wall cavity
Jump to a section
- First distinguish five different wet-window conditions
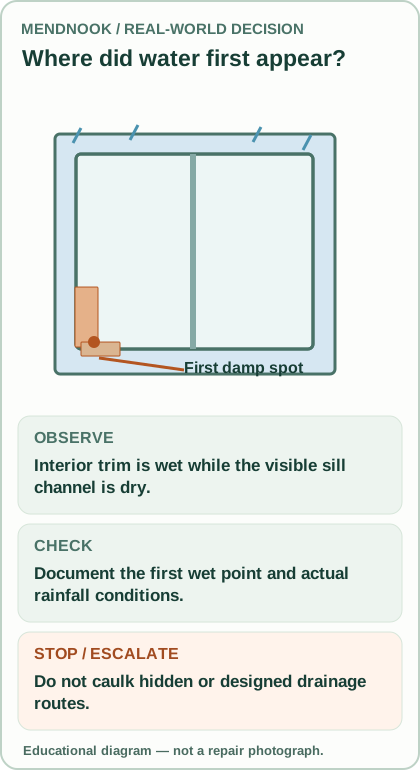
- Read the diagram: three checkpoints
- Make the situation safe before inspecting
- The two-page observation log
- Inspect only accessible drainage and seals
- Why water-path diagnosis matters
- Can an exterior caulk bead help?
- Post-action verification without fake testing
- Build a rain-leak evidence timeline
- Questions readers ask
- Sources and limits
- Questions before you buy or repair
- After the project: did it work?
Quick answer: Record exactly where the first moisture appears, when in the storm it arrives, and whether it is on the glass, inside the sash drainage channel, around the trim, or below the wall opening. Water can cross an improperly flashed wall cavity even when the visible window caulk appears intact. The U.S. Department of Energy's building-science explanation states that lapped flashing directs water outward and that openings interrupt the wall's drainage plane. Caulking visible holes without locating the path can trap water behind cladding.
First distinguish five different wet-window conditions
On a narrow screen, scroll this table sideways to see every column.
| Where moisture appears | Plausible first check | Do not jump to |
|---|---|---|
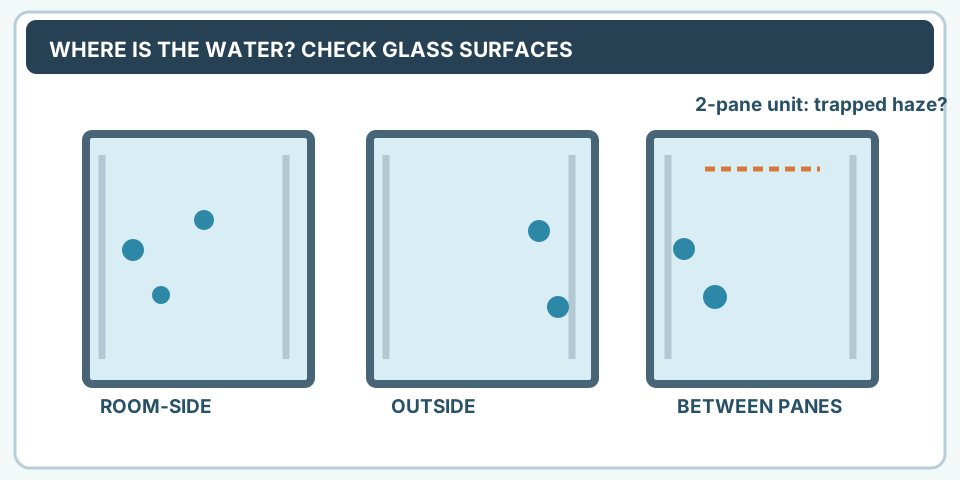
| Inside surface of room-facing glass on cold morning | Indoor humidity / dewpoint | Replacing exterior sealant |
| Between sealed glass panes | Failed insulated glass unit seal | Cleaning exterior weepholes |
| In a designated exterior sill drainage chamber | Manufacturer-approved weep inspection | Filling channel with caulk |
| At interior trim or drywall below a window | Water traveling behind frame/flashing | Spraying caulk over sash gaps |
| Drips at sash gasket only during driven rain | Weatherseal contact or sash alignment | Replacing all framing without diagnosis |
Our window condensation decision guide explains the wipe test between inside glass, outside glass and between panes. The window track and weep draft explains gentle cleaning of known drainage outlets. These are distinct diagnoses.
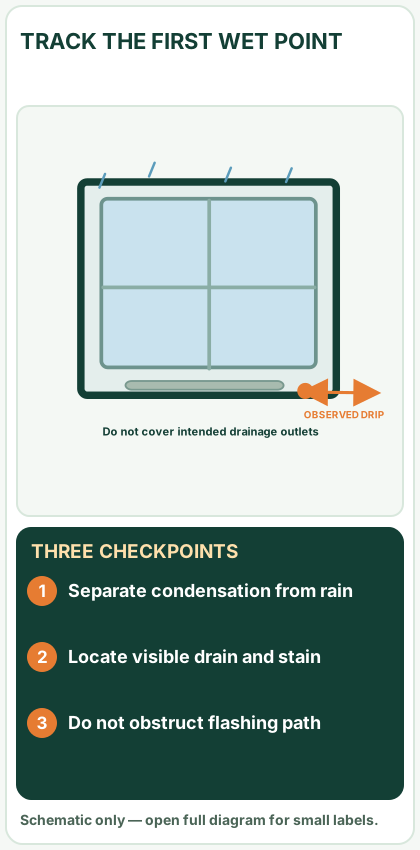
Open desktop diagram ↗ Open mobile diagram ↗
Read the diagram: three checkpoints
- Separate condensation from rain
- Locate visible drain and stain
- Do not obstruct flashing path
Make the situation safe before inspecting
Keep people away from wet outlets, extension leads, damaged glazing and loose trim. If electrical components are wet, do not touch exposed wiring; isolate electricity only if it can be done safely and obtain qualified help. Move vulnerable items away from interior water, use a safe tray or towel to limit damage, and document water location. Never climb an exterior ladder in rain, open a dangerously swollen window, or lean out to inspect an upper-storey head flashing.
If the drywall is soft, stained over a growing area, smells musty or the wall is visibly swollen, contact a qualified window/wall-envelope contractor. Surface cleaning cannot establish the condition of hidden sheathing.
The two-page observation log
Page one — weather: date/time, duration, rain intensity as observed, wind direction if known, whether water appears immediately or only after prolonged rain, and whether it also occurs during still weather. Record only what you know; don't infer an exact storm pressure from weather memory.
Page two — location: photograph full window and room context, then the first wet point at the sill, corner, jamb, head, glass, trim or wall. Put a dry paper towel on a safe, accessible interior ledge to detect the beginning of the leak if doing so does not interfere with window operation. Record the change during an actual storm; never stage a wet photo as a performed test.
A hypothetical observation might be "windward upstairs window, first damp spot 2 inches below left trim, glass dry, no obvious sill puddle". That clue suggests water may be traveling through the adjacent wall assembly, not that the leak is definitely located above the head flashing.
Inspect only accessible drainage and seals
With the sash safe and weather dry, identify the manufacturer and documented weep positions. A visible outlet can be carefully cleaned with the exact manual's approved tool if debris is present. Check for obviously torn gaskets, displaced corner seals and gaps between stationary trim and wall; photograph before moving anything. Do not poke wire through unknown holes, remove exterior cladding, use expanding foam inside a drainage slot or seal a manufacturer's pressure-equalization opening.
DOE's fully flashed opening guidance shows pan flashing beneath a window, side flashing overlapping the pan, and upper flashing arranged to direct water to the exterior. These layers can be hidden: a photo of intact visible caulk does not prove correct concealed flashing.
Why water-path diagnosis matters
Consider two examples:
Example A: drainage-channel debris. Water is observed only in a manufacturer-defined sill channel after rain and the documented outlet is covered in dust. A gentle manufacturer-approved clean may restore an unobstructed mouth; re-observe during later weather. It does not prove a performance rating or that all concealed drainage is clear.
Example B: trim wet below opening. The visible sash and sill seem dry but wall paint below the jamb stains during strong rain. That pattern may involve wall-wrap/flashing junctions. Don't fill the exterior bottom joint by guesswork, because some assemblies need a drainage path out. Arrange building-envelope inspection with the observation log.
The DOE air-sealing information sheet explains why an interior-side air barrier is often chosen so the remaining opening can drain; weather and product design determine actual repairs.
Can an exterior caulk bead help?
Only after identifying a stationary joint whose design calls for sealant, and confirming it is not a drain, pressure equalization feature or moving sash contact. Follow sealant manufacturer preparation, compatibility, backer and movement specifications. A fresh cosmetic bead over wet/moldy caulk or mobile sash hardware is not a reliable leak repair. Use caulking drafty window trim as a comparison of stationary vs moving joints — it is not a flashing replacement guide.
For a wet wall, a professional may need to remove limited trim or cladding, dry damaged material and reinstate correct flashing/water-control layering. Do not claim a homeowner can confirm a hidden detail from one surface photo.
Post-action verification without fake testing
Record which observations were made before any intervention and what was actually changed. During a later comparable rain event, inspect and document the same first-wet points at similar intervals. A week without rain is not evidence of repair success. A hose blast test is not appropriate as a general DIY verification; pressure, angle and sequence can force water where a system is not designed to receive it.
If leakage persists or the wall remains wet, the correct outcome is escalation and moisture remediation, not more caulk layers.
Build a rain-leak evidence timeline
Use photographs to answer where, when and under what weather water first appeared. Start with the entire window and wall from a safe indoor position. Then take close-ups of the first damp trim corner or sill track and a ruler for context. Note the time, whether the rain was wind-driven, and whether the glass itself was wet. Keep photographs of an accessible documented weep outlet separate from a stain under the interior trim.
If a professional removes trim or inspects concealed flashing, obtain their permission to document the actual exposed assembly. A generic cutaway diagram is valuable for understanding an assembly, but it is not evidence that your hidden pan flashing has been inspected.
After a documented repair, recheck during genuinely comparable natural rainfall. Accept: no recurring interior entry observed under those conditions, with drainage unchanged; a dry day is inconclusive. If not: escalate concealed water-path diagnosis rather than repeatedly applying surface caulk.
Questions readers ask
Should I caulk every gap outside? No. Some window gaps are intentional drainage/pressure relief.
Can clogged weep holes leak inside? They can contribute to problems in some systems, but not all leaks are weep failures.
Is fog between double glazing the same problem? No. Internal moisture between sealed panes is an insulated glass problem.
Can I test with a garden hose? Avoid unsupervised pressure spraying; professional methods depend on the assembly and test standard.
Sources and limits
- DOE Building Science Education — Window Flashing.
- DOE — Fully Flashed Window and Door Openings.
- Building Science Corp / DOE — Air Sealing Windows.
Evidence limits: This article does not report a MendNook water-intrusion test. Water-management repairs depend on the actual window and wall assembly.
Questions before you buy or repair
Should I caulk all gaps outside a leaking window?
No. Some gaps are needed for drainage or pressure equalization, and hidden flashing leaks need a different repair.
Is water between the glass panes a flashing leak?
Not usually. Moisture sealed between insulated glass panes indicates a different problem from rain entering a wall opening.
Does one dry-day check prove the repair worked?
No. Recheck actual moisture conditions during comparable rain after a documented repair; don't stage a hose test.
These answers summarize the guide's documented evidence. Check the cited sources and exact model instructions above before ordering parts.
After the project: did it work?
After completing only product-approved work, document what you actually observe instead of assuming a replacement part resolved the fault.
- Success looks like
- Documented corrective action preserves drainage and no repeat interior entry is observed under genuinely comparable rain.
- If it still fails
- Persisting trim or wall moisture requires professional flashing and water-control diagnosis, not repeated caulk.
- Keep for next time
- First wet point, storm observations, photographs, documented repair action and subsequent real rain observations
Keep your actual measurements and observed result in your private project notebook. This is a verification checklist, not a product certification.
My project record: progress and take-home checklist
Select a progress stage if helpful. This is a personal record only, not a claim that MendNook verified your repair.
Includes this guide's specific diagnosis, decision, safety, and outcome checks, plus any note entered above. Nothing is sent to MendNook; downloads and copy operations stay under your control.