
DECISION GUIDE / WINDOW BLINDS
Inside Mount vs Outside Mount Blinds: Choose Before You Measure
Compare mounting depth, handle clearance, light gaps, wall space and ordering measurements using real manufacturer guidance, not a universal deduction.
Check usable depth, handle clearance, bracket support and coverage goals. Manufacturer-specific ordering instructions determine the final measurements.
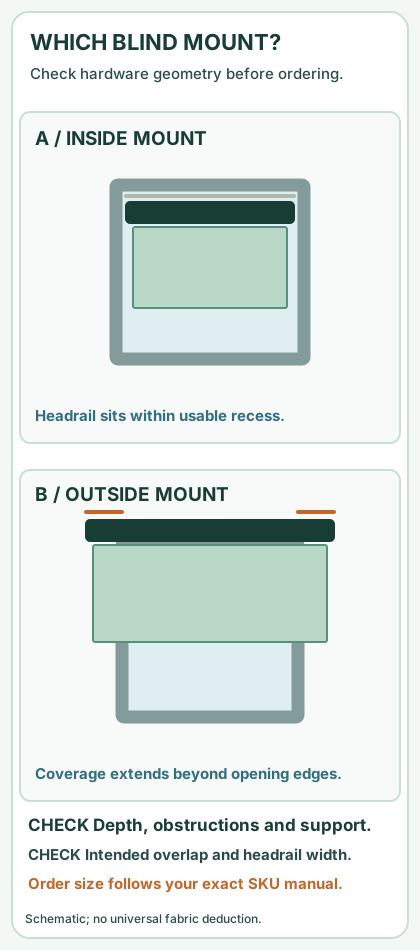
A blind that is perfectly measured for the wrong mounting style can still block a window handle, fail to fit a shallow recess or let in more light than expected. Decide whether the headrail belongs inside the opening or above and outside it before copying widths into a shopping cart. This guide compares the physical tradeoffs; it does not tell you that every brand has the same deductions or mounting depths.
Inside mount versus outside mount: a decision table
On a narrow screen, scroll this table sideways to see every column.
| Your window and goal | Inside mount may work when | Outside mount may work when | Verify before ordering |
|---|---|---|---|
| Shallow recess or protruding crank | Product's minimum usable depth and moving parts actually clear every obstacle | There is enough suitable wall/trim surface to attach brackets above or around the opening | Exact bracket and headrail drawings; do not use the glass-to-wall distance alone |
| Neat trim you want to display | The window is square enough, the recess has safe bracket fixing points and you accept normal side clearance | You prefer to cover trim or an uneven opening | Headrail projection, bracket attachment surface and window operation |
| Need stronger room darkening or privacy | You accept potential side light gaps and verify the treatment's own light-blocking details | Adequate side, top and bottom overlap can reduce uncovered edges | Whether the listed size refers to fabric, slats, headrail or finished unit |
| Window widths disagree | The chosen product can operate in the narrowest supported width without binding | A correctly supported outside mount can span the uneven opening | Three widths and heights, and if needed the diagonals; do not manufacture a tolerance |
| Door/window opens inward | The entire blind stack, controls and bracket clear the opening path | A bracket location beyond the moving sash leaves safe clearance | Actual swing, depth, projection and manufacturer operating limits |
| Multiple windows look identical | You still measure each opening independently | You still measure and mark each planned coverage area independently | Exact location label on each worksheet |
No universal winner: An outside mount is not automatically better for every window; it can improve side coverage but takes wall/trim space and needs secure bracket support. An inside mount can preserve trim but often needs usable depth and leaves some light clearance at the edges. These are the tradeoffs highlighted by Blinds.com and The Home Depot.
A six-step fit decision before opening the calculator
- Identify the product first. Roller shades, venetian blinds, vertical blinds and shutters can have different headrails, bracket positions and height rules. Read the product's current installation/measuring sheet, not just a generic blog example.
- Measure usable recess depth. Record the shallowest usable depth after accounting for window handles, tracks, trim and cranks. Compare it with both the product's minimum depth and its flush mounting depth, which may differ.
- Check how the window moves. Open the sash or door safely and mark any location a bracket, bottom rail, control or fabric could obstruct. Stop if the proposed mounting location compromises egress, ventilation or safe operation.
- Compare three width readings. For a traditional inside mount, record top, center and bottom at the intended bracket depth, with the narrowest measurement highlighted. For product-specific variants, follow the vendor sheet instead of transferring this general rule blindly.
- Record all three heights. Do not assume the longest or shortest reading applies to every product: horizontal shades, vertical treatments and shutters can specify different height conventions.
- Define the exact order-size field. Check whether the number requested is window opening, overall blind, headrail or fabric. If the manufacturer automatically makes clearance deductions, do not subtract them again.
Example A: a deep, square enough opening
Suppose the inside opening measures 35 7/8 in at top, 35 3/4 in at center and 35 7/8 in at bottom. The smallest recorded width is 35 3/4 in. That is a candidate opening width, not a guaranteed order width. If your chosen conventional inside-mount product tells you to supply the smallest exact opening width and the factory handles clearance, that is the figure you would take to the vendor instructions. If it asks for finished width, or uses a specialized mounting system, follow that procedure instead. Continue with the three heights and clearance checks using our blind measurement helper.
Example B: outside-mount coverage around an obstruction
Suppose the visible opening is 36 in wide and you deliberately plan 2 in of coverage on each side. The illustrative total coverage width is 36 + 2 + 2 = 40 in. This is not automatically the ordered headrail or fabric width: the supplier may distinguish between them. Measure available wall/trim surface before promising those overlaps, then use the outside-mount planner to try the coverage layout. The planned top bracket position and finished drop are separate decisions.
Example B2: the same 40-inch coverage can have three order widths
Do not copy the 40-in coverage goal directly into an outside-mount order field until you know what that field means. Three published Blinds.com instructions illustrate the real difference:
On a narrow screen, scroll this table sideways to see every column.
| Specific source being followed | Coverage goal | Example order value | Check before applying |
|---|---|---|---|
| General roller shade measuring guide | 40 in fabric | 43 in | This category example adds 3 in to obtain bracket-to-bracket width |
| No-valance roller fabric-width PDF | 40 in fabric | 41 3/8 in | This configuration lists fabric as 1 3/8 in less than ordered width |
| Cellular shade outside-mount guide | 40 in target shade coverage | 40 in | Uses its stated outside-mount exact-size convention |
These are separate product configurations, not three options for the same SKU. The difference between 43 in and 41 3/8 in is 1 5/8 in—large enough to change bracket placement or make a proposed mounting spot impossible. Before buying, measure the available bracket width on the real wall, confirm the fabric/order deduction from the chosen SKU's current sheet, and check for obstacles at the exact mount height. If the product documents disagree, stop and ask which current specification applies. Read the full outside-mount measuring comparison or use the coverage-only planner without treating its output as a checkout dimension.
Example C: three readings disagree a lot
You find 36 in, 35 1/2 in and 35 1/8 in across the opening. A 7/8-in spread is an investigation prompt, not permission to average. Recheck at the required measuring depth, check the frame/trim for distortion and examine the specific maker's limits. An outside mount may be easier if the recess is badly irregular, but it still needs a sound attachment surface and suitable coverage. A qualified installer can help if the geometry or structure is uncertain.
Mistakes that cost time even when arithmetic is right
- Ordering by glass width, forgetting trim, handle clearance or bracket projection.
- Applying a generic factory deduction to a width that the manufacturer already deducts.
- Assuming a nominal 36-inch shade means the fabric will cover exactly 36 inches.
- Planning outside-mount overlap without checking wall material, available flat mounting area and required anchors.
- Measuring one opening and copying the figures to three nearby windows.
- Rounding measurements in a way that contradicts a product-specific order guide.
Buy-or-measure checklist
- [ ] Record product, exact model and measuring-instructions revision.
- [ ] Label the window and note inside or outside mount.
- [ ] Record top, center and bottom widths plus left, center and right heights.
- [ ] Record usable depth, bracket projection, obstacles and available wall/trim support.
- [ ] Mark selected overlap only for an outside mount and confirm whether it is a finished blind, headrail or fabric dimension.
- [ ] Keep a printable measurement worksheet and a photo of the mounting area before purchase.
Frequently asked questions
Is outside mount always more blackout-friendly?
An outside mount can cover the opening edges better if there is room for overlap, but actual light blocking also depends on the shade type, fabric, hardware and positioning. It does not create a guaranteed blackout seal.
Should I subtract a quarter inch to make inside-mount blinds fit?
Not without explicit instructions from the chosen supplier. Many vendors ask for the exact opening measurement and apply their own deductions. Subtracting again can produce extra gaps. Confirm whether you are entering an opening measurement or an exact finished width.
Why do some guides say shortest height and others longest height?
They may describe different window-covering products. For example, vertical treatments can need clearance for the bottom, while some traditional horizontal treatments use the longest drop. The product's current installation/measuring specification takes precedence over a cross-category rule.
Sources, scope and verification
This is a research-based comparison, not field-tested with any specific product. Blinds.com explains depth, deductions and product-specific size conventions; its inside/outside mount discussion covers light gaps and obstruction tradeoffs. The Home Depot's measuring guide distinguishes inside and outside mount measurement. Always consult the specific manufacturer, model and product revision you intend to buy. Read our editorial and correction policy.
Important: MendNook has not physically tested these repairs or installations. These comparisons do not promise fit, cost, energy savings or compatibility; confirm the product-specific instructions before buying.